How to Replace a Cracked Ceramic Guide Insert Without Removing the Frame?
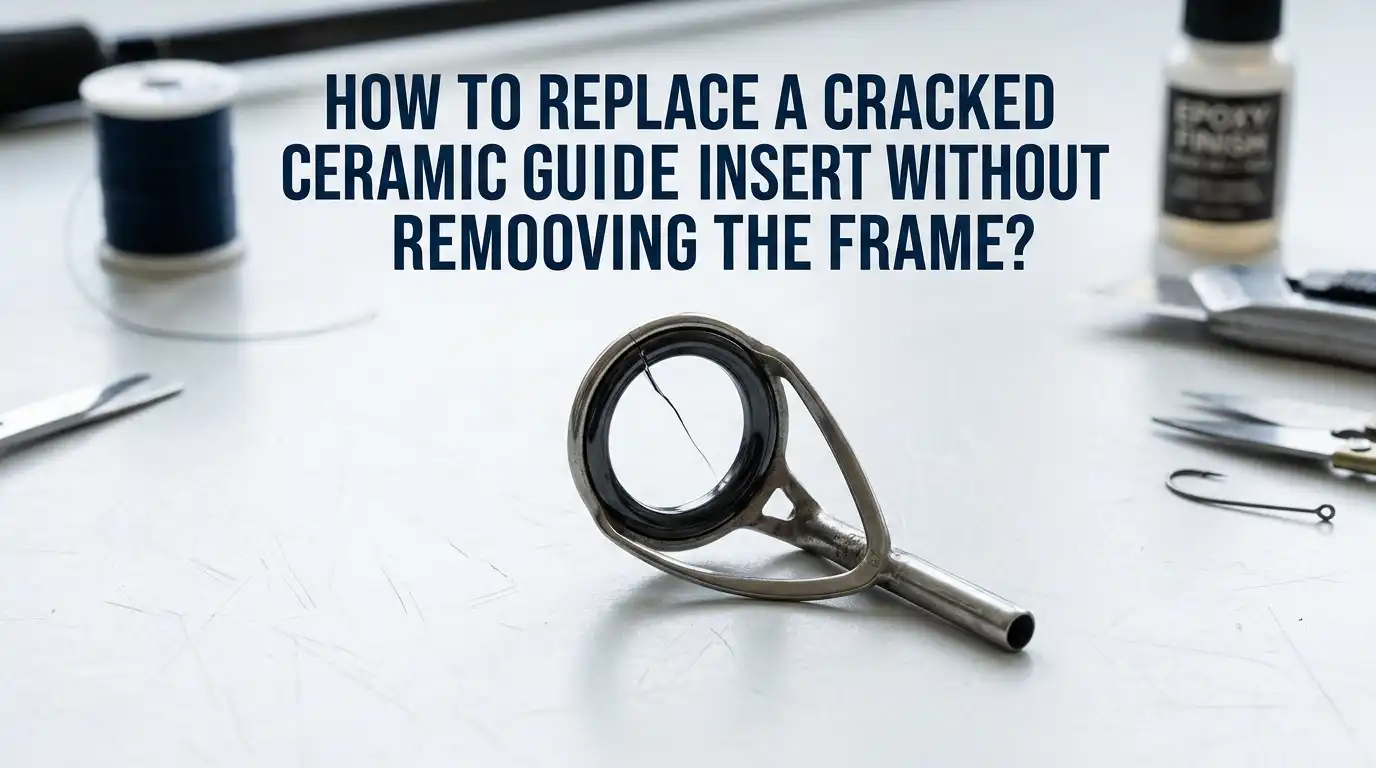
A cracked ceramic guide insert can ruin a perfect fishing day. You feel the line snag, you see frayed strands, and suddenly your favorite rod feels useless. The good news is you do not always need to remove the entire guide frame to fix the problem.
With a few small tools and a steady hand, you can swap out the damaged ceramic ring while keeping the original frame wrapped to the blank. This saves time, money, and the hassle of rewrapping thread.
This guide walks you through the full process. You will learn how to spot the damage, gather the right supplies, and slide a fresh ring into place without harming the rest of the rod. Keep reading to bring your rod back to life.
In a Nutshell
- The frame stays put. You only swap the cracked ceramic ring inside the metal frame. The thread wrap and frame remain untouched, which keeps the rod balanced and saves you from rewrapping work.
- A safety pin is your best friend. A bent safety pin taped to the rod acts as a tiny anvil that lets you press the new ring in safely without bending the frame.
- Heat helps, but use it lightly. Warming the new ceramic ring with a lighter for a second or two helps it expand and slide in. Too much heat will crack it on the spot.
- Always test with a Q tip. Run a cotton swab around the inside of the new ring. If fibers snag, there is a rough edge or glue blob that will fray your line.
- Pros and cons matter. This method is fast and cheap, but it works best on open style guides. Closed tip tops usually need a full tip replacement instead.
- Match the ring size carefully. A ring that is too big will pop out, and one that is too small will not seat. Use a guide sizing chart or measure with calipers.
Why Ceramic Guide Inserts Crack in the First Place
Ceramic inserts crack for a handful of common reasons. Impact damage is the top culprit. Dropping the rod, banging it against a boat rail, or pinching it in a car door can leave a hairline fracture you cannot even see. The line then grinds against that crack on every cast.
Heat shock also plays a role. Leaving a rod in a hot car or in direct sun can stress the ring. Even casting heavy lures over and over can fatigue the ceramic. Sometimes the epoxy or cement holding the ring loosens, and the ring rattles until it splits.
Knowing the cause helps you prevent repeat damage. Store rods in padded sleeves and keep them out of extreme heat.
Signs You Have a Cracked Ceramic Insert
Spotting a cracked insert early saves your line and your fish. The most obvious sign is fraying line after every cast. Run your fingers along the line near the rod tip. If it feels fuzzy, a guide is shredding it.
A simple Q tip test works wonders. Push a cotton swab through each guide. If cotton fibers snag, you have a chip, crack, or rough spot. You can also tilt the rod under a bright light and look for tiny fractures across the ring.
Another clue is a strange clicking sound during casts. That tick often means a piece of ceramic is loose inside the frame. Catch these signs early before a big fish breaks you off.
Tools and Materials You Will Need
You do not need a full rod building shop for this fix. Most of these items fit in a small tackle box pouch. Here is the short list:
A replacement ceramic ring in the correct size, a small safety pin, masking or electrical tape, a butane lighter or small torch, a sharp hobby knife or razor blade, fine grit sandpaper or a needle file, tweezers or small pliers, a cotton swab, and a tube of flexible super glue or rod building epoxy.
Optional but helpful items include a magnifying glass, a guide sizing gauge, and a small piece of cork to use as a backstop. Lay everything on a clean towel before you start so nothing rolls away.
How to Choose the Right Replacement Ceramic Ring
Picking the wrong size is the most common mistake. Measure the inner diameter of the metal frame, not the old ring. Use digital calipers or a guide sizing card from a rod building supplier. Ring sizes are typically labeled in millimeters, like 4.5mm, 6mm, or 8mm.
Material matters too. Standard ceramic rings work for most freshwater rods. If you fish saltwater or use braided line, look for silicon carbide or aluminum oxide rings, which handle abrasion better.
Pros of buying a multi size repair kit include having every size on hand and getting a small tube of glue included. The con is that kits often skip the exact size you need for premium rods. Single ring purchases give a perfect match but cost more per ring.
Step One: Remove the Cracked Ceramic Ring
Start by laying the rod flat on a padded surface. Use tweezers or fine point pliers to gently grip the broken ring. If it is already loose, it should pop out with light pressure.
If the ring is still seated, slide a thin razor blade under one edge and lift slowly. Work around the ring in small steps. Never pry hard, because you can bend the frame and ruin the alignment.
For stubborn rings, heat the frame for one to two seconds with a lighter held a few inches away. The old cement will soften. Pros of this method include keeping the frame intact. The con is that too much heat damages thread wraps nearby, so shield them with a wet paper towel.
Step Two: Clean the Frame Channel
Before fitting a new ring, the frame channel must be spotless. Old cement, dust, or ceramic chips will stop the new ring from seating flush. Use a folded piece of fine sandpaper or a small needle file to scrub the inside of the frame.
Wipe the channel with a cotton swab dipped in rubbing alcohol. This removes oils from your fingers and any leftover glue residue. Let it dry for one minute.
A clean channel is critical. If you skip this step, the new ring will sit crooked and crack again under load. Inspect the frame under good light. If you see bent prongs, gently straighten them with tweezers before moving on.
Step Three: Use the Safety Pin Trick to Hold the Frame Steady
This is the trick that makes the whole repair possible without removing the frame. Bend a small safety pin to a 90 degree angle. Tape the pin to the rod blank just behind the guide so the eye of the pin sits right under the frame.
The pin acts as a tiny anvil. When you press the new ring in, the frame has something solid to push against instead of flexing or twisting. This keeps the thread wrap and epoxy from cracking.
Pros of this method include zero cost and instant setup. The con is that very small guides may not have room for the pin. In that case, slide a thin piece of cork or a wooden skewer under the frame instead.
Step Four: Heat the New Ceramic Ring Lightly
Ceramic rings expand a tiny amount when warmed. This makes them slip into the frame more easily. Hold the new ring with tweezers, not your fingers. Pass it over a lighter flame for one to two seconds only.
You are not trying to make it glow. You only want gentle warmth. Touch it carefully to test, it should feel warm but not painful.
Pros of heating include an easier press fit and less risk of cracking the new ring during installation. The con is overheating. Ceramic shocks easily, so avoid direct flame contact. Never quench it in water afterward, which causes instant fractures. Let it cool naturally if you misjudge the heat.
Step Five: Press the New Ring Into the Frame
Now for the main event. Hold the rod steady with the safety pin anvil under the guide. Place the warm ring against the frame opening. Use a cotton swab or pencil eraser to press it in evenly.
Push gently and rotate the rod a quarter turn at a time. The ring should slide in flush with both sides of the frame. If it sticks halfway, do not force it. Pull it out, file the outer edge of the ring slightly, then try again.
The pros here are full control and a clean fit. The con is that ceramic is brittle, so one slip can shatter the new ring. Patience wins this step every time.
Step Six: Secure the Ring With Glue
Some frames hold the new ring tightly enough by friction. Most need a tiny dab of glue for safety. Use a toothpick to apply a pinhead sized drop of flexible super glue or thin rod epoxy around the outer edge where the ring meets the frame.
Avoid getting glue on the inner surface where the line will run. A glue blob inside the ring will shred your line faster than a crack ever could. Wipe stray glue away immediately with a cotton swab dipped in alcohol.
Pros of super glue include fast cure time and easy availability. The con is that super glue can become brittle. Two part epoxy lasts longer but takes hours to set, so weigh your time.
Step Seven: Test the Repair Before Hitting the Water
Once the glue has cured for the recommended time, test the work. Run a cotton swab through the new ring in both directions. If no fibers snag, the surface is smooth. If fibers catch, lightly polish the inside of the ring with a folded strip of fine sandpaper.
Next, thread your fishing line through the guide and pull it back and forth with light tension. Listen for clicking or roughness. Hold the rod up to the light and check that the ring sits perfectly centered.
Finally, do a few practice casts in your yard. A solid repair will feel just like the original guide. If the line whistles or drags, recheck the seat.
When This Method Is Not the Right Fix
This in frame ring swap works for most stripper guides and running guides on spinning and casting rods. It does have limits. Tip top guides are usually one piece units. The ceramic ring is fused inside, so you replace the whole tip with hot melt glue.
Single foot micro guides on ultralight rods often have ceramic rings that are too small to handle safely. In those cases, replacing the whole guide is faster and more reliable.
If you see a bent frame, cracked thread wrap, or lifted epoxy, skip the ring swap entirely. A wobbly frame will just crack the new ring within a few trips. Pros of full guide replacement include long term durability. The con is the time and skill needed to wrap and finish new thread.
Tips to Prevent Future Cracks
Prevention beats repair every time. Always store rods in padded sleeves or rod tubes. Never lean a rod against a wall where it can fall. Keep it out of hot car trunks during summer.
Avoid casting heavy lures with a rod rated for light tackle, since the extra force stresses every guide. After saltwater trips, rinse the guides with fresh water and dry them with a soft cloth. Salt crystals act like sandpaper on ceramic.
Inspect your guides at the start of every season. A two minute Q tip test can save a trophy fish later. These small habits stretch the life of your guides and keep your line running smooth for many seasons to come.
Frequently Asked Questions
Can I use regular super glue instead of rod building epoxy?
Yes, flexible cyanoacrylate super glue works fine for small ring repairs. It cures fast and holds well. The downside is that it can become brittle over time, especially in saltwater. For a longer lasting bond, two part rod building epoxy is the better choice if you have time to let it cure.
How do I know what size ceramic ring fits my guide frame?
Measure the inner diameter of the metal frame in millimeters using digital calipers. You can also press the old ring against a guide sizing card if it is still intact. Repair kits usually include sizes from 3.7mm up to 30mm, so you can match almost any common guide.
Will this repair hold up against heavy fish or braided line?
Yes, if the ring is seated flush and the inside is smooth. A properly installed ceramic ring handles the same load as the original. Make sure the ring material matches your line type. Silicon carbide and aluminum oxide rings handle braid better than basic ceramic.
How long does the glue need to cure before I can fish?
Super glue sets in about 60 seconds and reaches full strength in 24 hours. Rod building epoxy usually needs 6 to 24 hours depending on the brand. Always check the label and give it the full cure time before putting line tension on the guide.
What if the new ring cracks during installation?
This usually means too much pressure or too much heat. Remove the broken pieces with tweezers, clean the frame again, and try a fresh ring. Heat it more gently this time, and use the safety pin anvil to keep the frame from flexing as you press the new ring in.

Hi, I’m Ivy Webb, the passionate angler and creator behind BaitHookVault.com. I spend my days out on the water personally testing and reviewing a wide variety of fishing tools and gear.