Why Is My Cork Rod Handle Crumbling and How to Seal It Properly?
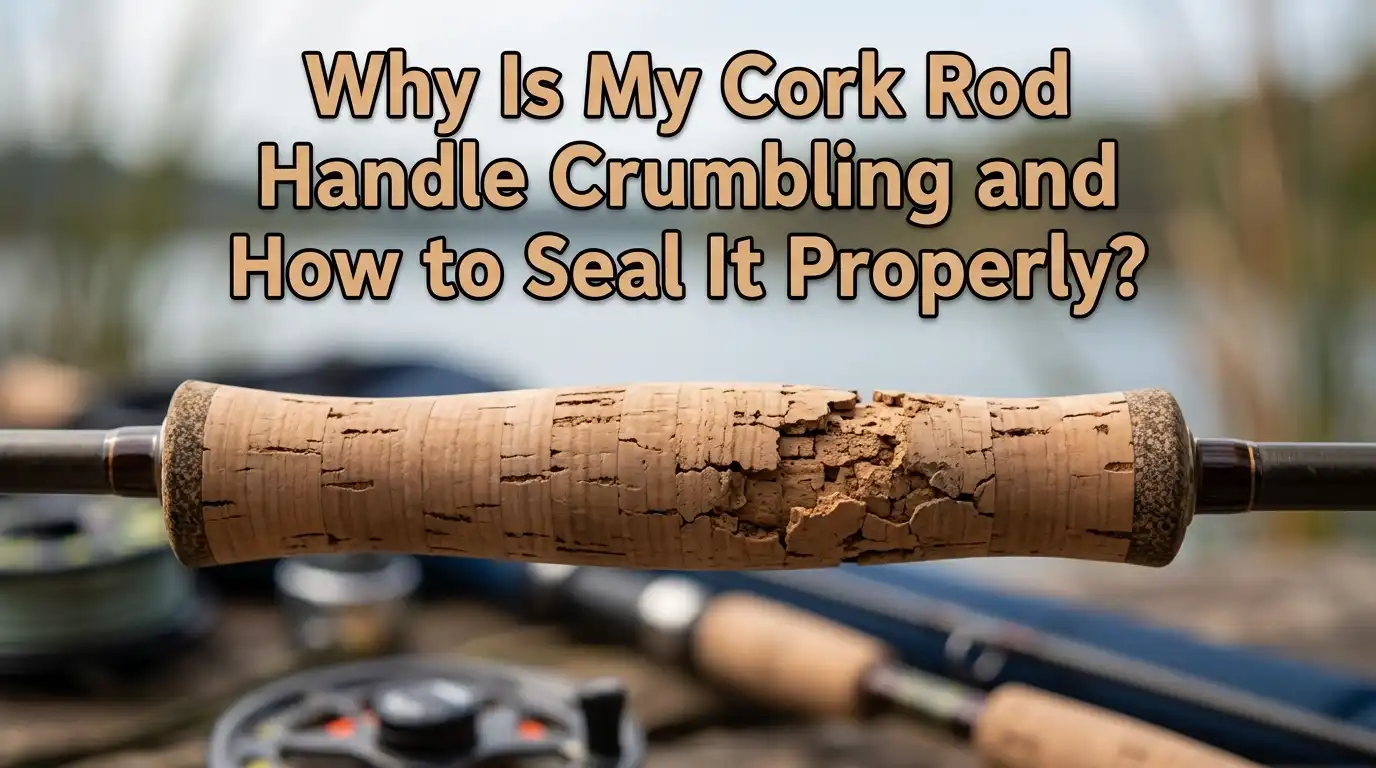
Your favorite fishing rod feels different in your hands lately. Tiny chunks of cork flake off every time you grip it. Small pits and dark spots cover the once smooth surface. You wonder if the rod is ruined or if you can save it.
Good news. A crumbling cork handle is one of the most fixable problems on any fishing rod. Cork is a natural material, and like any natural material, it wears down with sun, sweat, water, and time.
The cracks, pits, and loose bits you see are normal signs of aging cork. You can stop the damage, fill the gaps, and seal the surface in one afternoon with simple tools.
Key Takeaways
- Cork crumbles for natural reasons. Sun exposure, salt water, sweat, fish slime, dirt, and basic aging all break down the binders that hold cork particles together. Most rods over three years old show some surface wear.
- Cleaning comes first, always. You must remove dirt, oil, and old finish before any filler or sealant will stick. A magic eraser, mild soap, or fine sandpaper does this job well.
- Wood filler or cork paste fixes pits and holes. A mix of cork dust and wood glue (Titebond III works great) creates a putty that matches the original color and dries waterproof. Store bought cork fillers also work.
- U-40 Cork Seal is the angler favorite. It soaks in, hardens the cork, and keeps the natural feel. Other options include Tru Oil, Minwax Helmsman, and thinned polyurethane, each with trade offs in feel and durability.
- Prevention beats repair. Wipe your rod after every trip, store it out of direct sun, and reseal the cork every one or two seasons to keep the handle solid for years.
- The full repair takes about two hours of active work plus drying time. No special skills are needed.
Why Cork Rod Handles Start to Crumble
Cork is the bark of the cork oak tree. It is light, grippy, and warm to the touch, which is why rod makers have used it for over a hundred years. But cork is also porous and soft. Over time, the natural binders that hold the tiny cork cells together start to break down.
Sunlight is the biggest enemy. UV rays dry out the cork and weaken its surface. Salt water speeds up the damage by leaving crystals that grind into the material every time you grip the handle. Sweat, sunscreen, fish slime, and bait oils soak into the pores and rot the cork from the inside.
Cheap rods often use lower grade cork with more filler between the cork chunks. This filler crumbles first, leaving the small pits you see. Higher grade flor cork lasts longer but still wears down. Heat in a hot car or garage also dries the cork and makes it brittle.
How to Tell If Your Cork Handle Can Be Saved
Before you start any repair, take a close look at the handle. Most cork damage is cosmetic and easy to fix. You can almost always save a handle that has surface pits, dark stains, or shallow cracks.
Run your thumb across the handle. If small flakes come off but the core feels solid, you are in great shape. If the cork feels spongy, soft, or compresses under light pressure, the damage runs deep. Deep rot near the reel seat or hook keeper may need full ring replacement.
Look for gaps wider than a pencil lead or chunks of cork missing all the way to the rod blank. These need filler or new cork rings, not just sealant. Hairline cracks running along the handle are normal and seal up easily.
If more than a third of the handle is missing or the rings are loose and spinning, a full regrip from a rod builder may be the better choice.
Tools and Materials You Will Need
Gather everything before you start so the repair runs smoothly. You probably have most of these items at home already.
You will need fine grit sandpaper (220, 400, and 600 grit), a clean rag, mild dish soap, a small bowl of warm water, masking tape, and a foam brush. A magic eraser is great for stubborn dirt without scratching the cork.
For filling, grab wood filler in a light tan color, or make your own using cork dust and Titebond III wood glue. Save the dust from your sanding step to mix the perfect color match. A small putty knife or popsicle stick helps press the filler in.
For sealing, choose one product. U-40 Cork Seal is the most popular among rod builders. Other options include Tru Oil gun stock finish, Minwax Helmsman Spar Urethane (water based), or thinned polyurethane.
Pros of having all materials ready: smooth workflow, better finish, no rushed mistakes.
Cons: small upfront cost, usually under thirty dollars total.
Step One: Clean the Cork Handle Thoroughly
A clean surface is the foundation of every good repair. Dirt and oil block sealant from soaking in, so this step matters more than people think.
Start by taping off the rod blank and reel seat with masking tape. Wrap the tape several times around each end of the cork. This protects the rest of the rod from sandpaper and chemicals.
Wet a sponge or rag with warm soapy water. Use mild dish soap, never harsh cleaners. Scrub the cork in small circles with light pressure. The water should turn brown as years of grime lift out. Rinse with a clean damp rag.
For deep stains, switch to a magic eraser. Press lightly and work in short strokes. Magic erasers are mild abrasives, so heavy pressure removes too much cork. Let the handle dry for at least two hours before moving on.
Pros of soap and water: gentle, cheap, works on most dirt.
Cons: slow, may not lift deep oil stains.
Pros of magic eraser: fast, removes tough stains.
Cons: removes a thin layer of cork each time.
Step Two: Sand the Surface Smooth
Sanding opens the pores so filler grips well. It also removes the dead, oxidized top layer of cork. Always sand with the grain, moving along the length of the handle.
Start with 220 grit sandpaper. Use light pressure and short strokes. You want to remove gray, dirty cork and reveal the lighter, fresh cork underneath. Save the dust on a clean sheet of paper for filler later.
Switch to 400 grit once the surface looks even. This smooths out scratches from the rougher paper. Take your time around pits and cracks. Do not try to sand out deep pits. You will fill those in the next step.
Wipe the handle with a slightly damp rag to remove sanding dust. Let it dry fully.
Pros of sanding: opens pores, levels the surface, removes oxidation.
Cons: can thin the cork if you press too hard, takes patience.
Step Three: Fill Pits, Holes, and Cracks
Now comes the satisfying part. Filling makes the handle look almost new again.
For small pits, use premixed wood filler in a tan or natural color. Apply with a popsicle stick or your finger. Press the filler down into each hole. Wipe excess off the surface right away with a damp rag.
For a perfect color match, mix your saved cork dust with Titebond III wood glue. The ratio is about two parts dust to one part glue. Stir until it forms a thick paste. This homemade putty dries waterproof and the same shade as the cork.
For larger gaps or missing chunks, you may need to glue in a piece of cork ring. Cut the ring in half, shape it to fit, and glue with Titebond III. Clamp lightly with rubber bands until dry.
Let all filler cure for at least four hours, or overnight for best results. Sand smooth with 400 grit once fully hard.
Pros of premixed filler: easy, quick, consistent.
Cons: color may not match perfectly.
Pros of cork dust paste: perfect color match, very strong.
Cons: takes more time to mix and apply.
Step Four: Final Sanding and Surface Prep
After the filler dries, the handle needs one more pass to feel smooth. This step blends the patches into the rest of the cork so you cannot see where the repairs sit.
Use 600 grit sandpaper with very light pressure. Sand in long strokes along the handle. The goal is a uniform, soft texture, not removing more material. Run your hand across the cork. Any rough spot or filler edge should disappear.
Wipe down the handle with a clean, lint free cloth. A tack cloth works great for picking up the last bits of dust. Avoid using water at this stage because the cork needs to be bone dry before sealing.
Inspect the handle one more time under bright light. Look for missed pits or filler edges. Fix any issues now because once the sealant goes on, it is harder to make changes.
Pros of careful prep: smoother final finish, better sealant bond.
Cons: adds twenty minutes to the project.
Step Five: Apply U-40 Cork Seal (The Most Popular Method)
U-40 Cork Seal is the gold standard for sealing cork rod handles. Rod builders have trusted it for over forty years. It soaks deep into the cork, hardens the surface, and keeps the natural look and grip.
Pour a small amount onto a foam brush. Apply one thin, even coat along the entire handle. Work quickly because the product starts to set within minutes. The cork will turn slightly darker, almost amber, as it absorbs the sealant.
Most rod builders recommend only one coat of U-40. More layers can make the handle slick and rubbery. Let the rod dry upright for at least twenty four hours in a clean, dust free spot.
Once cured, the cork feels firmer and looks rich. Loose bits stop falling off.
Pros of U-40 Cork Seal: keeps natural feel, deep penetration, long history of success, easy one coat process.
Cons: small bottle costs more than alternatives, slight color change to amber.
Alternative Method: Tru Oil Gun Stock Finish
Tru Oil is a linseed oil based finish made for gun stocks. Many anglers swear by it for cork handles because it creates a tougher surface than U-40.
Apply with a clean rag in thin, wiped on coats. Each coat dries in about four hours. Most users apply two or three coats, sanding lightly with 600 grit between them. The result is a slightly harder, more polished feel.
Tru Oil resists water and stains better than raw cork. It also fills small surface pores on its own, which means you can sometimes skip heavy filling.
The trade off is feel. The cork loses some of its soft, warm grip and becomes a bit harder. Some anglers love this. Others miss the original cork texture.
Pros of Tru Oil: very durable, water resistant, available at any sporting goods store, cheaper than U-40.
Cons: changes the cork feel, requires multiple coats, longer total drying time.
Alternative Method: Minwax Helmsman Spar Urethane
For anglers who want maximum protection, water based Minwax Helmsman Spar Urethane is a strong choice. It forms a clear, hard shell over the cork.
Thin the urethane with a small amount of water (about ten percent) so it soaks in instead of sitting on top. Apply with a foam brush in two thin coats, with a light 600 grit sanding between coats. Dry time is about six hours per coat.
This finish is the most durable of the three. It resists water, salt, sweat, and UV better than U-40 or Tru Oil. Many bass and saltwater anglers prefer it for daily use rods.
The downside is that the cork ends up with a slick, plastic like surface. The natural grip drops a lot. Wet hands can slip on a heavily coated handle.
Pros of Minwax Helmsman: cheap, very durable, easy to find.
Cons: changes texture significantly, can feel slippery, takes longer to apply.
How to Prevent Cork from Crumbling Again
Repair is only half the battle. Good habits keep your cork solid for many seasons.
Wipe your rod down after every trip. A damp cloth removes salt, slime, and sunscreen before they soak in. Dry the handle with a clean towel.
Store rods out of direct sunlight. A garage that hits 110 degrees in summer dries cork fast. Keep them in a cool closet, basement, or padded rod tube. Avoid leaving rods in a hot car for hours.
Reseal the cork every one or two seasons. A quick wipe with U-40 or your sealant of choice keeps the surface fresh. This takes ten minutes per rod and adds years of life.
Use a rod sock or sleeve when transporting. This blocks dirt, dust, and small dings that open up the cork pores.
Pros of prevention: cheap, fast, saves big repairs later.
Cons: requires ongoing attention.
Common Mistakes to Avoid
A few simple errors ruin many cork repair jobs. Knowing these ahead of time saves you frustration.
Do not use harsh chemicals like acetone, paint thinner, or strong degreasers on cork. These dissolve the binders and make crumbling worse. Stick to mild soap and water.
Do not apply thick coats of any sealant. Cork needs to absorb the product, not be coated on top. Thick coats peel, crack, and feel rubbery.
Avoid sanding too aggressively. Heavy pressure or coarse grits remove too much cork and create dips in the handle. Light pressure with fine grits works best.
Never skip the drying time. Wet filler under sealant traps moisture and causes new damage within months. Patience here pays off for years.
Do not try to fix a handle that has rotted to the blank. Some damage is too far gone, and a professional regrip costs less than ruining the rod with a bad repair.
Frequently Asked Questions
How often should I seal my cork rod handle?
Most anglers reseal once every one or two fishing seasons. If you fish in salt water or hot sun often, do it once a year. A light cleaning and one fresh coat of U-40 takes only ten minutes and keeps the cork solid for many years.
Can I use super glue to fix cork cracks?
You can, but it is not the best choice. Super glue dries hard and brittle, while cork is soft and flexible. The repair often pops out within a season. Wood filler or a cork dust and Titebond III paste flexes with the cork and lasts much longer.
Will sealing make my cork handle slippery?
It depends on the product. U-40 Cork Seal keeps the natural grip almost unchanged. Tru Oil makes it slightly harder but still grippy. Polyurethane finishes can feel slick, especially when wet. Choose based on how you fish.
Is it cheaper to repair or replace a cork handle?
Repair is much cheaper. A full repair costs around twenty to thirty dollars in materials and one afternoon of your time. A professional regrip from a rod builder runs from sixty to over a hundred dollars depending on the rod. Replacement only makes sense if the cork is rotted to the blank.
Can I use the same method on EVA foam handles?
No. EVA foam needs different cleaners and does not absorb sealants the same way. For EVA, stick to mild soap, water, and a magic eraser. Cork sealants like U-40 are made for porous cork and will not bond to EVA.
How long does a sealed cork handle last?
With one good repair and basic care, a sealed cork handle can last ten or more years. Many vintage fishing rods from the 1970s still have their original cork, just resealed every few years. Cork is a tough material when you treat it right.

Hi, I’m Ivy Webb, the passionate angler and creator behind BaitHookVault.com. I spend my days out on the water personally testing and reviewing a wide variety of fishing tools and gear.