Why Is My Braided Line Fraying Near the Lure?
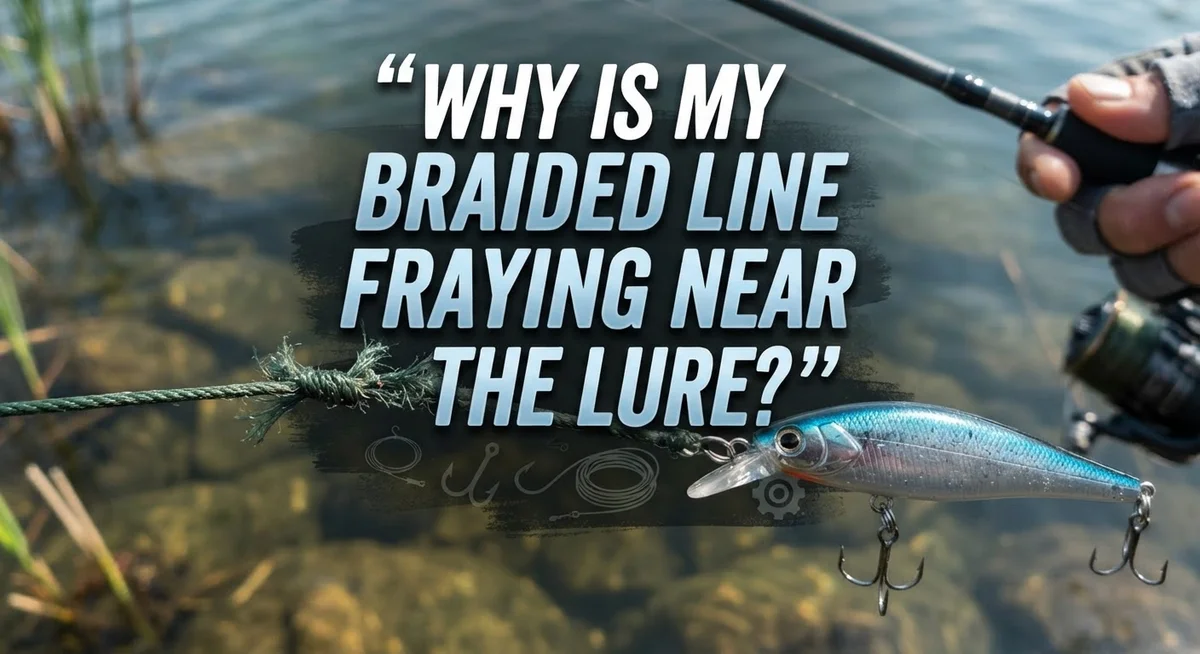
You cast your favorite lure and feel that dreaded rough spot on your line. Your braided line looks worn near the lure end. This is a common problem for many anglers.
Fraying near the lure can ruin your fishing trip fast. It weakens your line right where you need strength most. One good fight with a fish could snap it completely.
Several things cause this annoying issue. Abrasion from rocks, structure, or rough casting wears down the line fibers. Damaged rod guides with tiny chips can also cut into your braid. Sometimes the line itself is defective from the factory.
In a Nutshell
- Abrasion is the top culprit. Rocks, structure, and rough casting wear down your line over time. Even small nicks can grow into big problems.
- Bead pegging matters more than you think. Tightening beads too much creates friction points. This friction slowly damages your line’s outer strands.
- Rod guides can betray you. A chipped or cracked guide acts like sandpaper on your braid. Check your guides often for rough spots.
- Toothy fish are tough on line. Species like bluefish can shred braid in seconds. Their sharp teeth cut through even quality line easily.
- Sometimes the line itself is defective. Manufacturing flaws happen more often than anglers realize. A simple test can confirm if your line is the problem.
- Leaders offer real protection. A mono or wire leader adds a buffer between your braid and danger zones. This small addition can save your whole spool.
What Causes Braided Line to Fray Near the Lure
Abrasion happens when your braided line rubs against rough surfaces during casting and retrieval. Each time you cast, your line slides through rod guides that may have tiny chips or rough spots. Over many casts, this friction wears down the outer fibers of your braid.
Structure in the water creates another abrasion point. Rocks, logs, and debris scrape your line as you work your lure. Braided line has no stretch, so it contacts hard objects more directly than mono. This direct contact causes visible fraying near where your lure sits.
Bead pegging is a common culprit many anglers overlook. When you tighten a bead too much to hold your lure in place, you crush the braided fibers underneath. The pressure creates a weak spot that frays easily during casting or when a fish pulls hard. Looser pegging reduces this crushing force.
Rod guide damage accelerates fraying significantly. A single crack or chip in a guide becomes a cutting edge. Your line passes through this damaged spot hundreds of times per fishing session. The guide essentially saws through your braid slowly but consistently. Checking your guides regularly prevents this hidden damage.
Defective line occasionally causes fraying too. Manufacturing flaws create weak points in the braid itself. You might notice fraying in the same spot repeatedly, even after retying. Testing by reversing your line on the spool helps identify if the problem follows the line or stays in one location.
Fish teeth accelerate all these problems. Species with sharp teeth like bluefish attack your line directly. They shred braided fibers faster than any other cause. Even without tooth damage, aggressive fish create more tension that exposes weak spots already forming from abrasion.
Understanding these causes helps you prevent fraying before it ruins your fishing day.
How Rod Guides Contribute to Line Fraying
Rod guides are often overlooked, but they play a massive role in line fraying. A damaged guide acts like sandpaper on your braided line every single cast.
Chips and cracks in guides create sharp edges. Your braid slides across these rough spots repeatedly during casting and retrieval. Over time, this constant friction wears through the outer strands of your line.
The most vulnerable guides are the ones closest to your reel. These guides experience the most line pressure and movement. If you notice fraying happening consistently, inspect these guides first with a magnifying glass or bright light.
Guides made from certain materials wear faster than others. Ceramic guides last longer than older metal guides. Even ceramic can develop small cracks from impact or age. A single crack you can barely see will still damage your braid.
Check your guides regularly. Run your finger along each one to feel for rough spots. If you catch a snag, that guide needs attention. Some anglers use a small piece of pantyhose to test guides. If the pantyhose snags, your braid will too.
Corrosion also damages guides over time. Salt water especially causes deterioration. Rust creates rough surfaces that fray line quickly. Freshwater guides can corrode too if not maintained.
Guide alignment matters as well. Misaligned guides force your line to bend at awkward angles. This creates stress points where fraying starts. Bent guides from dropping your rod need immediate inspection.
Prevention is simpler than repair. Rinse your rod after each trip to prevent corrosion. Inspect guides before you fish. Replace damaged guides promptly rather than waiting. A small investment in guide maintenance prevents countless lost fish and frustrating frayed line situations.
The Role of Bead Pegging in Line Damage
Bead pegging is the process of sliding beads onto your line and then securing them tight against your lure or connector. When done incorrectly, this simple step becomes a major source of fraying damage.
The pressure from over tightened pegs creates friction points. Your braided line gets squeezed so hard that the individual strands begin to separate and fray right at the peg location. This happens because braided line is more sensitive to crushing force than monofilament.
When you peg a bead, you are essentially pinching the line between the bead and your lure. Too much force at this pinch point weakens the line’s structure. The braid starts to unravel from that exact spot, which is why you see fraying directly near your lure.
Many anglers don’t realize how little pressure is actually needed. You only need the bead to stay in place during casting and retrieval. A snug fit is sufficient. Excessive tightening provides no extra benefit and only increases damage risk.
The type of bead matters too. Smaller beads concentrate force into a tighter area. Larger beads distribute pressure across more line strands. This is why some anglers experience more fraying with certain bead sizes.
Temperature also plays a role. Cold water can make braided line stiffer and less flexible. When you peg a stiff line too tightly, it resists the pressure and the strands separate more easily.
Check your pegging technique regularly. If you notice fraying starting at the bead location, loosen your peg slightly on your next knot. You may find that a gentler approach eliminates the problem entirely.
Inspect your pegged connections after each fishing session. Look for any signs of strand separation forming. Catching this early lets you adjust your technique before major damage occurs.
Step-by-Step: Inspecting Your Line and Gear for Damage
Start by examining your rod guides with your eyes and fingers. Run your fingertip along each guide slowly, feeling for rough spots, chips, or cracks. These imperfections act like tiny razors on your braided line.
Pay special attention to guides closest to your reel. These guides take the most abuse during casting and retrieval. Look for discoloration, which signals corrosion buildup inside the guide.
Next, inspect your braided line itself beyond just the frayed area. Cut a small section of the damaged line and examine it under good light. Healthy braided line has smooth, intact fibers wrapped tightly together. Frayed sections show separated strands and loose weaving.
Test whether your line is defective by reversing it on your spool. Cast with the previously unused portion near your lure. If fraying stops, your line has a manufacturing flaw. If fraying continues, the problem lies elsewhere.
Check your bead pegging setup carefully. Squeeze the bead gently with your fingers where it sits on the line. The bead should move with slight resistance, not feel locked in place. Over tightened pegs crush braided fibers and cause fraying to start right at that pressure point.
Examine your lure attachment knot as well. Look for loose wraps or gaps in the knot itself. A poorly tied knot allows your line to slip and fray against the lure eye.
Inspect the lure eye for burrs or rough edges. Run your finger across it carefully. Sharp spots on the lure eye cut through braided line quickly during normal fishing.
Finally, check for water damage inside your rod. Moisture trapped in the rod blank causes guides to corrode faster. Look for discoloration or white deposits around guide bases.
Document what you find. Take photos of any damage you spot. This record helps you identify patterns and prevent future fraying problems.
Best Practices to Prevent Fraying Before It Starts
Preventing braided line fraying starts long before you cast your line. The key is building good habits into your fishing routine from day one.
Quality matters from the start. Invest in braided line from reputable manufacturers. Cheap line frays more easily because the fibers are lower quality and less tightly woven. Your line is your only connection to your fish, so this is worth getting right.
Check your rod guides before each fishing trip. Run your bare finger along every guide from the rod tip to the reel. You are looking for rough spots, chips, or cracks. Even tiny imperfections act like sandpaper on your braided line. If you find damage, get the guide replaced before you fish again.
Bead pegging requires a light touch. This is where many anglers cause their own problems. You only need to tighten the bead enough so it stays in place during casting. Over tightening squeezes the braided fibers until they separate. Loosen your peg slightly if you see any fraying starting at the bead location.
Inspect your lure eyes for burrs or rough edges. A sharp spot on the lure eye will shred your line faster than anything else. Feel the eye with your finger. If it feels rough, smooth it out with fine sandpaper or replace the lure.
Use a mono leader between your braided line and your lure. A 2 foot mono leader absorbs friction and protects your braided line. This simple step prevents most fraying problems near the lure.
Rinse your entire rod with fresh water after every fishing trip. Corrosion builds up on guides and creates rough surfaces. Salt water is especially damaging. Clean guides stay smooth and protect your line better.
These prevention steps take minutes but save you hours of frustration on the water.
Common Mistakes That Lead to Frayed Braided Line
Many anglers create their own fraying problems without realizing it. Understanding these mistakes helps you keep your braided line intact and fishing strong.
Ignoring rod guide damage is one of the biggest errors. Chips and cracks in your guides act like tiny scissors every time your line passes through. You might not see the damage at first glance. Run your finger along each guide carefully. Feel for rough spots or raised edges. Even small imperfections gradually fray braided line over multiple casts.
Using low quality braided line sets you up for failure from day one. Cheap line has inconsistent strand thickness and weaker construction. It frays more easily than premium options. The money you save upfront costs you in lost fish and constant retying on the water.
Skipping a leader entirely leaves your braided line vulnerable. Braided line is strong but not designed to handle direct contact with rough surfaces or sharp teeth. A mono leader acts as a buffer between your braided main line and whatever tries to damage it. This simple addition prevents most fraying issues.
Casting too aggressively also causes problems. Violent casting creates friction and stress on your line. The sudden force can damage strands even on quality line. Use smooth, controlled casting motions instead of jerky movements.
Not inspecting your setup regularly means problems go unnoticed until they become major. Check your rod guides weekly. Look at your line beyond just the frayed section. Examine your lure eye for burrs or rough spots that could catch and tear your line.
Leaving your gear wet after fishing invites damage too. Moisture trapped in guides and on line creates corrosion and weak spots. Rinse everything with fresh water and let it dry completely before storing.
These mistakes are easy to fix once you know about them. Small changes in your technique and maintenance routine prevent most fraying problems.
Troubleshooting: What to Do When You Spot Fraying
When you spot fraying on your braided line near your lure, act quickly. The fraying will only get worse if you ignore it.
Start by cutting away the damaged section. Use sharp scissors or a knife to remove the frayed portion cleanly. Cut back at least half an inch past where the fraying begins. This removes the weak fibers that could continue unraveling during your next cast.
After cutting, you need to retie your connection. Use a reliable knot like an improved clinch knot or palomar knot. These knots hold strong and create a clean attachment point to your lure. Make sure your knot is tight before you fish again.
While you have your rod in hand, inspect your guides closely. Run your finger along each guide from the reel toward the tip. Feel for any rough spots, chips, or cracks. Damaged guides act like sandpaper on your line. Even tiny cracks will fray braided line quickly.
Check your bead peg setup next. If you use beads on your line, make sure the peg isn’t too tight. Over tightening crushes the braided fibers and weakens them. Loosen your peg slightly so the bead moves freely but stays in place.
Look at your lure eye as well. Run your fingernail across it to feel for burrs or rough edges. A sharp burr will slice through braided line faster than you’d expect. Smooth out any rough spots with fine sandpaper if needed.
Finally, examine the line itself beyond just the frayed area. Look for other weak spots or damage. If fraying appears in multiple locations, your line may be defective. Consider replacing it entirely rather than dealing with repeated problems.
These steps take just a few minutes but prevent bigger frustrations later.
Final Thoughts
Frayed braided line near your lure is a common problem. But it does not have to ruin your fishing trips. Once you know the causes, you can fix them fast.
Most fraying comes down to a few simple factors. Rough rod guides, aggressive fish, tight bead pegs, or low quality line all play a role. Identify the cause, and the solution becomes clear.
Regular checks make a big difference. Look at your guides, line, and lure eyes often. This small habit catches problems early before they cost you a fish.
Remember that prevention beats repair every time. Adding a simple leader or adjusting your pegging technique takes seconds. These small changes protect your line for many trips ahead.
Don’t ignore small signs of wear. A tiny frayed spot can snap under pressure from a big fish. Cut damaged sections and retie your line right away.
Quality gear matters too. Good braided line resists abrasion better than cheap alternatives. Spending a little more upfront often saves money and frustration later.
Fishing should be enjoyable, not stressful. Understanding why your line frays gives you confidence on the water. You will spend less time worrying and more time reeling in fish.
Every angler faces this issue at some point. The difference is how you respond to it. Quick action and smart prevention keep your gear working well.
Keep these tips in mind on your next trip. Check your setup before you cast. Watch for warning signs while you fish.
Small efforts lead to big results. A few minutes of maintenance can save your catch and your gear. Treat your line with care, and it will serve you well for many seasons.
With this knowledge, you are ready to handle fraying with ease. Tie on your lure, cast with confidence, and enjoy your time on the water.
Frequently Asked Questions
Why does my braided line fray right where the lure connects?
Braided line frays near the lure for several reasons. Rough spots on your rod guides are a top culprit. Even tiny chips or cracks catch the line during casting and create damage over time. Tight bead pegs also cause fraying if you over tighten them. The pressure squeezes the line fibers until they separate. Low quality braided line has weaker fibers that break apart more easily. Fish with sharp teeth, like bluefish, can also shred your line during the fight.
How do I know if my rod guides are causing the problem?
Run your finger along each guide slowly. You should feel smooth surfaces. If you catch a fingernail or feel rough spots, that guide is damaged. Look closely at the guide opening too. Cracks or chips are easy to spot with good light. A damaged guide will fray your line consistently, usually in the same spot each time you cast.
Should I use a leader with braided line?
Yes, a leader is smart protection. A 2 foot mono leader with 20 pound or higher test works well. Leaders reduce fraying from rod guides and fish teeth. They also help your line last longer overall. Mono leaders are especially important if you fish around toothy species or rough structures.
What should I do if fraying starts?
Cut the damaged section away immediately with sharp scissors. Retie your connection cleanly. Then inspect your entire setup. Check your guides, your bead peg tension, and your line quality. These quick steps stop small problems from becoming big ones.

Hi, I’m Ivy Webb, the passionate angler and creator behind BaitHookVault.com. I spend my days out on the water personally testing and reviewing a wide variety of fishing tools and gear.