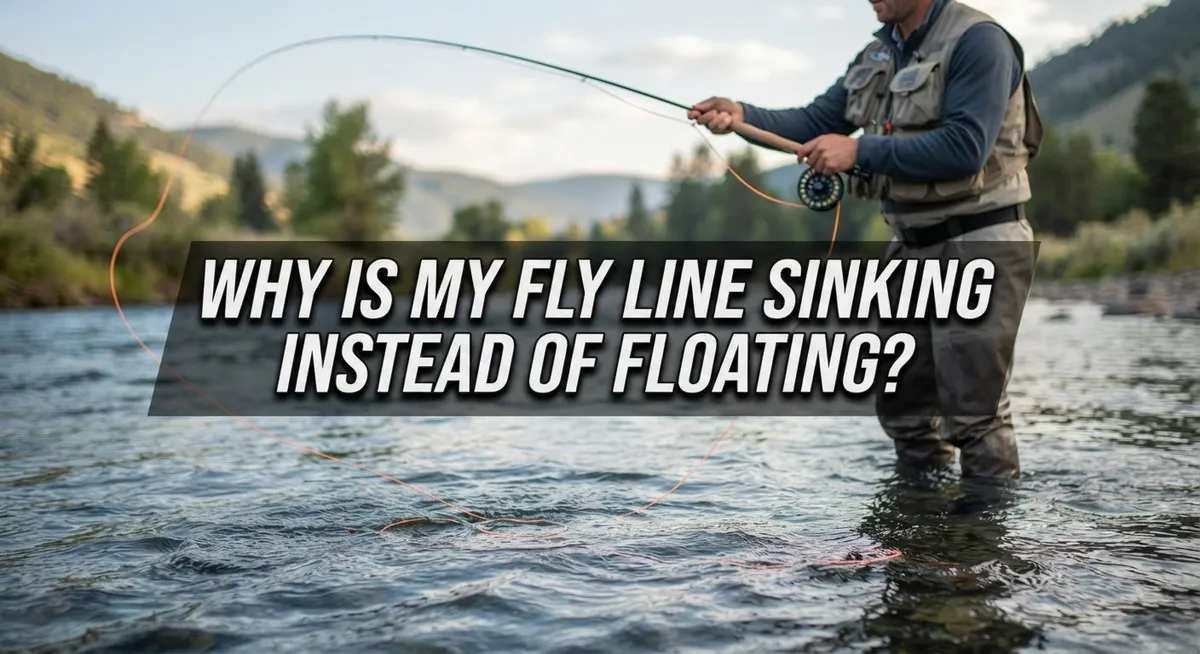
Why Is My Fly Line Sinking Instead Of Floating?
You cast your line with hope. You watch it settle. But instead of floating high, it slips beneath the surface.
Frustrating, right?
You’re not alone. Many anglers face this exact problem, even with lines labeled “floating.”
The good news? This issue almost always has a simple explanation. Dirt and grime build up on your line over time. This buildup weighs it down and kills its buoyancy.
There’s also a science piece here. Density is not the same as mass. Understanding this difference helps you see why some line sections sit lower than others naturally.
In a Nutshell
- Dirt and grime build up on your line over time. This is the most common reason floating lines start to sink.
- Density and mass are not the same thing. Understanding this helps you see why some lines sit low in the water even when they seem fine.
- Thin taper sections naturally float lower than thicker parts. This is normal line behavior, not a defect.
- Floatants can help your line float. But applying too much can attract dirt and make sinking worse.
- Heat treating your line and knots seals them properly. This stops water from creeping up and pulling your line down.
- River hydraulics sometimes overpower even a clean, well maintained line. Fast or turbulent water can push any line under.
How Floating Fly Line Is Designed to Work
Floating fly line works through a simple principle: it contains tiny air pockets trapped inside the line material. These air pockets make the line less dense than water, which allows it to sit on the surface. The outer coating of your line is specially formulated to repel water and keep those air pockets sealed.
The line’s construction includes a core wrapped in material that resists water absorption. This design keeps your line buoyant so you can control your cast and present your fly naturally. When everything works correctly, your line floats effortlessly across the water.
The tapered design of your line affects how it floats. Thicker sections have more mass and air pockets, so they float higher. Thinner sections have less mass, which means they sit slightly lower in the water. This is completely normal and happens on every floating line.
Your line’s coating plays a critical role in maintaining flotation. This coating acts as a barrier that prevents water from entering the core material. If water seeps into the core, it replaces those air pockets and causes your line to sink.
Regular maintenance keeps your floating line performing as designed. Dirt, algae, and grime reduce the coating’s ability to repel water. Over time, these deposits build up and create tiny pathways for water to penetrate the line.
The floatant you apply works by refreshing the water repellent properties of your line’s surface. A fresh layer helps seal the coating and restore buoyancy. Proper cleaning before applying floatant ensures the product works effectively and doesn’t trap dirt against your line.
Top Reasons Your Fly Line Is Sinking
Dirt and grime accumulation is the most common reason your floating line sinks. Every time you cast, your line picks up debris from the water, riverbank, and air. Algae, mud, and organic matter stick to the line’s surface and build up over time.
This buildup creates a layer that traps water against your line. The water seeps into the coating and weighs down your line. Your floating line becomes waterlogged even though it was designed to stay on top.
The problem gets worse in dirty water or after fishing in muddy rivers. Stagnant pools and lakes also contribute more algae growth to your line. Each fishing session adds another thin layer of contamination.
Floatants can actually make this worse if you don’t clean first. Applying floatant over dirty line traps the grime underneath. The floatant sticks to the dirt instead of sealing the line properly. Your line sinks faster because the floatant attracts even more debris.
Thin taper sections sink lower than thicker sections naturally. This is normal behavior due to reduced mass in those areas. However, excessive dirt makes thin sections sink much faster than they should.
River hydraulics sometimes overcome your line’s buoyancy too. Fast current and deep pools can push even a clean line under the surface. The water pressure works against the air pockets inside your line.
The fix starts simple: clean your line regularly. Remove visible dirt and algae with a soft cloth. Then apply floatant to a clean surface. This two step approach solves most sinking problems quickly and keeps your line floating cast after cast.
The Role of Dirt, Grime, and Algae Buildup
Your fly line picks up dirt, grime, and algae every time you fish. This buildup is the most common reason your floating line sinks instead of staying on top.
When dirt accumulates on your line, it creates a layer that traps water against the surface. This extra weight pulls your line down. The problem gets worse in muddy rivers or dirty water where particles stick more easily.
Algae growth happens naturally in lakes and slow moving sections of rivers. Green slime coats your line and adds weight. Over time, this coating becomes thicker and heavier.
Here’s the tricky part: floatants can make this worse. When you apply floatant to a dirty line, the product sticks to grime instead of the line itself. You end up with a sticky surface that attracts even more dirt. The floatant then traps that dirt against your line, making it sink faster.
The solution starts with regular cleaning. After each fishing trip, wipe your line with a soft cloth. Use gentle pressure to remove visible dirt and algae. You can also rinse your line with fresh water to wash away river debris.
Clean your line before you apply any floatant. This ensures the floatant actually coats your line material, not the dirt. A clean line with fresh floatant floats much better than a dirty line with old floatant.
Check your line every few fishing trips. If you see visible grime, clean it immediately. This simple habit prevents sinking problems before they start. Your line will float higher and perform better when you keep it clean.
Step-by-Step: Cleaning and Restoring Your Fly Line
Your fly line needs regular cleaning to restore its floating ability. Start by removing your line from the reel and laying it on a clean surface. Use a soft cloth or sponge to gently wipe the entire length of your line.
Warm water works best for this task. Dip your cloth in lukewarm water and wipe away visible dirt, algae, and grime. Pay special attention to areas where you grip the line most often, as these spots accumulate the most buildup.
For stubborn algae or debris, use a mild soap solution. Mix a small amount of gentle dish soap with water. Wipe your line carefully with this solution, then rinse thoroughly with clean water to remove all soap residue.
Dry your line completely before storing it. Use a clean, lint free cloth to pat it dry. This prevents moisture from sitting on the surface and causing additional problems.
Once your line is clean and dry, you can apply floatant. Apply it sparingly to avoid attracting new dirt. A light coating refreshes the water repellent properties your line needs to float properly.
Heat treating your line and knots seals them effectively. Gently run warm water over the line and knots to help the floatant set. This prevents water from creeping up into the line structure over time.
Clean your line every few fishing trips for best results. Regular maintenance takes only minutes but makes a huge difference in performance. This simple routine keeps your floating line working as intended and prevents the sinking problems you experience now.
Applying Floatant the Right Way
Applying floatant correctly makes a real difference in keeping your line floating. The key is timing and technique. Never apply floatant to a dirty line. Dirt particles stick to the floatant and create a water trapping layer that makes your problem worse.
Start by cleaning your line thoroughly. Use warm water and a soft cloth to remove all visible dirt and algae. For stubborn buildup, add a drop of mild soap to the water. Dry your line completely before moving forward. This step matters more than most anglers realize.
Once your line is clean and dry, apply floatant sparingly. Less is more here. Use a small amount and work it along your entire line with gentle, even strokes. Don’t glob it on in thick layers. A thin, even coat does the job better than heavy application.
Pay special attention to your knots and connection points. These areas trap water easily. Work the floatant into your knots with your fingers to seal them properly. Heat treating your line and knots after applying floatant creates an extra protective barrier. A gentle pass with a heat source helps seal everything.
The timing of application matters too. Apply floatant before you fish, not during your session. This gives the product time to set properly. Reapply floatant every few fishing trips, or whenever you notice your line sitting lower in the water than usual.
Remember this simple rule: clean first, then floatant. Skipping the cleaning step wastes your floatant and actually makes your line sink faster. The dirt particles become sticky traps for water. A clean line with proper floatant application floats exactly as designed.
Understanding Taper, Density, and Water Hydraulics
Your fly line’s ability to float depends on two physical properties working together: taper design and material density. Understanding how these interact helps you fix sinking problems.
Taper refers to how your line’s diameter changes along its length. Most floating lines start thick at the backing connection, gradually narrow toward the middle, then taper down to a thin tip. This design helps with casting distance and accuracy. However, thinner sections naturally sit lower in the water because they displace less volume.
Density describes how tightly packed the line’s material is. A denser line sinks faster because it weighs more per unit of length. Floating lines use materials with lower density to stay on top. When your line sinks, density hasn’t changed, but something else has interfered with buoyancy.
Water hydraulics play a huge role in real fishing conditions. A line that floats perfectly in your backyard pool might struggle in moving river current. Fast water pushes down on your line with force. This pressure can overcome the line’s natural buoyancy, especially in the thinner taper sections.
The key insight: your floating line’s construction hasn’t failed. Instead, dirt buildup reduces buoyancy by adding weight and trapping water. River current creates downward pressure that thin sections can’t resist. These are maintenance and environmental issues, not manufacturing defects.
Recognizing this distinction matters because it changes your approach. You won’t fix a sinking line by buying a new one. Instead, focus on cleaning regularly and understanding where your line naturally floats lower. This knowledge helps you make smart decisions about line placement and casting technique in different water conditions.
Common Mistakes That Cause Lines to Sink
Fly lines sink for specific reasons, and most come down to what you’re doing (or not doing) with your line. The biggest mistake is neglecting regular maintenance. Your line collects dirt, algae, and debris every time you fish. This buildup sits on the surface and gradually pulls your line down into the water.
Over-applying floatant creates another common problem. Many anglers think more floatant equals better floating. The opposite happens. Extra floatant attracts dirt and grime, which then sticks to your line permanently. This added weight defeats the purpose entirely.
Skipping the cleaning step before applying floatant wastes your effort. You’re essentially sealing dirt onto your line. The floatant traps moisture underneath, and your line sinks faster than before.
Heat treatment mistakes also cause sinking issues. If you don’t properly seal your knots and connection points, water creeps up the line slowly. This happens because water finds tiny gaps in your knots and gradually migrates along the line. The water weight accumulates, and your line loses buoyancy.
Understanding your line’s taper prevents another mistake. Thin sections of your line naturally float lower than thick sections. This is normal physics, not a defect. Many anglers mistake this for a sinking problem when it’s actually how tapered lines work.
River conditions can overcome your line’s buoyancy too. Strong currents and hydraulics push against your line with force. A line that floats perfectly in your backyard pool might struggle in moving water. This isn’t a maintenance failure. It’s water pressure working against your line’s design.
Troubleshooting: When Cleaning and Floatant Aren’t Enough
Sometimes cleaning and floatant alone won’t solve your sinking line problem. This happens more often than you’d think, and understanding why helps you fix it properly.
Floatant buildup can actually work against you. When you apply floatant repeatedly without cleaning first, it traps dirt and grime underneath. This creates a sticky layer that holds moisture and makes your line sink faster. The solution? Strip off old floatant completely before reapplying. Soak your line in warm water and gently rub it with a soft cloth to remove all residue.
Your line’s natural taper sections float differently than you expect. The thin parts near your leader naturally sit lower in the water because they have less mass. This isn’t a defect. It’s normal physics. If only these sections sink, your line is actually working as designed.
River conditions can overwhelm even a well maintained line. Fast moving water and strong currents push against your line with tremendous force. A line that floats perfectly in your pool might struggle in powerful current. This isn’t a cleaning issue. It’s a hydraulics problem that requires adjusting your casting technique or line choice.
Heat sealing offers another solution when cleaning fails. Gently warming your line with warm water or careful heat application can close microscopic pores that allow water absorption. Focus on your knots and connection points, which are the most vulnerable areas.
If your line still sinks after cleaning, applying floatant, and heat treating, your line may have reached the end of its life. Line degradation happens over time, and no amount of maintenance can reverse it.
Final Thoughts
Your fly line does not have to sink and stay that way. Most sinking problems come from simple causes you can fix yourself.
Dirt and grime build up on your line every time you fish. This buildup adds weight and breaks down the coating that keeps your line afloat.
Regular cleaning solves most floating problems right away. A clean line floats better than a dirty one, every single time.
Floatant helps, but only when you apply it correctly. Too much floatant actually attracts more dirt and makes things worse.
Remember that density and mass are different things. Your line’s material density stays the same, but dirt adds extra mass that pulls it down.
Thin taper sections will always float lower than thicker parts. This is normal line behavior, not a sign of damage.
Water hydraulics sometimes overpower even a well maintained line. Fast currents and turbulent water can push a floating line under, regardless of how clean it is.
When basic maintenance does not work, try heat sealing your knots and connection points. This step often stops water from creeping into your line.
Sinking lines and floating lines serve different purposes. A sinking line helps you reach specific depths on purpose.
A floating line should stay on the surface unless something interferes with it. Understanding this difference helps you troubleshoot smarter.
Keep your line clean, apply floatant sparingly, and check your knots often. These small habits keep your floating line doing its job.
With good care, your fly line will float reliably trip after trip. Simple maintenance beats complicated fixes every time.
Frequently Asked Questions
Why does my floating line sink even though I just bought it?
New lines can sink quickly if dirt and algae accumulate on the surface. Every time you cast, your line picks up debris from the water, air, and your hands. This buildup weighs down the line and breaks the surface tension that keeps it floating.
The solution is simple: clean your line regularly. Use a soft cloth to wipe it down after each fishing session. This removes the grime before it hardens and becomes difficult to remove.
Can floatant make my line sink worse?
Yes, floatant can actually attract more dirt if you apply too much. When you over-apply floatant, it becomes sticky and collects particles from the environment. This defeats the purpose of using floatant in the first place.
Apply floatant sparingly and only to sections that need it. Let it dry completely before casting. This keeps your line clean while maintaining its buoyancy.
Why do the thin parts of my line float lower than the thick parts?
Thin taper sections have less mass, so they naturally sit lower in the water. This is normal and expected. The thicker sections of your line will float higher because they displace more water.
This doesn’t mean your line is broken. Understanding this difference helps you adjust your casting technique and line management on the water.
What should I do if cleaning and floatant don’t work?
Try heat sealing your knots and connection points. Gently warm these areas to help them repel water. Be careful not to damage the line with excessive heat.
If your line still sinks after cleaning, floatant, and heat treatment, it may be time to replace it. Most fly lines have a lifespan of several years with proper care.

Hi, I’m Ivy Webb, the passionate angler and creator behind BaitHookVault.com. I spend my days out on the water personally testing and reviewing a wide variety of fishing tools and gear.