How to Put Fishing Line on a Spinning Reel?
You just bought a brand new spinning reel, and now you are staring at a spool of fishing line with no idea where to start. Sound familiar? Spooling fishing line on a spinning reel is one of the most basic skills every angler needs.
Yet so many people get it wrong on their first try. Bad spooling leads to tangled messes, frustrating line twists, and lost fish. The good news is that this process is straightforward once you know the right steps.
This guide will walk you through everything from choosing the right line to tying the perfect knot to filling your spool to the ideal level. Whether you are a total beginner or someone who has been doing it wrong for years, this post will help you get it right every single time.
Key Takeaways
- Choose the right line type for your fishing style. Monofilament works great for beginners because it is affordable and easy to manage. Braided line offers superior strength and sensitivity. Fluorocarbon provides near invisibility underwater but can be stiff on a spinning reel.
- Always use an arbor knot to secure line to the spool. This knot is simple, reliable, and holds firm under pressure. It is the standard knot most experienced anglers recommend for attaching line to a reel spool.
- Match the line direction to the reel rotation to prevent line twist. The line should come off the filler spool in the same direction that your reel bail rotates. This single step prevents most common line twist problems.
- Fill your spool to about 1/8 inch below the spool lip. Overfilling causes loose coils to fly off during casting. Underfilling reduces your casting distance and creates friction as line catches on the spool edge.
- Apply steady tension while reeling in new line. Pinching the line between your fingers or using a damp cloth keeps the line tight and prevents loose wraps that cause tangles later.
- Check for line twist every 15 to 20 cranks during the spooling process. Let the line go slack briefly and watch for curls or loops. If you see twists forming, flip the filler spool over and continue.
Why Proper Spooling Matters for Your Spinning Reel
A spinning reel works by wrapping line around a fixed spool using a rotating bail arm. This design is different from a baitcasting reel, and it creates unique challenges. Line twist is the number one enemy of spinning reel users. Poorly spooled line leads to tangles, wind knots, and reduced casting distance.
A well spooled reel casts farther and more accurately. It also reduces the chance of bird’s nests and frustrating tangles during your fishing trip. Taking five extra minutes to spool your reel properly saves hours of headaches on the water. Good spooling habits extend the life of your fishing line too, because evenly distributed line wears more slowly than line that is bunched or twisted.
Choosing the Right Fishing Line for a Spinning Reel
Three main types of fishing line work with spinning reels. Each has its own strengths and weaknesses. Your choice depends on where you fish, what species you target, and your experience level.
Monofilament is the most popular choice for spinning reels. It is affordable, stretchy, and easy to handle. The stretch helps absorb shock from hard fighting fish. However, monofilament has line memory, which means it holds the shape of the spool and can cause coiling issues over time.
Braided line offers incredible strength in a thin diameter. It has zero stretch, which gives you excellent sensitivity to feel every bite. The downside is that braid can slip on the spool and is highly visible in clear water. Many anglers solve these problems by using a monofilament backing and a fluorocarbon leader.
Fluorocarbon is nearly invisible underwater and sinks faster than monofilament. It works best as a leader material rather than a main line on spinning reels. Fluorocarbon tends to be stiff, which can cause management problems on a spinning spool.
Gathering Your Tools and Materials
Before you start spooling, gather everything you need. Having your tools ready makes the process smooth and quick. You do not need expensive gear for this task.
You will need your spinning reel, a rod (optional but helpful), and a fresh spool of fishing line. A pair of line clippers or sharp scissors is essential for trimming knots and tag ends. A pencil or pen can serve as a spool holder if you do not have a dedicated line spooling station.
A damp cloth or towel is one of the most useful items you can have during this process. Running the line through a damp cloth adds tension and reduces heat from friction. Some anglers also use a piece of electrical tape to secure braided line to the spool before tying the knot, which prevents the line from slipping.
How to Tie Fishing Line to the Reel Spool
The arbor knot is the go to knot for attaching fishing line to a spinning reel spool. It is easy to learn and holds securely under tension. Here is how to tie it in four simple steps.
First, open the bail arm on your spinning reel. Wrap the tag end of your fishing line around the spool arbor one full time. Second, tie a simple overhand knot around the standing line (the main line going back to the filler spool). Third, tie another overhand knot in the tag end itself. This acts as a stopper knot. Fourth, pull the standing line tight so both knots cinch down against the spool.
Trim the tag end close to the stopper knot. Close the bail arm. Give the line a firm tug to make sure everything holds. If you are using braided line, wrap a small strip of electrical tape around the spool first. Braid is slippery and can spin freely on a bare spool without this extra grip.
Matching the Line Direction to Prevent Twist
This step is the most important part of the entire spooling process. Getting the line direction wrong is the main reason anglers experience line twist. A spinning reel bail rotates in a fixed direction, and your line must come off the filler spool in the same rotational direction.
Here is a simple way to check. Lay the filler spool flat on the floor with the label facing up. Hold your rod and reel above it. Start reeling slowly and watch how the line comes off the filler spool. After about 10 to 15 cranks, stop and let the line go slack between the rod tip and the filler spool.
If the slack line lies flat and straight, you have the right orientation. If you see curls, twists, or loops forming in the slack line, flip the filler spool over so the label faces down. Test again. The correct orientation will produce clean, twist free line every time.
Applying the Right Amount of Tension While Reeling
Tension is critical during the spooling process. Line that goes on too loosely will create gaps and tangles. Line that goes on with too much force can damage the line or cause it to dig into lower layers on the spool.
The easiest method is the pinch technique. Hold the line between your thumb and index finger with light to moderate pressure as you reel. Use a damp cloth between your fingers and the line to reduce friction burns and add consistent tension. You should feel steady resistance as you crank the handle.
Some anglers prefer to have a friend hold a pencil through the center of the filler spool. The friend applies light pressure on the sides of the spool with their hands to create resistance. This method works well because it keeps the filler spool from spinning too fast and feeding slack line onto your reel.
Pros of the pinch method: No extra tools needed, you control the tension directly.
Cons of the pinch method: Your fingers can get sore or hot from friction over long sessions.
Pros of the pencil method: Consistent tension, frees up your hands.
Cons of the pencil method: Requires a second person or a stable mounting point.
How Much Line Should You Put on a Spinning Reel
The ideal fill level is about 1/8 inch below the rim of the spool lip. This measurement gives you the best balance between casting distance and line management. Most reel manufacturers print the line capacity on the spool itself, which tells you how many yards of a specific pound test the spool can hold.
Overfilling your spool is a common beginner mistake. Too much line causes loose coils to fall off the spool during casting. These loose loops create tangles and wind knots that are difficult to fix on the water.
Underfilling is equally problematic. When there is too much space between the line and the spool lip, the line catches on the rim during casting. This creates friction that reduces your casting distance by a significant amount. Testing has shown that an underfilled spool can lose 20% or more of its casting potential.
A quick visual check works well. Look at the spool from the side. You should see a small, even gap between the top of the line and the edge of the spool all the way around.
Using a Backing Line for Braided Line
Braided line is thinner than monofilament at the same pound test. This means you often need less braid to fill a spool. Instead of wasting expensive braid, smart anglers use a monofilament backing to fill the bottom portion of the spool.
Start by spooling inexpensive monofilament onto your reel as a base layer. Fill the spool about one third to one half full with mono. Then tie the braided line to the monofilament using a double uni knot or an FG knot. Continue spooling with braid until you reach the ideal fill level.
The monofilament backing also prevents braid from slipping on the spool. Braid’s smooth texture makes it prone to spinning freely on metal or graphite spool surfaces. The mono backing grips the spool and gives the braid something to bite into. This method saves money and improves performance at the same time.
Pros of using backing: Saves money on expensive braid, prevents slipping, fills spool evenly.
Cons of using backing: Adds an extra knot connection, requires slightly more setup time.
Step by Step Process to Spool Your Spinning Reel
Let us put it all together with a clear, ordered process. Follow these steps for a perfect spool every time.
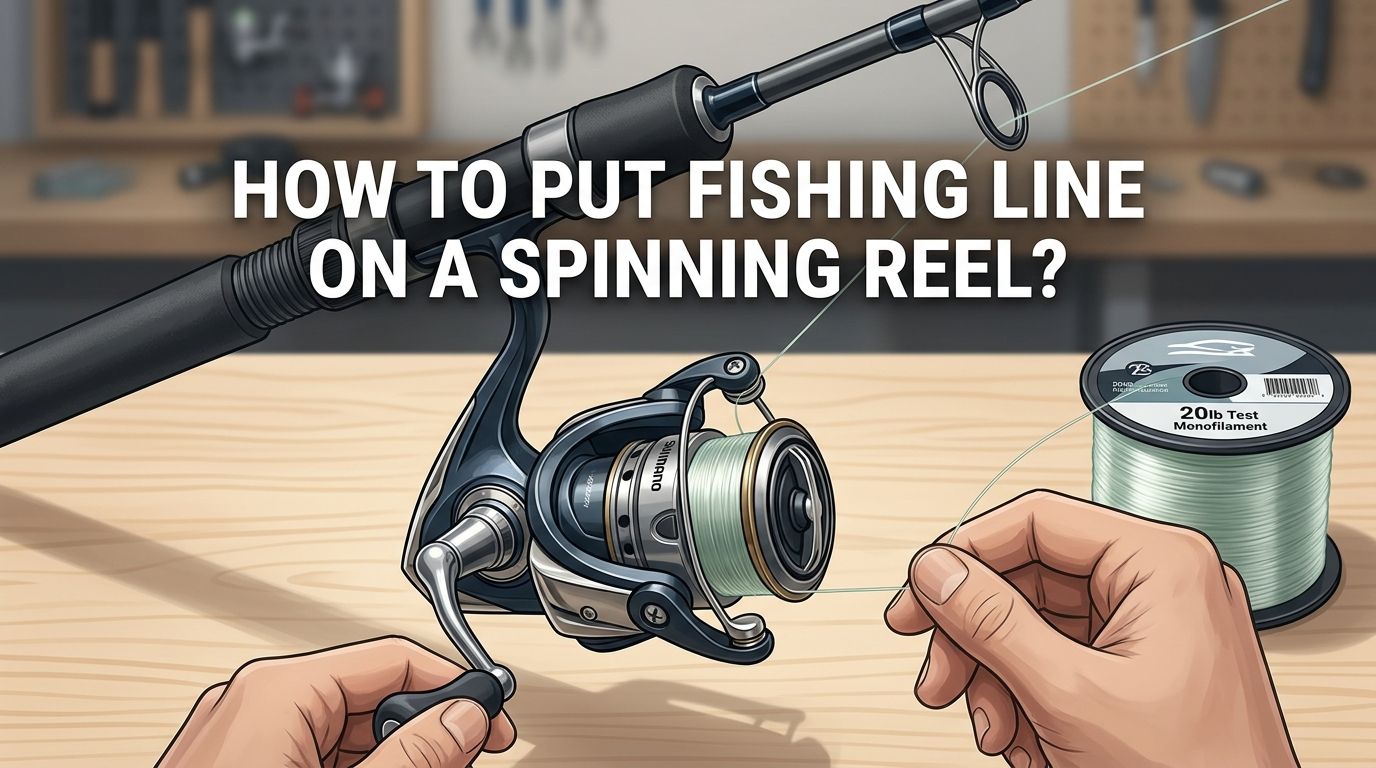
Open the bail arm on your spinning reel. Thread the line through the first guide on your rod (the one closest to the reel). Tie an arbor knot to secure the line to the spool. Close the bail arm.
Place the filler spool on the floor, label side up. Begin reeling slowly with steady tension using the pinch method or a damp cloth. After 15 to 20 cranks, stop and check for line twist by letting the line go slack. If you see twists, flip the filler spool over.
Continue reeling until the line reaches about 1/8 inch below the spool lip. Cut the line from the filler spool. Thread the free end through the remaining rod guides. You are now ready to tie on a lure or hook and start fishing.
This entire process takes about five to ten minutes. Rushing through it only creates problems you will have to fix later on the water.
Common Mistakes to Avoid While Spooling
Even experienced anglers make spooling mistakes from time to time. Here are the most frequent errors and how to avoid them.
Closing the bail with the reel handle instead of by hand is a habit that introduces line twist over time. Always flip the bail closed manually after each cast. Reeling against a closed drag is another common source of twist. Make sure your drag is set properly so the spool can release line under pressure.
Skipping the line direction check is a mistake that costs many beginners hours of frustration. Never assume the line is coming off the filler spool correctly. Always test it within the first 15 to 20 cranks.
Using old or damaged line is a waste of time. Monofilament and fluorocarbon degrade from UV exposure and general use. If your line feels stiff, looks faded, or has nicks in it, replace it before your next trip.
How to Fix Line Twist on a Spinning Reel
Sometimes line twist happens despite your best efforts. You do not need to throw away your line to fix it. There are a few quick solutions that work well on the water.
The drag method is the simplest fix. Remove all terminal tackle from your line. Let out a long length of line behind a slowly moving boat or into a current. The water resistance straightens the line and removes most twists. Reel the line back in under tension.
If you are fishing from shore, cast out as far as you can with no lure attached. Let the bare line sit in the water for a few minutes. The current or wave action helps untwist the line. Reel it back in slowly while pinching the line for tension.
For severe twist, strip all the line off the reel and lay it out straight on a large grassy area. Let it sit for a few minutes, then respool it using the proper technique described in this guide. This full reset approach takes more time but eliminates all twist.
Maintenance Tips to Keep Your Line in Great Shape
Good line maintenance extends the life of your fishing line and keeps your spinning reel performing at its best. A few simple habits make a big difference.
Rinse your reel and line with fresh water after every saltwater fishing trip. Salt crystals dry on the line and cause it to become brittle. Even freshwater anglers benefit from occasional rinsing to remove dirt, algae, and debris that collect on the line.
Store your rod and reel out of direct sunlight. UV rays break down monofilament and fluorocarbon over time. A rod rack inside a garage or closet is ideal. Replace your line at least once or twice per season if you fish regularly. Heavy users may need to change line every few weeks.
Check the first few feet of your line before every trip by running it between your fingers. If you feel any rough spots, nicks, or abrasion, cut that section off and retie your knot. The last few feet of line take the most abuse and are the most likely point of failure.
Frequently Asked Questions
Which direction should the line come off the spool for a spinning reel?
The line should come off the filler spool in the same rotational direction as your spinning reel bail. Most spinning reels wrap line in a counterclockwise direction. Lay the filler spool flat on the ground and check that the line peels off matching that rotation. If you see twists forming after a few cranks, simply flip the filler spool over and continue.
Can I put braided line directly on a spinning reel without backing?
You can, but it is not recommended. Braided line is smooth and slippery. It tends to spin freely on the spool without a monofilament backing or a strip of electrical tape for grip. Using a mono backing also saves you money because you need less braid to fill the spool properly.
How often should I change the line on my spinning reel?
It depends on how often you fish and what type of line you use. Monofilament should be replaced every few months or after about 20 fishing trips. Braided line lasts much longer and may only need replacing once a year. Fluorocarbon falls somewhere in between. Always inspect your line for nicks, fading, and stiffness before each outing.
What pound test line should I use on my spinning reel?
Check the specifications printed on your reel or in the reel’s manual. Every spinning reel has a recommended line weight range. A common setup for freshwater bass fishing is 6 to 10 pound monofilament or 10 to 20 pound braided line on a 2500 to 3000 size reel. Match your line weight to the species you plan to target and the conditions you will fish in.
Why does my line keep tangling after I spool it?
The most likely cause is line twist from incorrect spool orientation during the spooling process. Other common causes include overfilling the spool, reeling against a locked drag, and closing the bail with the reel handle instead of by hand. Review each of these factors and correct the one that applies to your situation.
Is it better to spool line with the rod assembled or without it?
Using your rod during spooling is the preferred method. Threading the line through at least the first guide above the reel helps direct the line onto the spool evenly. It also gives you a better feel for the tension as you reel in the new line. You can spool without a rod, but using one produces cleaner results.

Hi, I’m Ivy Webb, the passionate angler and creator behind BaitHookVault.com. I spend my days out on the water personally testing and reviewing a wide variety of fishing tools and gear.