How to Tie a Chatterbait to Fishing Line? Step by Step Guide
You just bought a brand new chatterbait. You hold it up, look at the blade, the jig head, and the wire line tie point.
Then the question hits you: where exactly do I tie it, and what knot should I use? You are not alone. Thousands of anglers ask this same question every season, and tying a chatterbait the wrong way can cost you fish, frustration, and money.
A chatterbait (also called a bladed jig) is one of the most effective bass lures on the market. It produces a unique vibration that triggers reaction strikes in both clear and stained water.
Key Takeaways
- Tie your line to the wire arm directly below the blade. Every chatterbait has a small loop or eyelet at the top of the wire frame, right under the hex blade. This is your connection point. Do not tie to the blade itself or to the jig head hook eye.
- The Palomar knot is the most popular and reliable choice for chatterbaits. It is easy to tie, retains over 95% line strength, and works well with fluorocarbon, braid, and monofilament. Most tournament anglers use this knot as their go to option.
- A loop knot gives your chatterbait more freedom of movement. If you want the blade to swing and vibrate with maximum action, a non slip loop knot allows the lure to move more freely on the line. This can trigger more bites in clear water or pressured conditions.
- You do not need a snap swivel with a chatterbait. The lure does not spin, so a swivel adds unnecessary weight and bulk. Tying direct to the line tie produces the best action and sensitivity.
- Match your knot to your line type for the best results. Fluorocarbon pairs well with the Palomar, improved clinch, or San Diego jam knot. Braid works best with the Palomar or a double uni connection to a fluorocarbon leader. Monofilament handles almost any knot well.
- Always wet your knot before cinching it tight. Friction from a dry pull can damage your line and weaken the knot by up to 50%. A quick lick or dip in the water makes a big difference in knot strength and durability.
Where Do You Tie the Line on a Chatterbait
This is the first question most beginners ask, and it is a fair one. A chatterbait looks different from a standard jig. It has a flat hex shaped blade attached to a wire arm that connects to the jig head.
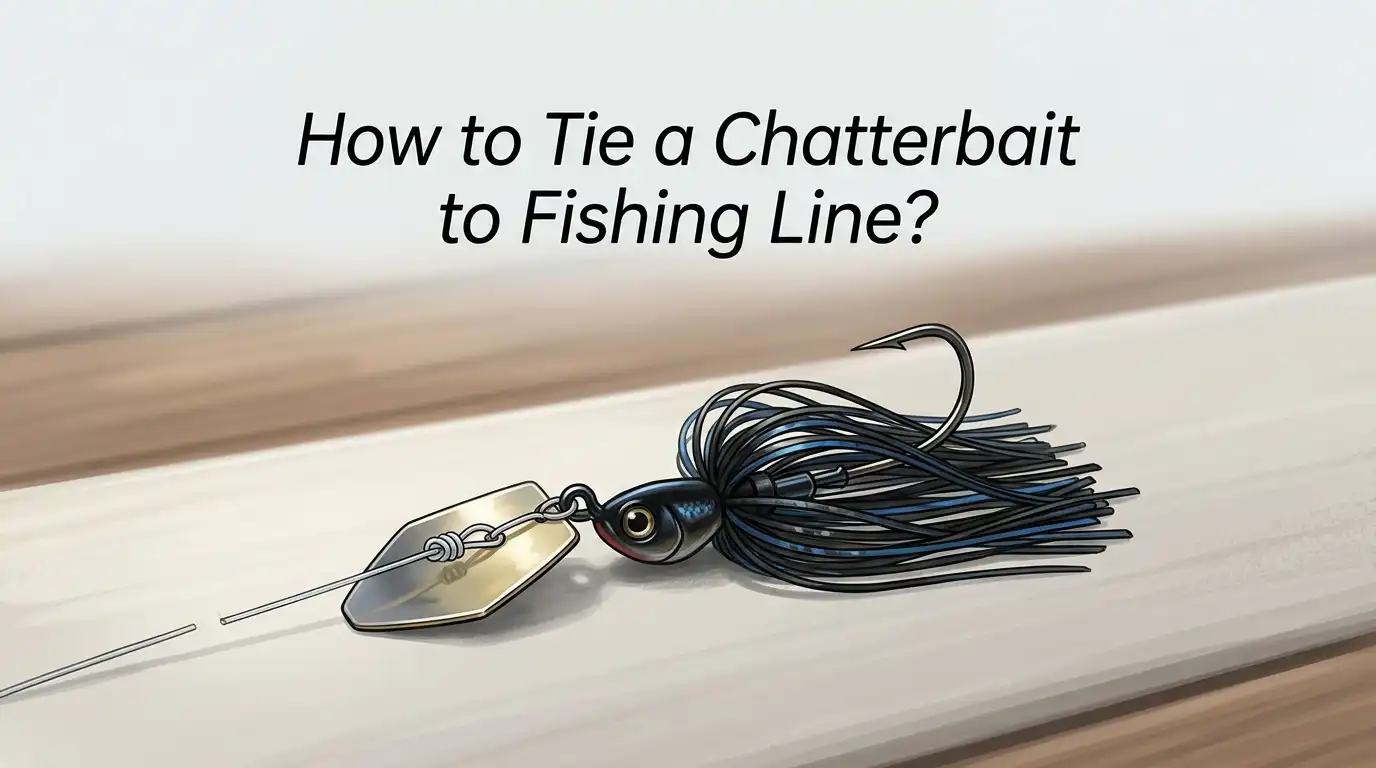
Your tie point is the small wire loop or eyelet located at the top of the frame, right below the blade. Some chatterbaits have a split ring or a small built in swivel at this connection point. Others have a simple bent wire loop. Thread your line through this eyelet and tie your knot there.
Do not tie your line to the blade or the hook. The wire eyelet is specifically designed to give the blade room to chatter and vibrate. If you tie to the wrong spot, you restrict the action and make the bait less effective.
Why the Right Knot Matters for Chatterbait Fishing
The knot you choose affects three things: lure action, knot strength, and sensitivity. A tight cinch knot holds the bait firmly and transfers every vibration to your rod tip. A loop knot gives the bait more freedom and a wider range of motion.
Chatterbaits put unique stress on knots because of the constant vibration. The blade creates rapid oscillation that can slowly work a poorly tied knot loose over time. This is why a strong, well seated knot is essential every time you rig up.
Choosing the wrong knot for your line type can also cause failures. Fluorocarbon is stiffer than monofilament and needs knots that seat properly on hard materials. Braid is slippery and can pull through certain knots. Matching the right knot to the right line keeps you connected to fish.
How to Tie a Chatterbait with the Palomar Knot
The Palomar knot is the number one choice among bass anglers for chatterbaits. It is simple, strong, and works on every line type.
Step 1: Double about 6 inches of line and pass the loop through the wire eyelet of the chatterbait. Step 2: Tie a simple overhand knot with the doubled line, leaving a large enough loop to pass the entire lure through. Step 3: Pass the chatterbait through the loop. Step 4: Wet the knot and pull both the standing line and tag end to cinch it tight. Step 5: Trim the tag end close.
Pros: Retains over 95% line strength. Easy to learn. Works with fluorocarbon, braid, and monofilament.
Cons: Passing the entire lure through the loop can be awkward with a bulky trailer attached. Uses more line than a clinch knot.
How to Tie a Chatterbait with the Improved Clinch Knot
The improved clinch knot is another excellent option, especially for fluorocarbon and monofilament users. Many anglers prefer it for speed and ease on the water.
Step 1: Thread the tag end through the chatterbait’s wire eyelet. Step 2: Wrap the tag end around the standing line 5 to 7 times. Step 3: Pass the tag end through the small loop formed near the eye. Step 4: Pass the tag end through the large loop you just created. Step 5: Wet the knot and pull the standing line to tighten. Step 6: Trim the tag end.
Pros: Fast to tie. Does not require passing the lure through a loop. Excellent knot strength on monofilament and fluorocarbon up to 20 pound test.
Cons: Can slip on braided line without modification. Slightly weaker than the Palomar on heavier lines. Not ideal for line over 25 pound test.
How to Tie a Chatterbait with a Loop Knot
A non slip loop knot creates a small, fixed loop at the lure connection. This loop lets the chatterbait swing freely, which increases the blade’s vibration and side to side action.
Step 1: Tie a simple overhand knot in the line about 6 inches from the end, but do not tighten it. Step 2: Pass the tag end through the chatterbait’s wire eyelet. Step 3: Pass the tag end back through the overhand knot, entering from the same side it exited. Step 4: Wrap the tag end around the standing line 4 to 5 times. Step 5: Pass the tag end back through the overhand knot. Step 6: Wet and cinch the knot tight. Trim the tag.
Pros: Maximizes lure action and blade movement. Great for clear water or finesse presentations. Gives the chatterbait a more natural swimming motion.
Cons: Slightly weaker than the Palomar in raw strength tests. Takes more practice to tie correctly. Not ideal for heavy cover situations where a tight connection is needed.
How to Tie a Chatterbait with the San Diego Jam Knot
The San Diego jam knot has gained popularity among chatterbait anglers, especially those who fish fluorocarbon line. Many pros consider it one of the strongest terminal knots available.
Step 1: Pass the line through the wire eyelet and run the tag end parallel to the main line. Step 2: Create a loop by folding the tag end back. Step 3: Wrap the tag end around both the standing line and the tag end 6 to 7 times, working away from the lure. Step 4: Pass the tag end through the loop near the eye. Step 5: Wet the knot and slowly pull the standing line to tighten. Step 6: Trim the tag end.
Pros: Extremely strong. Seats very well on fluorocarbon. Provides a secure, cinched connection to the lure.
Cons: Takes longer to tie than a Palomar or clinch knot. Requires practice to get the wraps even. Can be difficult with cold or wet hands.
Best Fishing Line Types for Chatterbaits
Your line choice changes how the chatterbait performs and which knots work best. Here is a breakdown of the three main options.
Fluorocarbon is the most popular choice for chatterbait fishing. It sinks, has low stretch for good sensitivity, and is nearly invisible underwater. Most anglers use 15 to 20 pound test fluorocarbon. The Palomar and San Diego jam knots work best with this line.
Braided line with a fluorocarbon leader is a great setup for long casts and heavy cover. Braid has zero stretch, which gives you excellent hooksets. Use a double uni knot or Alberto knot to connect braid to a 3 to 4 foot fluorocarbon leader, then tie the leader to the chatterbait with a Palomar.
Monofilament is the most forgiving option and works well for beginners. It has more stretch, which can help prevent pulled hooks. Any of the knots discussed in this guide work well with monofilament.
Should You Use a Snap or Swivel with a Chatterbait
This is a common question, and the short answer is no. You do not need a snap swivel or a clip when fishing a chatterbait.
A chatterbait does not spin during the retrieve, so there is no line twist to worry about. Adding a snap swivel creates an extra connection point that can fail. It also adds weight near the blade, which can dampen the vibration and reduce the lure’s action.
Tying directly to the wire eyelet gives you the best performance. You get maximum sensitivity, a cleaner presentation, and one less thing that can break under pressure. Some anglers use a small round snap (not a snap swivel) for quick lure changes during tournaments, but this is a matter of convenience, not necessity.
If you do use a snap, choose a small, round one that does not interfere with the blade’s movement. Avoid large, bulky snaps or swivels at all costs.
Common Mistakes When Tying a Chatterbait
Even experienced anglers make errors that cost them fish. Here are the biggest mistakes to watch for.
Tying to the wrong spot is the most frequent error. Some people tie their line to the jig head hook eye or even to the blade. Always tie to the wire line tie above the jig head and below the blade.
Not wetting the knot before cinching it causes heat friction that weakens the line. This is especially damaging with fluorocarbon, which is more brittle than monofilament. Always moisten the knot with saliva or water before pulling tight.
Leaving a long tag end can catch debris and interfere with the blade’s action. Trim your tag end to about 1/8 inch after tying.
Reusing a frayed line at the knot is another common problem. After catching several fish, retie your knot with fresh line. The constant vibration of a chatterbait wears line faster than most other lures.
How to Check Your Knot Before Casting
A quick knot check takes five seconds and can save you from losing your best fish. Make this a habit every time you tie on a chatterbait.
Pull test your knot by holding the lure in one hand and giving the line a firm tug with the other. Apply steady pressure and increase it gradually. If the knot slips or the line feels rough near the eye, cut it and retie.
Visually inspect the knot to make sure the wraps are neat and even. Overlapping wraps or crossed lines weaken the knot. The tag end should point away from the lure and be trimmed short.
Run your fingers along the first 12 inches of line above the knot. Feel for any nicks, abrasion, or rough spots. If you find any damage, cut above the bad section and retie. A fresh knot on clean line is always worth the extra minute.
Tips for Tying Chatterbaits in Cold or Windy Conditions
Bad weather makes knot tying harder, and chatterbaits are often best in early spring when conditions are tough. A few simple tricks help you tie better knots in difficult situations.
Use a line cutter or nail clippers on a retractable lanyard so you always have them within reach. Cold fingers make it hard to handle small tools. Keep your clippers attached to your vest or jacket.
Warm your hands before tying by putting them in your pockets or breathing on them. Cold fingers lose dexterity fast, which leads to sloppy wraps and weak knots.
Pre rig multiple rods at home before you head to the water. If you know you will be throwing chatterbaits, tie them on in a warm, dry environment where you can focus. This saves time and produces better knots.
If wind is a problem, turn your back to it and use your body as a shield. Hold the line close to your body to keep it from blowing around while you make your wraps.
How Often Should You Retie Your Chatterbait
Retying is not optional. It is essential maintenance that keeps you connected to fish. The vibration of a chatterbait puts constant stress on your knot and line.
Retie after every 3 to 5 fish. The repeated stress of hooksets, fights, and the lure’s constant chatter wears the line near the knot faster than you might expect. A fresh knot every few fish keeps your connection strong.
Retie immediately if you feel your lure hit a rock, stump, dock piling, or any hard structure. Impact damage can create micro abrasions in the line that are invisible to the eye but drastically reduce breaking strength.
Also retie after every line tangle or bird’s nest. Tangles create kinks and weak spots in the line. Even if you successfully clear the tangle, the damaged section needs to go.
Make retying a regular part of your routine. Experienced anglers check their line and retie consistently throughout the day. It is one of the simplest ways to land more fish.
Frequently Asked Questions
What is the best knot for tying a chatterbait to fluorocarbon line?
The Palomar knot and the San Diego jam knot are both excellent choices for fluorocarbon. The Palomar is easier to tie and retains over 95% line strength. The San Diego jam knot is slightly stronger in pull tests but takes more practice. Either one will give you a secure, reliable connection for chatterbait fishing.
Can I use a snap swivel with a chatterbait?
You can, but most anglers recommend tying directly to the wire eyelet. A snap swivel adds unnecessary weight and can reduce the blade’s vibration. The chatterbait does not spin, so a swivel serves no real purpose. If you want quick lure changes, use a small round snap without the swivel.
Where exactly do I tie my line on a chatterbait?
Tie your line to the wire eyelet located at the top of the frame, directly below the hex blade. This is the designated line tie on every chatterbait. Do not tie to the blade or the jig head hook eye.
Should I use a loop knot or a cinch knot for my chatterbait?
A cinch knot (like the Palomar or improved clinch) is best for heavy cover, stained water, and windy conditions where a tight connection gives you control. A loop knot is better for clear water and finesse situations where you want maximum lure action. Both work well, and many anglers carry rods rigged with each style.
How often should I retie my chatterbait?
Retie every 3 to 5 fish and after any contact with hard structure like rocks, stumps, or docks. The constant vibration of a chatterbait wears your line faster than many other lures. A fresh knot takes less than a minute and prevents break offs on big fish.
What pound test line should I use for chatterbait fishing?
Most anglers use 15 to 20 pound fluorocarbon for general chatterbait fishing. In heavy cover, 20 pound test gives you extra security. In open water with a spinning rod, 10 to 12 pound fluorocarbon or a braid to fluorocarbon leader setup works well. Match your line weight to the cover and conditions you are fishing.

Hi, I’m Ivy Webb, the passionate angler and creator behind BaitHookVault.com. I spend my days out on the water personally testing and reviewing a wide variety of fishing tools and gear.