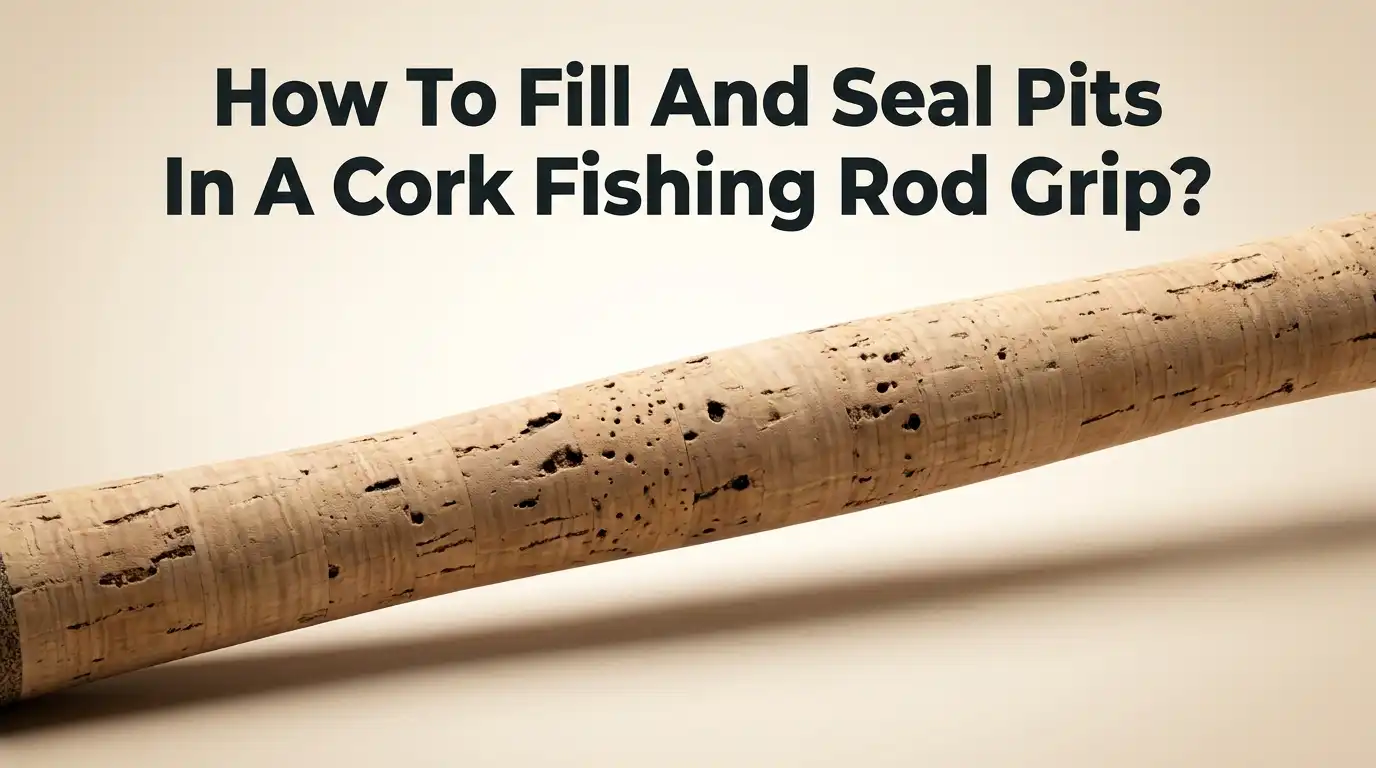
How To Fill And Seal Pits In A Cork Fishing Rod Grip?
Your favorite fishing rod feels like an old friend. But over time, that smooth cork grip starts to show its age. Tiny holes appear. Small chips break away.
Rough pits form under your fingers. This is normal, and it happens to almost every cork handle out there. The good news is you can fix it yourself at home.
Cork is soft, light, and comfortable, which is why anglers love it. But those same traits make it easy to damage. Water, sweat, sunscreen, and daily use all wear it down. Left alone, small pits turn into big cracks. Then the whole grip starts to crumble.
Key Takeaways
- Cork pits are fixable at home. You do not need a professional or expensive tools. A wine cork, some sandpaper, and wood glue can do most of the job.
- The best filler matches your cork. Sand a spare cork into fine dust, then mix that dust with glue or epoxy. This gives a color and texture that blends right in.
- Cleaning comes first, always. Dirt and oil stop filler from sticking. Wash the grip with mild soap and let it dry fully before you start any repair.
- Sealing protects your hard work. After you fill and sand, a good cork sealer keeps water, dirt, and sweat out. This makes the fix last for years.
- Patience pays off. Filler shrinks as it dries, so you may need two or three passes. Rushing the cure time is the most common mistake people make.
- Prevention beats repair. Simple habits like drying your rod and sealing the cork once a year stop most pits before they start.
Why Cork Grips Develop Pits Over Time
Cork looks solid, but it is full of tiny air pockets. This structure makes it light and grippy. It also makes it weak in certain spots. Every time you squeeze the handle, you push on those soft pockets. Over months and years, the weak spots give way and form pits.
Water is the biggest enemy of cork. Repeated soaking and drying loosens the natural bond inside the material. The cork swells, then shrinks, then cracks. Sunscreen and bug spray speed this up because their oils break down the surface.
Lower grade cork often ships with small voids already inside it. These hidden gaps open up as you fish. Knowing why pits form helps you prevent them later. For now, the important part is that damage is normal and fully repairable.
Signs Your Cork Grip Needs Repair
Look closely at your grip in good light. Small round holes where your fingers rest are the first sign. These are called finger pits, and they form from steady pressure. You may also spot long thin cracks running along the handle.
Run your thumb over the surface. Soft or crumbly spots mean the cork is breaking down underneath. Squeeze the grip the way you do when casting. If you feel gaps or a spongy feel, there are voids hiding inside.
Dark stains and a chalky feel are other clues. Chalky cork has lost its natural oils and its seal. Catching these signs early saves you a bigger job later. A grip with dozens of deep pits still repairs well, but small fixes are faster and cleaner.
Tools And Materials You Will Need
Gather your supplies before you start. This keeps the job smooth and stops you from running around mid repair. Most of these items are cheap and easy to find at home or a hardware store.
You will need a clean wine cork or spare cork for making dust. Grab sandpaper in a few grits, around 120, 220, and 400. A small sharp tool like a toothpick, dental pick, or hobby knife helps clean and pack the pits.
For filler, pick wood glue, carpenter’s wood filler, or a two part epoxy. Cork dust from your spare cork ties it all together. You also want mild dish soap, a damp cloth, and a cork sealer for the final step. A small mixing cup and a brush round out the kit.
Step One: Clean The Cork Grip First
Never skip cleaning. Filler will not stick to dirt, oil, or old sunscreen. A clean surface is the base of a strong repair. Start by wetting the grip with a damp cloth or sponge.
Put a small drop of mild dish soap right on the cork. Scrub gently with a damp sponge or a soft brush. Use light and even pressure so you do not tear the soft spots. A pencil eraser works well for stubborn grime in the pits.
Rinse the cork with clean water and wipe away all soap. Do not soak the grip, since too much water harms cork. Now let it dry fully. This can take several hours or overnight. Filling damp cork traps moisture inside and ruins the fix.
Pros: Clean cork bonds better and the color matches truer. Cons: It adds drying time, so you cannot repair the same hour you clean.
Step Two: Make Your Own Cork Dust Filler
The best filler looks like the cork itself. You make this by sanding cork into fine dust. Take a clean, dry wine cork and rub it with 220 grit sandpaper over a clean sheet of paper. Collect about half a teaspoon of dust.
You can also use dust from lightly sanding your own grip. This gives the closest color match since it is the exact same cork. Just sand a tiny bit, since you only need a small pile.
The finer the dust, the smoother your patch will look. Coarse dust leaves a rough, grainy finish. Store the dust in a small cup until you are ready to mix. This homemade filler beats store paste because it blends into your grip almost invisibly.
Step Three: Mix The Filler Paste
Now you turn dust into filler. Pour your cork dust into a small cup. Add your chosen adhesive a little at a time. The goal is a thick paste that holds together like cookie dough.
Wood glue is the easiest choice for beginners. Mix it with cork dust until it forms a soft, packable ball. Carpenter’s wood filler works straight from the tub, and you can stir in dust for a better color. Two part epoxy needs a 50/50 mix, then you fold in the dust.
Some people add a splash of acetone to wood filler to loosen it. Only do this in a ventilated space. Mix a small batch at a time, since epoxy and glue start to set fast. Test the color on a scrap before you apply it to the grip.
Pros of wood glue: cheap, easy, cleans up with water. Cons: it shrinks more and needs longer to dry.
Step Four: Prep And Clean The Pits
Before you pack filler, prep each pit. Use your sharp tool to scrape out any loose or crumbly cork inside the hole. You want clean, firm edges so the filler grabs on tight. Loose bits stop the patch from bonding.
Blow out the dust or wipe it away with a dry brush. A clean pit gives the filler room to sink in and lock. If the pit is very shallow, you can widen it slightly to hold more filler.
Do this for every pit you plan to fix. Take your time and check each one under good light. Prepping now saves you from patches that pop out later. A well cleaned pit is the difference between a repair that lasts one trip and one that lasts years. This small step makes the whole job stronger.
Step Five: Pack The Filler Into The Pits
This is the main event. Take a small amount of filler on your pick or toothpick. Do not glob it on top of the cork. Instead, push it down into the pit and press firmly.
Pack it tight so it fills the porous channels inside the cork. Keep adding small amounts until a tiny hump rises above the surface. This hump gives you material to sand flat later. A brush works well if you chose thin wood glue.
Filler shrinks as it dries, so build it up a little proud of the surface. Wipe away any smears on the surrounding cork right away with a damp cloth. Dried smears are hard to remove and blur your grain.
Work one pit at a time for the best control. Rushing here leads to messy, uneven patches that stand out.
Step Six: Let The Filler Cure Fully
Patience matters more than anything now. Rushing the cure is the top mistake people make. Set the rod down in a dry, dust free spot and leave it alone.
Cure time depends on your filler. Two part epoxy sets in about 40 minutes. Wood filler dries in 15 minutes for shallow pits, but deep ones need 2 to 8 hours. Wood glue does best left overnight.
Deep pits often need a second pass. As the filler shrinks, a small dip appears. Just add more paste, then let it cure again. Repeat until the patch stays level.
Touching or sanding too soon smears soft filler and ruins the shape. Give it the full time listed on your product. A patch that cures hard will sand clean and hold up on the water for a long time.
Step Seven: Sand The Repair Smooth
Once the filler is hard, it is time to sand. Start with 220 grit sandpaper. Sand only the raised humps, not the whole grip. You want the patch level with the cork around it.
Use light strokes and check often. Removing too much cork leaves a dip and shows the repair. Go slow, since you can always sand more but never add cork back.
Finish with a finer grit like 400 for a smooth feel. Rub in the direction that follows the grip’s shape. Wipe away all dust with a damp cloth when you are done. Then let the grip dry again.
Now step back and check your work. A good sanding job makes the patch nearly invisible.
Pros of careful sanding: a smooth, natural feel and hidden repairs. Cons: over sanding thins the grip and exposes fresh pits.
Step Eight: Seal The Cork To Protect It
Sealing is the step many people skip, and it is a mistake. A good seal keeps water, dirt, and sweat out of your fresh repair. This is what makes the fix last for years instead of months.
Cork sealer soaks into the surface and hardens it. Products like a urethane cork sealer or a gunstock finish work well. Apply a thin, even coat with a clean cloth or brush.
Most sealers need just one coat. Wipe off any extra so it does not get sticky. Let it dry fully before you fish. Some anglers prefer to leave cork bare and let natural oils from their hands seal it.
Pros of sealing: blocks water, stops chalking, extends grip life. Cons: it slightly changes the raw cork feel some anglers love. Test a small area first if you are unsure.
Comparing The Best Filler Methods
Different fillers suit different needs. Wood glue mixed with cork dust is the classic budget choice. It cleans up with water and blends well. The downside is more shrinkage and longer drying time, so plan for extra passes.
Carpenter’s wood filler is fast and simple. You can use it right from the tub, and oak colored versions match most cork. It sands easily too. On the negative side, its color match is not always perfect without added cork dust.
Two part epoxy with cork dust is the toughest fix. It cures hard, flexes a little, and resists water best. The trade offs are a faster working time and a messier mix. For grips you fish hard and often, epoxy is worth the effort. For quick touch ups, wood glue or filler wins on ease. Match the method to how much you use the rod.
How To Prevent Future Pits In Your Cork
Repair is good, but prevention is better. A few simple habits keep your grip smooth for years. Rinse your rod with fresh water after each trip, then dry it well. Salt and grime wear cork down fast.
Store your rods out of direct sun and heat. Sunlight dries cork and cracks the surface. Avoid getting sunscreen and bug spray on the grip, since their oils break the cork down.
Seal your cork once a year to refresh its protection. A quick coat of sealer blocks water and dirt before they cause damage. Wipe the grip clean now and then with a damp cloth and mild soap.
Grip your rod with a relaxed hand when you can. Constant hard squeezing carves finger pits over time. These small steps cost almost nothing and save you the bigger repair job down the road.
Common Mistakes To Avoid During Repair
A few simple errors can ruin a good repair. The biggest one is skipping the cleaning step. Filler will not bond to dirty or oily cork, so the patch pops right out. Always clean and dry first.
Rushing the cure time is another common slip. Sanding soft filler smears it and wrecks the shape. Wait the full time your product needs, even if it feels slow.
Over sanding causes trouble too. Grinding away good cork leaves dips and fresh weak spots. Sand only the raised patch and stop often to check. Using too much filler at once is also messy, since big globs crack and fall out.
Finally, do not soak the cork in water while cleaning. Too much moisture swells the cork and causes more cracks. Use a damp cloth, not a soaking one. Avoiding these mistakes gives you a clean, lasting fix.
Frequently Asked Questions
Can I use regular wood filler on a cork grip?
Yes, carpenter’s wood filler works well on cork. Oak colored filler matches most grips nicely. For an even better blend, stir in some fine cork dust before you apply it. It sands smooth and cleans up with water.
How long does a cork grip repair last?
A good repair lasts several years with proper care. Sealing the cork after the fix makes the biggest difference. If you rinse, dry, and reseal your rod each season, the patch holds up through many fishing trips.
Will the filled pits be noticeable?
Not if you use cork dust in your filler. The matching color and texture blend the patch into the grip. Careful sanding hides it further. Most repairs become nearly invisible once you seal the cork and let it dry.
Do I really need to seal the cork after repair?
Sealing is not required, but it is strongly recommended. A seal keeps water and dirt out of your fresh repair. This helps the fix last far longer. Some anglers skip it and let hand oils protect the cork instead, which also works over time.
What is the best filler for deep pits?
Two part epoxy mixed with cork dust is the strongest choice for deep pits. It cures hard and resists water. Fill deep pits in layers, letting each layer cure before adding more. This stops shrinking and gives a solid, level patch.
Can I fish right after sealing the cork?
No, let the sealer dry fully first. Most cork sealers need a few hours to cure hard. Fishing too soon leaves the surface tacky and can smear the finish. Check your product’s dry time and wait a little longer to be safe.

Hi, I’m Ivy Webb, the passionate angler and creator behind BaitHookVault.com. I spend my days out on the water personally testing and reviewing a wide variety of fishing tools and gear.