How to Fix a Broken LCD Screen on Your GPS Fish Finder?
A cracked or malfunctioning LCD screen on your handheld GPS fish finder can ruin a great day on the water. You rely on that small display to read sonar data, track waypoints, and locate fish.
When the screen goes blank, shows dead pixels, or displays cracks, the entire unit feels useless. But here is the good news: you may not need to throw it away or spend a fortune on a brand new device.
This guide walks you through every practical option for fixing your broken fish finder screen. We cover simple troubleshooting steps, DIY repair methods, professional repair routes, and warranty options.
In a Nutshell
- Identify the problem first. Not every screen issue requires a full LCD replacement. Some problems like a white screen, flickering display, or frozen image can result from loose ribbon cables, corroded connections, or firmware glitches. A quick diagnosis can save you time and money.
- DIY LCD replacement is possible but risky. You can order a replacement LCD panel for many popular fish finder models online. The process involves careful disassembly, cable disconnection, and reassembly. However, one wrong move can damage the main board or void your warranty permanently.
- Professional repair services exist. Several third party repair shops specialize in marine electronics. They can replace screens, fix water damage, and restore your unit. Expect to pay between $50 and $200 for labor depending on the model and severity of damage.
- Check your warranty before doing anything. Garmin offers a 1 to 3 year warranty on marine products. Humminbird provides coverage based on proof of purchase. Lowrance has similar terms. Physical damage like cracked screens may or may not be covered, so contact the manufacturer directly before opening the device.
- Prevention matters more than repair. Screen protectors, sun covers, and protective cases cost very little. They can prevent the next crack or UV damage that leads to delamination. Investing a few dollars now saves hundreds later.
- Sometimes replacement is the smarter choice. If the repair cost exceeds 60% to 70% of a new unit’s price, buying a replacement often makes more financial sense. Older models with discontinued parts fall into this category.
Identify the Type of Screen Damage
The first step is to figure out what exactly is wrong with your fish finder screen. A cracked screen looks different from a display that shows only white. Dead pixels appear as small dark or bright spots that do not change. A delaminated screen often shows bubbling, discoloration, or rainbow effects under the glass.
Each type of damage points to a different fix. Cracks and physical breaks almost always require a full LCD panel replacement. White screens or blank displays can sometimes result from loose internal connections or power issues. Knowing the difference helps you avoid unnecessary repairs or spending money on parts you do not need.
Take a flashlight and shine it at different angles on the screen. Power the unit on and off several times. Press all buttons to check if the device responds even though the display seems dead. Write down exactly what you observe before moving forward.
Gather the Right Tools for the Job
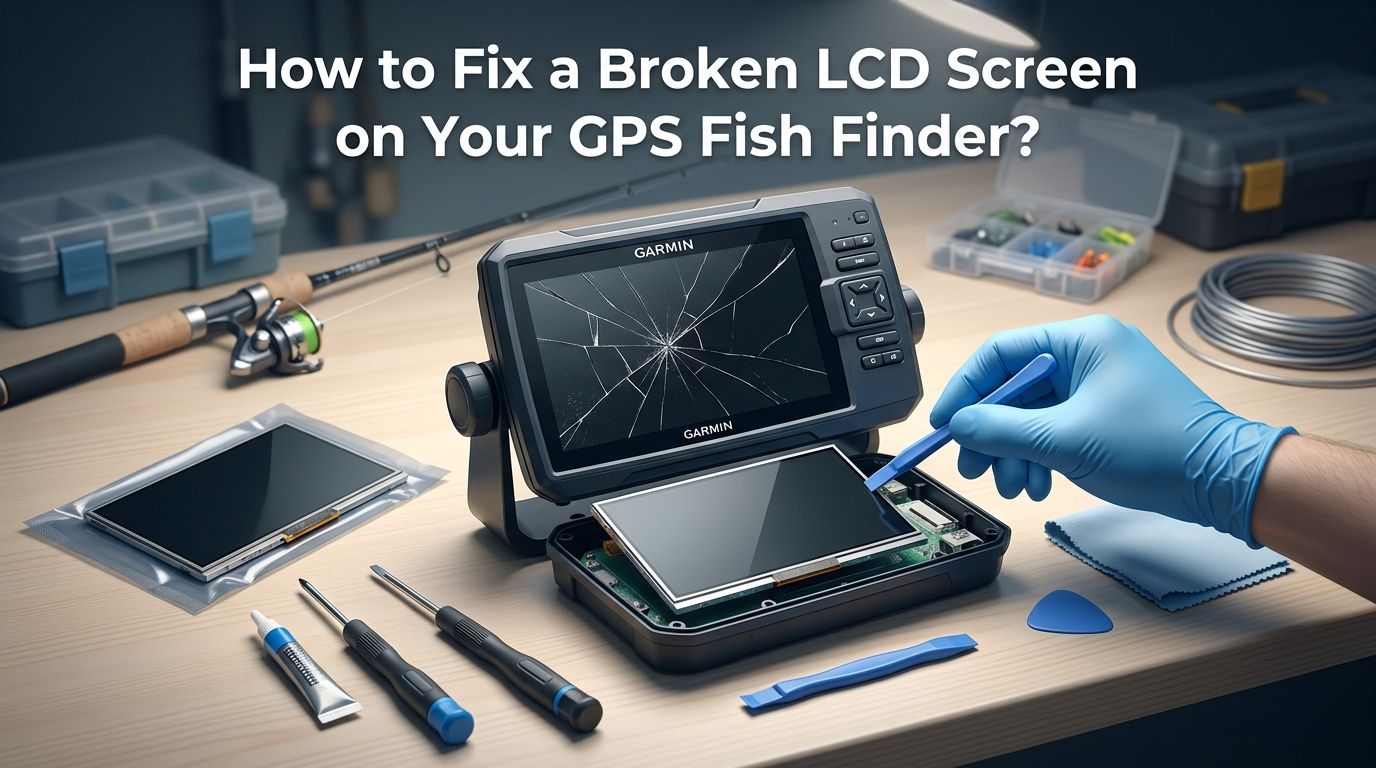
Before you open any electronic device, you need the correct tools. For most handheld GPS fish finders, you will need a set of small Phillips head screwdrivers, a plastic spudger or pry tool, a pair of fine tip tweezers, and a clean microfiber cloth. A heat gun or hair dryer can help soften adhesive around the screen bezel.
You should also have isopropyl alcohol (90% or higher) for cleaning contact points and removing old adhesive residue. An anti static wrist strap is a smart addition because it prevents static discharge from damaging sensitive electronic components on the circuit board.
Set up your workspace on a clean, flat, well lit surface. Use a small container or magnetic tray to hold tiny screws. Losing even one screw can make reassembly impossible. Having everything ready before you start will make the entire process smoother and less stressful.
Back Up Your Data and Settings
Many handheld GPS fish finders store waypoints, routes, and custom sonar settings in internal memory. Before you disassemble anything, try to back up this data. Some units allow you to export waypoints to a microSD card through the settings menu.
Garmin units often support data transfer through Garmin Express software on a computer. Humminbird models may let you save screenshots and waypoint files to a memory card. If your screen is completely dead, you might not be able to access the menus. In that case, note your model number and check if the manufacturer can recover data during a warranty repair.
Skipping this step means you could lose years of saved fishing spots and custom settings. It takes only a few minutes but can save significant frustration later. Always back up before you begin any physical repair work.
Try Basic Troubleshooting First
Sometimes the fix is simpler than you think. A screen that appears dead might just need a hard reset. Hold the power button for 15 to 20 seconds to force a restart. Some models have a specific button combination for a factory reset. Check your owner’s manual for instructions.
Inspect the power cable and battery connections. Corroded or loose power connections can cause the screen to go white, flicker, or shut off randomly. Clean the contacts with isopropyl alcohol and a cotton swab. Make sure the battery is fully charged if your unit uses a rechargeable one.
Update the firmware if possible. Manufacturers release software updates that fix display bugs and improve performance. Connect the unit to a computer and visit the manufacturer’s support page. A firmware update has resolved screen freezing and display glitches for many users.
Pros: Costs nothing, takes minutes, and solves software related display problems.
Cons: Will not fix physical cracks, dead LCD panels, or hardware failures.
Open the Device Carefully
If troubleshooting fails, you may need to open the fish finder. Start by removing all screws from the back panel. Most handheld units have four to six small Phillips head screws. Some models also use clips around the housing edges that require gentle prying with a plastic spudger.
Work slowly around the seam between the front and back housing. Do not use metal tools to pry the case apart because metal can scratch the housing or damage internal clips. Apply even pressure and listen for the gentle click of clips releasing.
Once the back cover is off, you will see the main circuit board, battery (if internal), and ribbon cables connecting the LCD to the board. Take a photo with your phone before disconnecting anything. This photo serves as your reference during reassembly and helps you remember the exact placement of every cable and component.
Inspect Internal Connections and Ribbon Cables
A surprising number of “broken screen” cases are actually loose or corroded ribbon cable connections. The ribbon cable is a thin, flat cable that connects the LCD panel to the main circuit board. Vibrations from boat engines, drops, and temperature changes can loosen these connections over time.
Gently press the ribbon cable connector back into its socket. If you see a small locking tab on the connector, flip it up carefully, reseat the cable, and then press the tab back down. Look closely for green or white corrosion on the pins. Clean any corrosion with isopropyl alcohol and a soft brush.
Power the unit on after reseating the cables to see if the display works. Many users on fishing forums have reported fixing white screen problems and dead displays simply by cleaning and reconnecting the ribbon cable.
Pros: Free fix, easy to do, and solves many display problems caused by poor connections.
Cons: Requires opening the device which may void your warranty.
Replace the LCD Panel Yourself
If the LCD panel is physically cracked or completely dead, you will need a replacement screen. Search for your specific model number followed by “LCD replacement” to find compatible panels. Many suppliers carry screens for popular models like the Garmin Striker 4, Humminbird Helix 5, and Lowrance Hook series.
Disconnect the old LCD ribbon cable from the main board. Remove any screws or adhesive holding the panel in place. Carefully lift the broken panel out without bending it, as broken glass can cut your fingers. Place the new panel in position, connect the ribbon cable, and secure the panel with screws or fresh adhesive.
Reassemble the housing, replace all screws, and power on the unit to test the new screen. Check for even backlighting, proper touch response (if applicable), and clear image quality across the entire display.
Pros: Costs $20 to $80 for most panels, lets you keep your existing unit and data.
Cons: Risk of damaging the main board, may void warranty, requires patience and steady hands.
Use a Professional Repair Service
Not everyone is comfortable opening electronics. Professional marine electronics repair shops can handle LCD replacements, water damage restoration, and circuit board repairs. Some shops specialize exclusively in fish finder and chartplotter repairs.
Search for “marine electronics repair” in your area or look for mail in services online. Several well known repair shops accept units from across the country. Expect to pay between $75 and $250 for a screen replacement depending on the model and screen size. Turnaround time typically ranges from one to three weeks.
Contact the shop before sending your unit. Ask about their experience with your specific brand and model. Request a quote and inquire about their warranty on repair work. A reputable shop will guarantee their repairs for at least 30 to 90 days.
Pros: Lower risk of further damage, professional quality work, and often includes a repair guarantee.
Cons: Higher cost than DIY, requires shipping time, and you lose access to your unit during repair.
Check Your Warranty Options
Before spending money on repairs, contact the manufacturer directly. Garmin provides a 1 to 3 year warranty on its marine devices depending on the product line. Humminbird offers warranty support with proof of purchase. Lowrance provides similar coverage through its Navico dealer network.
Physical damage from drops or impacts is often excluded from standard warranty coverage. However, screen defects caused by manufacturing issues, delamination from UV exposure, or spontaneous display failures may qualify for a free replacement or discounted repair.
Call the manufacturer’s customer support line with your serial number and purchase receipt ready. Describe the problem in detail. Some companies offer flat rate repair programs where you pay a fixed fee and receive a refurbished or new replacement unit. This option can be more cost effective than a third party repair.
Decide Between Repair and Replacement
Sometimes fixing an old unit does not make financial sense. Compare the total repair cost against the price of a new equivalent model. If you own an older handheld fish finder and the screen replacement plus labor exceeds $150, a new entry level unit with better features might cost just $50 to $100 more.
Consider the age of your device and whether replacement parts are still available. Discontinued models often have scarce or overpriced screens. Newer units offer improved displays, better GPS accuracy, sharper sonar imaging, and longer battery life.
However, if your unit is a high end model with premium features, repairing it almost always makes sense. A $500 or $800 fish finder with a $60 screen replacement is a clear win. Evaluate your specific situation and make the choice that gives you the best value for your money.
Prevent Future Screen Damage
Once you fix or replace your screen, protect it from future damage. Apply a screen protector film designed for marine electronics. These films guard against scratches, minor impacts, and UV damage from direct sunlight. They cost just a few dollars and take seconds to apply.
Use a sun cover or protective cap whenever the fish finder is not in use. Prolonged UV exposure causes screen delamination, a condition where the LCD layers separate and create bubbles or discoloration. Sun covers block harmful rays and extend screen life by years.
Store your handheld fish finder in a padded carrying case during transport. Most screen cracks happen during travel when the device bounces around in a tackle box or boat compartment. A $10 case can prevent a $100 repair. Also avoid placing heavy items on top of the unit and keep it away from extreme heat inside a closed vehicle.
Understand Common LCD Problems and Their Causes
Knowing why screens fail helps you avoid repeat issues. Ribbon cable corrosion is one of the most common causes of display failure in marine electronics. Moisture enters the device through worn gaskets or cracked housings and attacks the delicate connection points.
UV damage and heat exposure cause delamination over time. The adhesive between the LCD layers breaks down under constant sunlight, causing the screen to bubble, darken, or show rainbow patterns. This problem is especially common on boats without covered console areas.
Physical impacts from drops, tackle, and rod tips cause cracks and shattered glass. Even a small crack can let moisture into the display assembly and cause further damage. Low voltage from weak batteries can also cause flickering or dim screens. Always use a fully charged battery and check your power connections regularly to prevent voltage related display issues.
Know When to Ask for Help
If you are unsure about any step in the repair process, stop and seek help. Marine electronics forums have active communities where experienced users share repair advice. Platforms like The Hull Truth, Bass Boat Central, and Reddit’s kayak fishing community offer model specific repair tips.
Watch video teardown guides for your exact model before attempting a repair. Several YouTube channels focus on fish finder repairs and show every step in detail. Seeing the internal layout of your specific unit builds confidence and reduces the chance of mistakes.
You can also contact local electronics repair shops that handle small device repairs. Even shops that primarily fix phones and tablets often have the skills to replace an LCD panel in a fish finder. Ask if they have experience with marine or GPS electronics before handing over your unit.
Frequently Asked Questions
Can I fix a cracked fish finder screen myself?
Yes, you can replace a cracked LCD screen yourself if you have basic electronics repair skills and the right tools. You need a compatible replacement panel, small screwdrivers, a plastic pry tool, and patience. The process involves opening the housing, disconnecting the old screen, and connecting the new one. However, this will likely void your warranty, so check your coverage first.
How much does it cost to repair a fish finder screen?
DIY screen replacement typically costs $20 to $80 for the LCD panel alone. Professional repair services charge $75 to $250 depending on the model and screen size. Manufacturer repair programs may offer flat rate pricing that includes parts and labor. Always compare the repair cost against the price of a new unit.
Why did my fish finder screen turn white?
A white screen often indicates a loose or corroded ribbon cable connection between the LCD and the main circuit board. It can also result from a firmware glitch or a low voltage power supply issue. Try a hard reset first. If that fails, opening the unit and reseating the ribbon cable often solves the problem.
Does Garmin repair cracked fish finder screens?
Garmin generally does not repair physical screen damage under standard warranty. However, they may offer a discounted replacement unit through their out of warranty exchange program. Contact Garmin customer support with your serial number for specific options available for your model.
How do I protect my fish finder screen from future damage?
Use a screen protector film to guard against scratches and UV exposure. Apply a sun cover when the unit is not in use. Store the device in a padded case during transport. Avoid placing heavy objects on the screen and keep the unit out of extreme heat. These simple steps can prevent most common screen damage.
Can a phone repair shop fix my fish finder screen?
Some phone and tablet repair shops have the skills to replace an LCD panel in a fish finder. The process is similar to replacing a smartphone screen. Ask the shop if they have experience with small electronic devices and whether they can source the correct replacement panel for your model.

Hi, I’m Ivy Webb, the passionate angler and creator behind BaitHookVault.com. I spend my days out on the water personally testing and reviewing a wide variety of fishing tools and gear.