Why Is My Level Wind Mechanism Jamming on Retrieve and How to Clear It?
You are mid retrieve. Your line starts bunching to one side of the spool. The level wind guide refuses to move. That annoying jam just cost you a fish and possibly some line. Sound familiar? A stuck level wind is one of the most frustrating problems baitcaster owners face, and it happens more often than you think.
The good news is that most level wind jams are easy to fix at home. The root cause almost always traces back to dirt buildup, a worn pawl, or improper lubrication.
You do not need expensive tools or professional help for the majority of these repairs. You need a basic understanding of how the mechanism works and a willingness to open up your reel.
In a Nutshell
- Dirt and grime on the worm shaft cover cause about 80% of all level wind failures. Oil on the mechanism attracts dust, sand, vegetation, and other debris that your fishing line carries in water droplets. This residue builds up into a sticky film that drags the line guide and stops it from moving freely.
- A worn or damaged pawl is the second most common cause. The pawl is the small pin at the bottom of the line guide that rides inside the grooves of the worm shaft. Over time, this part wears down or chips. A damaged pawl catches on the worm shaft grooves and creates that frustrating sticking or jamming sensation.
- Improper lubrication accounts for many avoidable failures. Both too much oil and too little oil create problems. Excess oil traps more grit. Dry components generate friction that accelerates wear on the pawl and worm gear teeth.
- Forcing the reel handle when the level wind is stuck causes secondary damage. Continuing to crank puts stress on the worm shaft and can chip the gear teeth. Always stop reeling the moment you notice the guide has stopped moving.
- Regular cleaning after each fishing session dramatically extends the life of your level wind system. A toothbrush and cotton swab are all you need. Five minutes of post trip care can save you hours of repair time and parts replacement costs later.
- Most level wind repairs require only basic tools and replacement parts. A small screwdriver, needle nose pliers, reel oil, and a clean cloth will handle the vast majority of fixes at home.
How the Level Wind Mechanism Actually Works
The level wind system is the small guide that moves your fishing line back and forth across the spool during retrieval. It distributes line evenly so you avoid tangles and pile ups on one side of the spool.
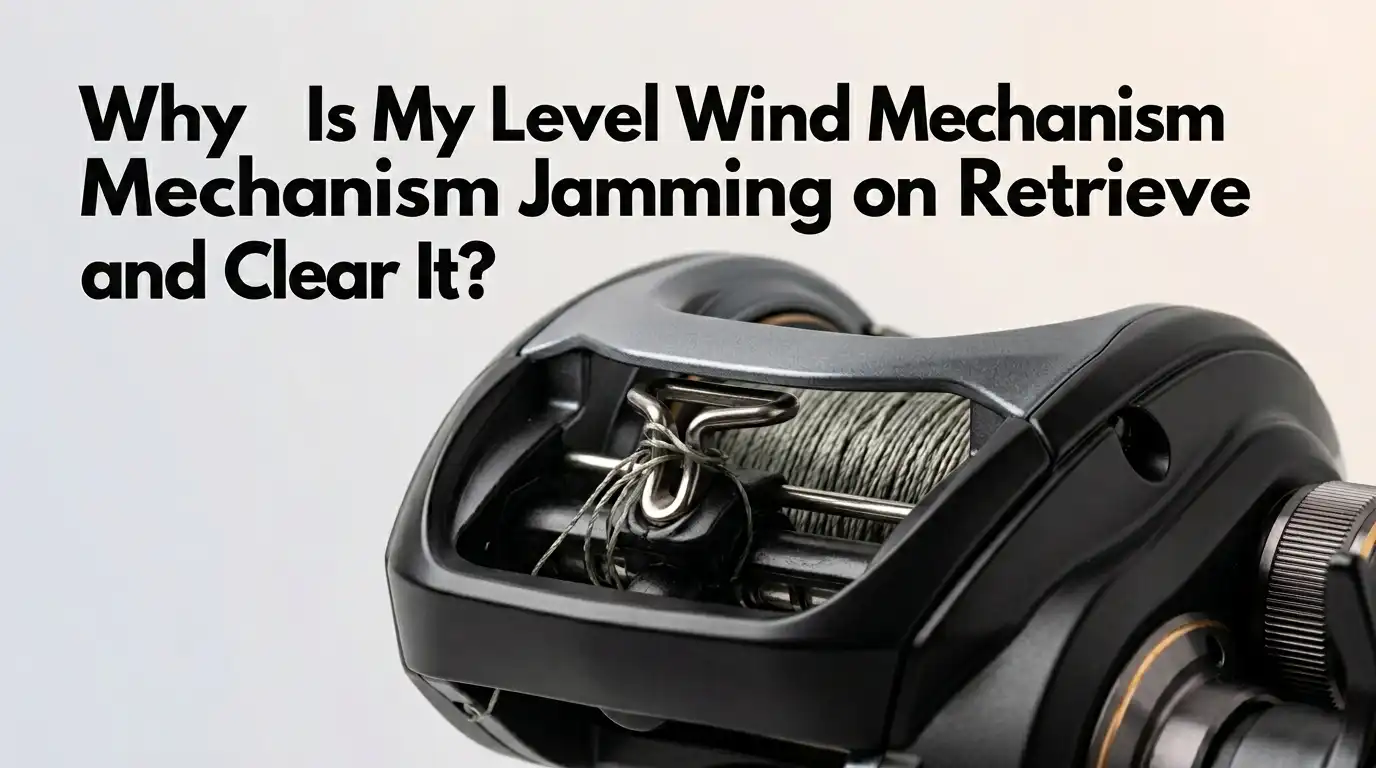
The core of this system is the worm shaft, a metal rod with spiral grooves cut into it. When you turn the reel handle, gears spin this shaft. A small pin called the pawl sits inside the worm shaft grooves. As the shaft rotates, the pawl follows the grooves and moves the line guide left and right across the reel.
A worm shaft cover sits on top of the shaft to protect it. The line guide glides over this cover on a thin film of oil. The tolerances between the guide and cover are extremely tight. Even a small amount of debris can cause friction, drag, or a complete jam.
This entire system relies on smooth interaction between clean, lubricated parts. Any breakdown in one component affects the whole chain.
Dirt and Grime Buildup on the Worm Shaft
Dirt accumulation is the number one cause of level wind jams. It accounts for roughly 80% of all failures according to experienced reel technicians. The problem starts small and grows over time.
Every cast brings water droplets back along your line. Those droplets carry sand, silt, vegetation particles, and microscopic debris. The oil on your worm shaft cover attracts and holds this material. After several fishing trips, a thin film of grime coats the cover and frame area.
This grime creates drag between the line guide and the cover surface. The guide slows down, hesitates, and eventually sticks at one end of its travel path. You might barely notice it at first. The hesitation is slight. But it gets progressively worse until the guide locks in place entirely.
Pros of cleaning as a fix: It is free, fast, requires no parts, and solves the problem most of the time.
Cons of cleaning as a fix: If you waited too long and the pawl is already damaged from dragging, cleaning alone will not be enough.
How a Worn or Broken Pawl Causes Jamming
The pawl is a tiny but critical part. It is the small pin or tooth that rides inside the spiral grooves of the worm shaft. Over time, this piece wears down from constant contact with the metal grooves.
A worn pawl does not engage the grooves properly. It can skip, catch, or stick at the transition points where the worm shaft groove reverses direction. These transition points are at each end of the shaft. That explains why most jams happen on one specific side of the reel.
A broken pawl is more obvious. The line guide simply stops moving entirely because nothing connects it to the worm shaft grooves. You will notice line piling up on one side of the spool immediately.
Pawls are considered a high wear item on all brands of baitcasting reels. Experienced technicians say it is the most commonly replaced part across every manufacturer.
Pros of pawl replacement: Inexpensive part, easy to install, solves the problem permanently.
Cons of pawl replacement: Requires ordering the correct part for your specific reel model, and you may need to replace the worm shaft too if it has sustained damage.
Worm Shaft Damage and Stripped Gear Teeth
Sometimes the worm shaft itself is the problem. The spiral grooves can develop chipped teeth at the tips where the direction changes. These chips create rough spots that catch the pawl and stop the guide.
You can also find grooves cut into the worm shaft where the pawl has jumped track. This type of damage means the pawl was already worn and has been scraping outside its intended path. Both the worm shaft and pawl need replacement in this situation.
Stripped idler gears or spool gears that drive the worm shaft rotation will also stop the level wind. If you turn the handle and the worm shaft does not rotate at all, a gear in the drive train has lost teeth or broken.
Inspect the worm shaft teeth with a magnifying glass. You need to see the very tips of each groove. Damage at this scale is hard to spot with the naked eye. Any chipping, rounding, or scoring means the shaft should be replaced.
Pros of worm shaft replacement: Restores the system to factory condition.
Cons of worm shaft replacement: Slightly more involved repair, and you should replace the idler gear at the same time since both parts wear together.
Incorrect Screw Placement After Servicing
This problem catches many anglers off guard. After cleaning or servicing a reel, you might accidentally put the wrong screw in the wrong hole on the gear side plate. This is a surprisingly common mistake.
Many baitcasting reels have screws of different lengths securing the side plate. One shorter screw belongs in a specific position, usually the hole at the top of the reel near the thumb bar. If you place a longer screw in that hole, it passes through the frame and physically blocks the line guide path.
The result looks identical to other jams. The level wind moves partway across and then stops dead. You might assume the worm gear or pawl is damaged when the real culprit is a screw tip protruding into the guide channel.
Always note the exact position of each screw before you remove them during disassembly. Lay them out in order or mark their positions. This five second habit eliminates a frustrating troubleshooting dead end.
Step by Step Guide to Cleaning the Level Wind System
Start by removing the reel from your rod. Make sure there is no line tension. Have a clean cloth, cotton swabs, a soft toothbrush, and reel specific oil ready.
Step 1: Remove the side plate opposite the handle by unscrewing the fasteners. On some reels, you loosen the cast control cap first. Take note of every part position as you go.
Step 2: Use the toothbrush to scrub the worm shaft cover and the frame area surrounding it. Remove all visible grime and residue. A cotton swab works well for tight spots.
Step 3: Clean the worm shaft grooves with a cotton swab dampened with a mild reel safe cleaner. Remove all old lubricant and debris from the grooves.
Step 4: Clean the pawl and the line guide body. Look for visible wear or damage on the pawl while it is accessible.
Step 5: Apply one small drop of reel oil to the worm shaft cover. Crank the handle a few times to spread the oil. If you see a dry spot, dab it with an oiled swab. Place one drop on the worm shaft itself and crank again.
Step 6: Reassemble the reel carefully. Test by turning the handle and watching the line guide travel its full path smoothly.
How to Replace a Damaged Pawl
Replacing the pawl is straightforward on most baitcasters. The procedure varies slightly by brand, but the general process applies broadly.
Remove the side plate and locate the pawl at the bottom of the line guide body. On many models, a small pawl cap secures it. Use a flat head screwdriver to unscrew this cap. The pawl lifts right out.
Examine the old pawl carefully. Compare it to the new replacement to confirm you have the right part. The new pawl must be an exact match for your reel model. Using the wrong size causes immediate failure or accelerated wear on the worm shaft.
Place the new pawl into the line guide body. Wiggle it slightly to ensure it seats correctly. The tooth of the pawl should engage with the worm shaft grooves. Turn the shaft by hand to confirm the guide moves smoothly in both directions.
Replace the pawl cap, tighten it gently, and reassemble the side plate. Test the reel by cranking the handle and watching for smooth, full travel of the line guide.
When to Replace the Entire Worm Shaft Assembly
A complete worm shaft replacement is necessary when you find chipped groove tips, scored tracks, or visible wear grooves on the shaft surface. Cleaning and a new pawl will not solve the problem if the shaft itself is compromised.
Remove the retaining spring clip that holds the worm shaft in place. Slide the old shaft out. Clean the cavity and mounting area before installing the new shaft. Slide the new shaft in, replace the spring clip, and install a new pawl at the same time.
Experienced reel technicians also recommend replacing the idler gear during this repair. The idler gear mates with the spool gear and drives the worm shaft. These parts wear together, and old idler gear teeth may damage a fresh worm shaft prematurely.
Pros of full assembly replacement: Long lasting fix, restores full functionality, prevents repeated failures.
Cons of full assembly replacement: Higher parts cost, requires more careful disassembly, and you must source model specific components.
Lubrication Best Practices for the Level Wind
Proper lubrication is critical, but more is not better. Excess oil on the level wind system attracts and holds dirt, sand, and organic material. This creates the exact buildup that causes jams in the first place.
Use one drop of reel specific oil on the worm shaft cover after cleaning. Crank the handle several times to let the line guide distribute the oil evenly. Check for dry spots and dab them with an oiled cotton swab if needed.
Apply one drop of oil directly on the worm shaft. Crank the reel again to coat the grooves. Add a second drop on the opposite side only if the first drop did not reach the full length.
Some technicians prefer light grease on the worm shaft instead of oil. Grease stays in place longer and does not migrate. However, grease can slightly increase resistance on the line guide. Oil provides smoother operation but needs more frequent reapplication.
Do not use general purpose household oils. Use only lubricants made for fishing reels. Household products may contain additives that damage reel components or break down plastics.
What to Do When the Level Wind Jams Mid Fish
The worst time for a jam is when you have a fish on the line. You need a quick field response to avoid losing the catch and damaging your reel.
Stop cranking immediately. Continuing to reel against a jammed level wind puts extreme stress on the pawl and worm shaft. You risk breaking both parts and turning a simple fix into an expensive repair.
Try a gentle tap on the line guide with your thumb. Many sticking jams release with a light bump. The guide often starts moving again once freed from a debris induced hang up.
If the guide will not free up, switch to manual line management. Use your thumb to guide the line back and forth across the spool as you reel. This mimics what the level wind does and prevents line piling. It is not ideal, but it gets the fish in the boat.
Once the fish is landed and secured, stop using that reel for the session. Clean and inspect it before your next trip. Field fixes are temporary, and continuing to fish with a malfunctioning level wind risks more serious damage.
Preventing Future Level Wind Jams
Prevention is far easier than repair. A simple routine after each fishing session keeps your level wind working for years.
Clean the worm shaft cover and frame area with a toothbrush and cotton swab after every trip. This takes less than five minutes. Pay extra attention after fishing in heavy vegetation, muddy water, or saltwater environments. These conditions accelerate grime buildup dramatically.
Apply a small amount of oil to the worm shaft cover and shaft after cleaning. One drop per surface is enough. Resist the urge to saturate the parts.
Rinse your entire reel with fresh water after saltwater use. Salt crystals form in the worm shaft grooves and act like sandpaper on the pawl and shaft surfaces.
Store your reels in a dry, cool place. Humidity promotes corrosion on the metal parts of the level wind system. A reel bag or case provides basic protection from dust and moisture during storage.
Inspect the pawl and worm shaft visually at least once per season. Catching early wear before it causes a jam saves time and prevents secondary damage to the worm shaft.
When to Seek Professional Reel Repair
Some level wind problems go beyond a basic home fix. If you have replaced the pawl and worm shaft and the guide still jams, deeper issues may exist inside the gear train.
Stripped drive gears that connect the handle to the worm shaft require precise alignment and matching parts. A professional reel technician has the tools and parts inventory to handle this. They can also identify problems you might miss, like a slightly bent frame or a warped side plate that creates misalignment.
If your reel is still under warranty, contact the manufacturer before opening it. Disassembly may void the warranty on some models. A warranty claim often gets you a repaired or replaced reel at no cost.
Professional service is also worth considering for high end reels. The cost of a service is small compared to the replacement value. A trained technician will clean, lubricate, and inspect every component, catching potential failures before they happen on the water.
Common Mistakes That Make Level Wind Problems Worse
Many anglers accidentally make things worse before they make them better. Avoiding these errors saves time and money.
Forcing the handle when the guide is stuck is the most damaging mistake. This chips worm shaft teeth and snaps pawls. Always stop reeling the instant you feel resistance or see the guide stall.
Over lubricating the worm shaft creates a sticky trap for debris. One drop of oil per surface is the correct amount. Flooding the area with lubricant feels productive but causes faster buildup.
Using incorrect replacement parts leads to rapid failure. A pawl designed for a different model may fit loosely and skip out of the grooves. Always verify the exact part number for your specific reel model and year.
Skipping the worm shaft inspection during a pawl replacement is a missed opportunity. If the shaft is damaged, a new pawl will wear out quickly. Always check both parts when you have the reel open.
Reassembling with screws in the wrong positions can physically block the line guide. Keep screws organized during disassembly to prevent this preventable error.
Frequently Asked Questions
Why does my level wind only jam on one side?
The worm shaft groove changes direction at each end of the shaft. These transition points are where the groove tips are most likely to chip or where debris collects. A worn pawl often catches at one specific transition point because the damage or wear is not uniform across the entire shaft. Cleaning the worm shaft ends and inspecting the groove tips at both transition points usually reveals the problem.
Can I fish without the level wind working?
Yes, you can still fish. You will need to manually guide the line with your thumb as you retrieve. This technique requires practice and attention, but experienced anglers have done it for years. However, fishing with a broken level wind puts uneven pressure on the spool and can cause line management issues on your next cast. Fix the reel as soon as possible.
How often should I clean the level wind system?
Clean it after every fishing trip if you fish in saltwater, muddy water, or heavy vegetation. For clean freshwater conditions, a thorough cleaning every three to five trips is a good baseline. Apply a drop of oil after each cleaning. A seasonal deep inspection of the pawl and worm shaft is recommended for all anglers regardless of conditions.
What oil should I use on the level wind?
Use oil specifically made for fishing reels. These products have the correct viscosity and contain no additives that damage reel components. Avoid household oils like WD 40, sewing machine oil, or cooking oils. Some anglers use light reel grease on the worm shaft for longer lasting protection, but standard reel oil works well for most situations.
How do I know if my pawl needs replacement or just cleaning?
Remove the pawl and inspect its tip under good light or a magnifying glass. A healthy pawl has a sharp, defined point that fits snugly into the worm shaft grooves. A worn pawl shows a rounded, flattened, or chipped tip. If cleaning the system and reapplying oil does not resolve the jamming, the pawl almost certainly needs replacement.
Is it worth repairing an old reel or should I buy a new one?
A pawl and worm shaft replacement costs a fraction of a new reel. Most baitcasters, even budget models, are worth repairing if the frame and main gear train are still solid. High quality reels from the 1990s and earlier often outlast modern reels once the level wind parts are refreshed. Professional service adds cost but extends the life of any well built reel significantly.

Hi, I’m Ivy Webb, the passionate angler and creator behind BaitHookVault.com. I spend my days out on the water personally testing and reviewing a wide variety of fishing tools and gear.