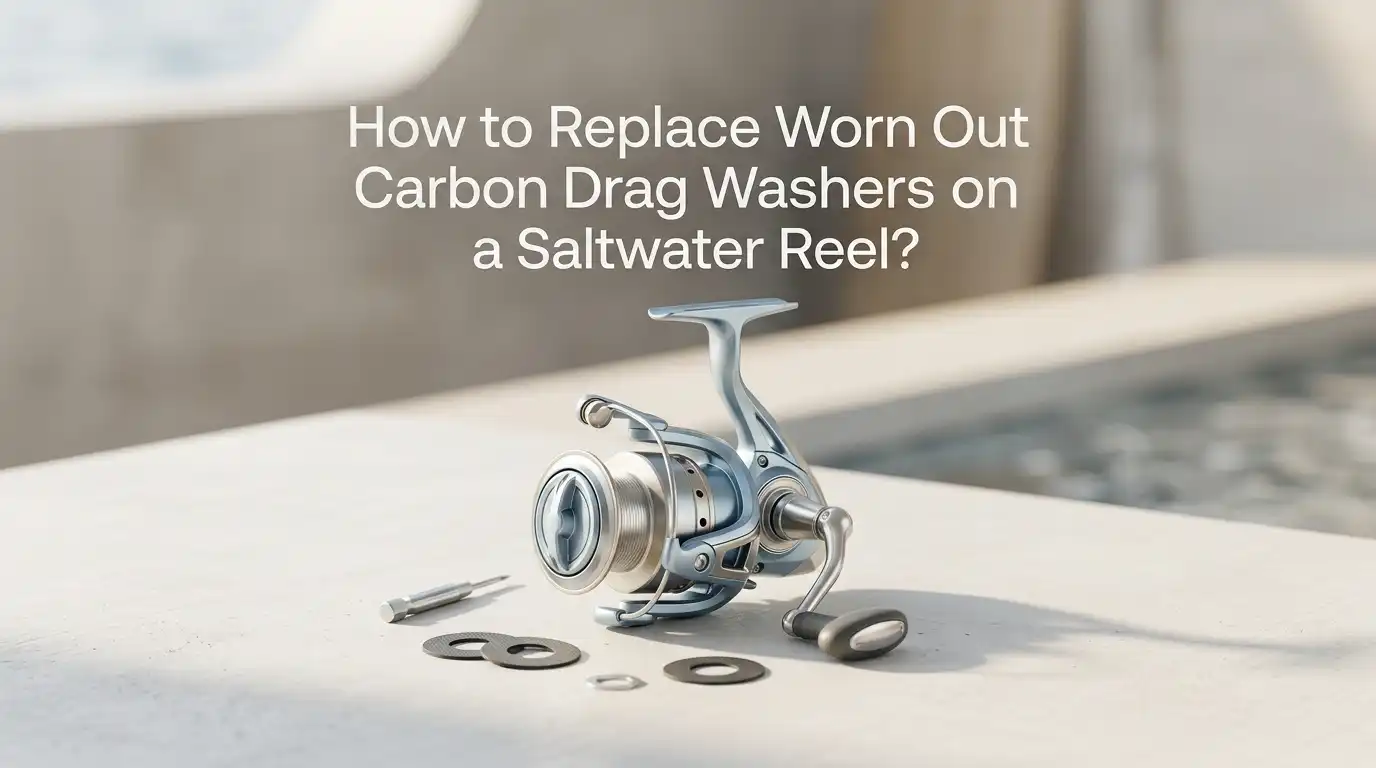
How to Replace Worn Out Carbon Drag Washers on a Saltwater Reel?
A saltwater reel can feel strong one week and rough the next. That change often starts in the drag stack. If the carbon drag washers are worn, dirty, glazed, or soaked with salt, your reel can slip, stick, or surge at the worst time. That means lost fish, damaged line, and a reel that no longer feels safe under pressure.
The good news is simple. You can replace worn carbon drag washers at home with basic tools, a clean work area, and the right order of parts. This guide shows you the full process in clear steps.
You will learn how to spot worn washers, open the reel, clean the drag stack, choose between dry and lightly greased carbon washers, and put everything back together with confidence.
Key Takeaways
- Carbon drag washers fail for clear reasons. Salt, heat, old grease, sand, and pressure wear them down over time. A drag that starts with a jerk, slips under load, or feels rough usually points to washer trouble. Small warning signs matter because drag problems often get worse fast once salt and grime stay inside the spool or main gear.
- The washer order matters as much as the new parts. Many reels use alternating metal and carbon washers. Some also use spring washers that must go back in the same direction. Take a photo before you remove anything. That one step can save you from a weak drag, no drag, or a reel that feels wrong after reassembly.
- Cleaning is part of the repair. New washers will not fix a drag stack if the metal washers are rusty, cupped, or dirty. Wipe old grease away, remove grit, and inspect each metal surface before you install the new set. A smooth metal surface helps a smooth drag.
- You can install carbon washers dry or with a very light coat of drag grease. Each method has pros and cons. Dry washers can give a firmer feel, but they may start with more jerk and can take in moisture faster. Lightly greased washers usually feel smoother and resist salt better, but too much grease hurts performance. Thin means thin. The weave should still show.
- Do not rush the reassembly. Many drag issues come from one missed washer, one flipped spring washer, or one part placed out of order. Tighten parts with care and test the drag before your next trip. Pull line by hand and feel for steady pressure.
- A simple after trip routine keeps new washers alive longer. Tighten the drag before a light fresh water rinse, dry the reel, then loosen the drag for storage. Avoid strong spray and avoid sealing a wet reel in a bag. Good care after each trip can add a lot of life to the new drag stack.
Why Carbon Drag Washers Wear Out in Saltwater
Saltwater is hard on every reel part, but the drag stack takes direct stress. Each run from a fish creates heat and friction. Over time, that heat can glaze the carbon surface and make the drag feel jumpy. Salt and fine grit can also work into the stack and scratch the metal washers.
Old grease adds another problem. It can trap dirt and turn sticky. Then the drag no longer starts smoothly. That rough start is one of the biggest warning signs because it can snap light line fast.
There are two common causes here. One is heavy use. The other is poor care after trips.
Pros of regular drag care: smoother runs, less heat, longer washer life.
Cons of skipping care: sticky drag, corrosion, extra wear, lost fish.
If your reel sees surf, spray, or boat decks often, the washers work even harder. Saltwater does not need a dramatic dunking to cause damage. A little exposure, repeated many times, is enough.
Signs Your Drag Washers Need Replacement
A worn washer usually gives clear signals if you know what to feel. The first sign is a drag that starts with a grab, then suddenly slips. That stop and go feel is a problem. A good drag should give line in a smooth and steady way.
Another sign is weak drag pressure. You tighten the knob or star, but the reel still slips too easily. That often means the drag material is worn thin, polished smooth, or contaminated. A burnt smell or dark glazed look is also a clue.
Watch for these signs during use and during inspection:
- Jerky line release
- Sudden surging under pressure
- Reduced max drag
- Visible cracks, tears, or shiny burned spots
- Rust or dirt between washers
Pros of replacing early: protects line, protects gears, restores confidence.
Cons of waiting too long: extra heat, damaged metal washers, more repair time.
If the reel clicks but the line still comes off in bursts, do not blame only the setting. The drag stack may be asking for help.
Tools and Supplies to Gather First
You do not need a big workshop for this job. You need a small set of careful tools and a clean place to work. Most reel repairs go wrong because parts get lost or the wrong tool strips a screw head.
Start with small screwdrivers, a nut driver or wrench for the handle nut, tweezers or needle nose pliers, cotton swabs, a soft cloth, and a small tray for parts. Add cleaning solvent or alcohol, and have the correct carbon washer set ready. A phone camera is one of the best tools here because photos preserve the part order.
You may also need drag grease if you choose the lightly greased method.
DIY pros: lower cost, faster fix, better knowledge of your reel.
DIY cons: risk of part mix up, stripped screws, wrong order.
Shop service pros: less risk, expert inspection.
Shop service cons: more cost, more waiting.
Lay every tool out before you start. Once the reel is open, you do not want to search around with loose parts on the table.
How to Find the Right Schematic and Washer Size
Before you remove one screw, get the reel schematic for your exact model. Many reels look almost the same, but their drag stacks can differ in thickness, order, and spring washer direction. One wrong washer size can make the drag weak or impossible to adjust.
Check the reel foot, body, or box for the model number. Then match that number with the correct parts diagram. Keep the schematic beside you during the whole job. This step prevents guesswork, and guesswork is what ruins drag performance.
The schematic helps you confirm three things:
- The exact number of drag washers
- The order of metal and carbon parts
- The location of any under gear washer or spring washer
Pros of using the schematic: less confusion, faster reassembly, fewer mistakes.
Cons of skipping it: wrong stack height, missing washer, poor drag feel.
If your new washer kit looks slightly different from the old set, compare thickness and position against the diagram before you go further.
Prepare a Clean Work Area and Protect Small Parts
A clean work area makes this repair much easier. Spread a light colored towel or mat on the table. Small clips, screws, and washers are easier to see on a plain surface. A towel also stops parts from rolling away.
Use a parts tray, small cups, or a sectioned box to separate items in the order you remove them. Place left side parts in one area and right side parts in another. Simple organization saves real time later.
Good light matters too. Shadows hide tiny washers and spring clips. If possible, work under a bright desk lamp. Keep paper towels nearby for grease and solvent. Do not work where sand, pet hair, or food crumbs can blow into the reel.
Pros of a careful setup: cleaner parts, easier photos, safer reassembly.
Cons of a messy setup: lost clips, dirty drag surfaces, wasted time.
This job is not hard, but it rewards calm hands. A clean space helps you stay calm and accurate.
Open the Reel and Remove the Drag Stack
The exact path depends on the reel type, but the rule stays the same. Remove parts slowly and keep them in order. On many star drag reels, you remove the handle cap, handle nut, handle, star, and spacing parts before you access the side plate and main gear. On many spinning reels, you remove the spool and then access the drag stack inside it.
Take a photo at each stage. Do not trust memory once parts start to pile up. If you see curved spring washers, note their direction right away. If you force anything, stop and check the schematic.
Lift the old drag stack out in sequence and lay it down exactly as it came out. Keep metal washers flat. Keep carbon washers separate if they are dirty or greasy.
Pros of step by step removal: easier reassembly, less damage, clear washer order.
Cons of rushing: bent clips, wrong spring direction, missing parts.
If one washer sits under the main gear, do not forget it. Some reels rely on that washer for proper drag pressure.
Check the Old Washers and Metal Discs Closely
Once the stack is out, inspect every part before you clean or replace it. Old carbon washers can show wear in several ways. Look for shiny glazed spots, cracks, frayed edges, thinning material, or dark burned areas. Those signs tell you the washer has seen too much heat or contamination.
Now inspect the metal washers. They should be smooth and flat. If a metal washer is warped, rusty, or has burrs, it can ruin the feel of the new carbon washers. New drag material cannot fix a damaged metal surface.
Here is a simple rule. Reuse metal washers only if they are flat and clean well.
Pros of reusing good metal washers: lower cost, quick repair.
Cons of reusing bad ones: jerky drag, uneven pressure, wasted new washers.
Run a fingertip over the surface very gently. If it feels rough, scratched, or uneven, that part deserves extra attention. Good drag performance comes from the whole stack, not only the carbon pieces.
Clean the Drag Parts the Right Way
Cleaning is where the real reset happens. Wipe old grease, salt, and grit from the drag cavity, spool, or main gear recess. Use cotton swabs, a lint free cloth, and a safe cleaning liquid that leaves parts dry. Work slowly and keep dirt from spreading back onto clean surfaces.
Clean the metal washers until the surfaces feel smooth. If there is very light rust or a small burr, polish gently with very fine abrasive material. Do not grind hard. You want a smooth face, not a thinner washer. Too much force here can change the part shape.
For the reel body, remove salt and dirt from the nearby area too.
Pros of a deep clean: smoother start up, better drag range, less future corrosion.
Cons of a weak clean: old grit stays trapped, drag remains rough, new washers wear early.
Let every part dry fully before you reassemble. A damp stack can trap salt and undo your work before the next trip begins.
Dry Install or Light Grease Which Method Fits Best
This is the question many anglers ask. Should carbon drag washers go in dry or lightly greased? Both methods can work, but they feel different and serve different needs. For most saltwater reels, a very light coat of drag grease helps produce a smoother start and better moisture resistance.
A dry install can give a firmer drag feel and a cleaner stack, but it may start with more jerk and can take in water and debris faster. A lightly greased install usually reduces start up shock and helps protect the stack from salt. The key word is light. If the washer looks goopy, there is too much grease.
Dry method pros: simple, clean, firm feel.
Dry method cons: more stick at start, less protection from moisture.
Light grease pros: smoother release, better salt resistance, longer life.
Light grease cons: too much grease can reduce performance and attract dirt.
If your reel manual or maker guidance is clear, follow that first. When in doubt, use only a very thin coating made for reel drags.
Install the New Carbon Washers in the Correct Order
Now place the new washers back in the exact stack order. Most drag stacks alternate metal and carbon parts, but some include keyed washers, eared washers, or a small washer below the main gear. Match everything to your photo and schematic.
If you use light grease, work a thin film into the carbon washer and wipe off extra until the weave still shows. Then start the stack. Seat each keyed or eared washer fully in its slot. Keep metal washers flat and centered. One crooked washer can change the whole drag feel.
Pay close attention to curved spring washers. Their direction affects drag pressure and adjustment feel. Put them back exactly as they were.
Pros of careful stacking: correct drag range, smooth line release, normal adjustment.
Cons of wrong order: weak drag, locked drag, uneven pressure.
Before you close the reel, pause and compare the finished stack to your first photo. This five second check is worth it.
Reassemble Test and Fine Tune the Drag
Put the reel back together in reverse order. Tighten screws until snug, but do not overdo it. Small reel screws can strip easily. As each part goes back on, make sure it sits flush and turns freely where it should.
Once the reel is assembled, test the drag before you put the reel away. Tighten the drag a little at a time and pull line from the spool by hand. The pressure should build in a smooth and even way. There should be no chattering, no sudden jump, and no dead spot. A smooth pull is the goal.
After that, do a simple setting check. A practical starting point is about one quarter to one third of your line strength.
Pros of hand testing now: catches mistakes early, saves trip time.
Cons of skipping the test: surprise failure on the water.
If the drag feels odd, reopen the stack before fishing. A quick correction at the bench is much easier than a lost fish later.
Simple Habits That Make New Washers Last Longer
Fresh washers will not stay fresh without good care. After each saltwater trip, tighten the drag before a light fresh water rinse. This helps reduce water entry into the drag area. Use a light mist or damp cloth, not a strong spray. Then shake off water, dry the reel, and loosen the drag for storage.
Do not store the reel wet inside a sealed bag or box. Open air drying is better. If you use braid, remember that wet line can hold salt close to the spool for a long time. Dry storage matters more than many anglers think.
Every few trips, inspect the line roller, spool, and drag area for salt and grit.
Light rinse pros: safer for seals and drag stack, easy habit, less corrosion.
Strong spray cons: forces water inside, moves salt deeper, shortens reel life.
These small habits take only minutes, but they protect the repair you just finished and help the drag stay smooth through the season.
FAQs
How often should I replace carbon drag washers on a saltwater reel?
There is no fixed schedule because use level matters more than age. A reel used every week in surf or spray may need drag inspection much sooner than a lightly used boat reel. Check the washers when the drag starts to feel jerky, weak, or noisy. Performance tells the truth faster than a calendar does.
Can I replace only the carbon washers and keep the metal washers?
Yes, if the metal washers are flat, smooth, and free from rust or burrs. Clean them well and inspect both sides before reuse. If a metal washer is warped or rough, replace it too. A bad metal washer can spoil a brand new carbon set and bring the same problem back.
What happens if I use too much drag grease?
Too much grease can make the drag stack messy and less consistent. It can also hold dirt and reduce the clean friction you want from the washers. Use only a very thin coat if you choose the greased method. The carbon weave should still be visible. Thin and even beats thick and messy every time.
Do I need a professional reel technician for this repair?
Not always. Many anglers can do this job at home if they have the schematic, the right parts, and a patient work style. If the reel has major corrosion, damaged gears, or a very complex layout, a technician may be the safer choice. Simple washer replacement is a good home repair, but severe damage needs expert eyes.

Hi, I’m Ivy Webb, the passionate angler and creator behind BaitHookVault.com. I spend my days out on the water personally testing and reviewing a wide variety of fishing tools and gear.