How To Prevent Braid From Slipping On A Bare Metal Spool?
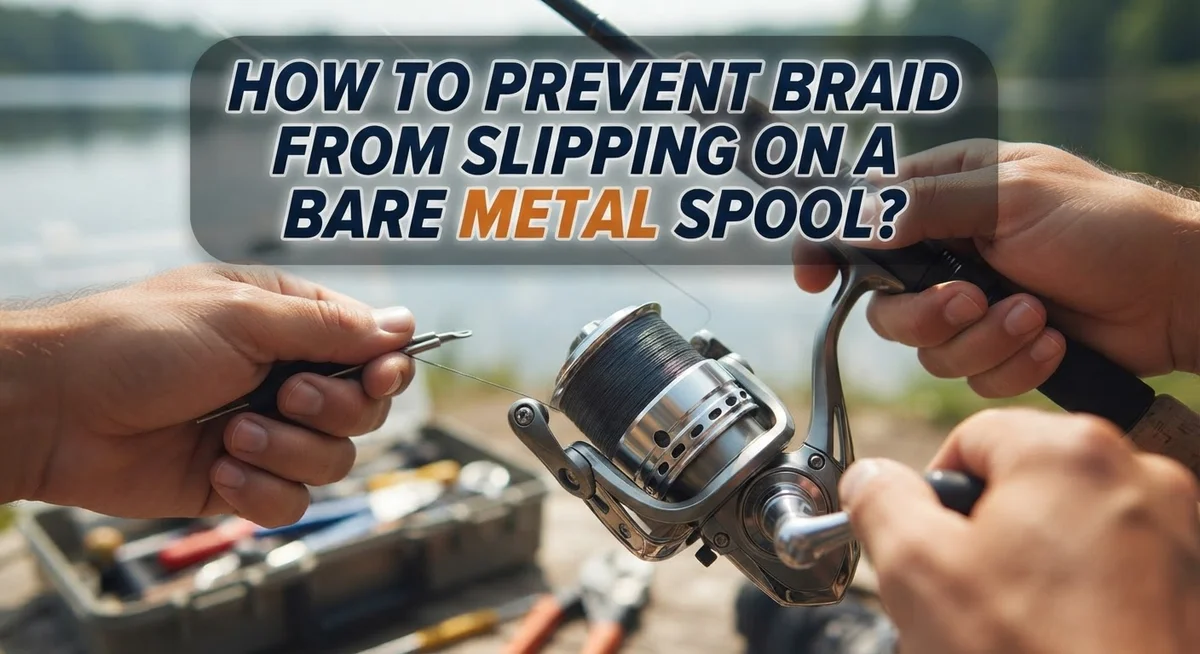
Have you ever cast your line, felt a big fish pull hard, and then watched your braid spin uselessly around the spool? This frustrating problem happens to many anglers.
Braided line is super strong and thin. But it has one big weakness. It does not grip bare metal spools well.
When you fight a fish, the pressure builds. Your braid can slip and spin on the spool. This means you lose line, lose power, and sometimes lose the fish too.
In a Nutshell
- Tie the right knot first. A strong knot, like an arbor knot, gives your line a solid base. This is the very first step before you add any grip material.
- Add tape over the knot. Electrical tape works great for this job. Wrap it tightly over the knot area on the spool.
- Try friction tape for extra grip. Cloth surgeon’s tape or hockey tape gives braid something rough to hold onto. These options work even better than smooth tape.
- Use mono as backing. Adding a layer of monofilament line under your braid creates a grippy surface. This is a classic trick many anglers swear by.
- Keep tension steady while spooling. Loose line on the spool leads to slipping later. Always keep firm pressure as you reel line onto the spool.
- Cover the spool fully. Skipping spots with your tape or backing leaves weak areas. Full coverage stops your braid from finding a slick spot to spin on.
Why Braid Slips On Bare Metal Spools
Braided line slips on bare metal spools because the smooth surface offers almost no friction. When a fish pulls hard, the pressure increases dramatically. Your braid has nowhere to grip, so it spins freely around the metal.
The core issue comes down to physics. Braided line is thin and strong, but it needs texture to hold firm. Bare metal is slick like ice. The two simply don’t work well together without help.
Under load, the problem gets worse. A big fish applies constant pressure to your line. The braid wants to slide up and down the spool rather than stay locked in place. This creates that frustrating spinning sensation when you’re fighting something heavy.
The solution is simple: add friction. Your braid needs something rough or sticky to grip onto. This is why tape and backing materials work so well. They create the texture that bare metal lacks.
Think of it like trying to hold a wet glass versus a towel wrapped around a glass. The towel gives your fingers something to grip. The same concept applies to your spool.
Many anglers make the mistake of thinking a good knot is enough. A strong knot is important, but it only holds the line to the spool at one point. Once the line starts spinning under pressure, that knot becomes less effective. The rest of the braid still has nothing to grip.
The real protection comes from covering the problem area. When you add tape or mono backing over your knot, you create a surface the braid can hold onto. This prevents the line from sliding around during the fight.
Tying The Right Knot To Anchor Your Braid
The knot you choose makes all the difference when anchoring braid to a bare metal spool. An arbor knot is your best option because it grips tight and resists slipping under pressure.
Here’s how to tie it correctly. First, wrap your braid around the spool once. Then create a loop around the spool shaft with your braid line. Pull the working end through that loop to form a simple overhand knot around the shaft itself.
Next, tie a second overhand knot in the braid about 2 inches from the first knot. This creates a stopper that prevents the first knot from sliding. Tighten both knots firmly, then trim the excess line.
The key is making sure both knots cinch down completely. Loose knots will slip the moment you set the hook on a fish.
After tying, apply tape directly over your knot. This is the critical step many anglers skip. The tape covers the knot area and gives your braid something textured to grip onto as line gets pulled from the spool.
Electrical tape works well for this purpose. Wrap it around the spool at least once, covering the knot completely. Make sure the tape sits flat with no wrinkles or gaps.
Some anglers prefer friction tape options like cloth surgeon’s tape or elastic finger tape. These materials provide even more grip than electrical tape.
Test your knot before you fish. Pull hard on the line with your hands. If the braid spins freely around the spool, your knot needs tightening or your tape needs better coverage. A secure knot plus proper tape coverage stops slipping every time.
Using Mono Backing For Extra Grip
Mono backing creates a textured surface that braid can grip. Unlike bare metal, monofilament line has enough friction to hold your braid steady under pressure.
Here’s how mono backing works. You spool a layer of monofilament onto your reel first. Then you tie your braid directly to this mono layer. The rough texture of mono gives your braid something to hold onto, preventing slippage when you set the hook or fight a fish.
The process is straightforward. Start by spooling your mono backing onto the bare metal spool. You only need about 50 to 100 yards, depending on your reel size. Make sure you maintain steady tension as you spool it on. Loose backing creates weak spots that braid can slip through.
Once your mono backing is in place, tie your braid to it using an arbor knot or similar strong connection. The mono layer acts as an anchor point. Your braid now has friction on both sides, making slippage nearly impossible.
Mono backing offers several advantages over tape alone. It works on any spool size and doesn’t wear away over time. You can reuse the same backing for multiple braid applications. The material is affordable and readily available.
One important tip: choose mono backing with adequate thickness. Thinner mono may compress under pressure and lose its grip. Medium to heavy monofilament works best for this purpose.
This method combines the strength of a proper knot with the friction that mono provides. Your braid stays locked in place, even during intense fishing sessions. Many experienced anglers prefer this approach because it offers reliable, long term protection against slippage on bare metal spools.
Applying Electrical Or Friction Tape Correctly
Electrical tape and friction tape both work well to stop braid from slipping. The key is applying them correctly over your knot area. Here’s how to do it right.
Start by tying your braid to the spool with a proper arbor knot or double overhand knot. Make sure both knots cinch down completely and sit flat against the metal. Loose knots won’t hold anything in place.
Next, wrap electrical tape around the knot area. Use about one inch of tape to start. Press it down firmly so it sticks well to both the braid and the spool. The tape creates friction between your line and the metal surface. This friction is what prevents slipping under load.
For better results, apply tape in overlapping layers. Wrap the first layer around the knot, then add a second layer slightly higher. This overlap ensures no gaps exist where braid can slip through. Cover the entire knot area completely.
Friction tape options include cloth surgeon’s tape, elastic finger tape, or double sided hockey tape. These materials grip better than standard electrical tape. Apply them the same way: wrap firmly around the knot with overlapping layers.
Test your setup before fishing. Pull on the braid with steady pressure. It should not move or slide on the spool. If it does slip, add another layer of tape.
One important tip: keep tape edges smooth and flat. Rough edges can catch and cause problems during casting. Press everything down firmly as you apply it.
Let the tape cure for a few minutes before spooling. This gives the adhesive time to set properly. A well taped knot should hold your braid securely for many fishing trips.
Step-By-Step Guide To Spooling Braid Without Slippage
Your braid needs something to grip when it sits on bare metal. Without friction, the line slides under pressure and your setup fails. The solution is simple: add a friction layer between the knot and the spool.
Start by tying your arbor knot or double overhand knot directly to the spool. Make sure both knots cinch down completely and sit tight against the metal surface. This anchor point matters, but it alone won’t stop slippage.
Now wrap tape over the knotted area. Electrical tape works well because it sticks firmly and stays put. Wrap it around the knot in overlapping layers to build up friction. Keep the tape edges smooth and flat so your braid sits evenly on top.
Alternative friction materials work just as well. Cloth surgeon’s tape, elastic finger tape, or double sided hockey tape all provide grip. Choose whichever material you have available. The key is covering the problem area completely.
Another option is using mono backing instead of tape. Mono backing creates a textured surface that braid can grip naturally. Tie your braid directly to the mono backing using a strong connection. This method lasts longer than tape and works on any spool size.
Let your tape or backing material cure for a few minutes before you start spooling. This gives the adhesive time to set properly.
Test your setup before you fish. Pull on the braid with steady pressure to see if it holds. If the line slips, add more tape or backing material until it stays firm. Your goal is a secure connection that won’t move under load or casting pressure.
Maintaining Proper Tension While Spooling
Maintaining proper tension while spooling is essential to prevent your braid from slipping on bare metal. The tension you apply during the spooling process directly affects how well your line stays in place.
Start by keeping consistent pressure on your braid as it winds onto the spool. Your hand should hold the line firmly but not so tight that you damage the fibers. Steady, even tension prevents loose wraps that can shift under load.
Pay attention to how the line lays on the spool. Each wrap should sit snugly against the previous one without gaps. Uneven spacing creates weak points where braid can slip when you’re fighting a fish. Watch the spool carefully as you wind to catch any problems early.
The friction material you’ve applied works best when the braid sits under consistent pressure. Loose wraps reduce contact between your line and the tape or mono backing. This contact is what prevents slippage. Maintain that pressure throughout the entire spooling process.
Adjust your hand position if you feel the tension dropping. Your fingers should guide the line onto the spool while maintaining firm contact. Some anglers use a slight pinching motion to keep everything tight.
Temperature matters too. If you’re spooling in cold conditions, your braid may feel stiffer and harder to control. Warm conditions might make it feel too loose. Work with these differences by adjusting your hand pressure accordingly.
After you finish spooling, let the line settle for a few minutes before fishing. This allows everything to stabilize and lock into place. Test your setup by pulling hard on the line to confirm nothing moves. Proper tension during spooling gives your friction materials the best chance to do their job effectively.
Common Mistakes That Lead To Slippage
Many anglers make simple mistakes that cause their braid to slip right off bare metal spools. Understanding these errors helps you avoid frustration on the water.
The first mistake is tying the wrong knot. Some people use basic knots that don’t grip the spool well. An arbor knot or double overhand knot creates the best connection. Weak knots let your line slip under even light pressure.
Another common error is skipping the friction material entirely. Bare metal is smooth and slippery. Braided line has nothing to grip on a smooth surface. You need something between the knot and the spool to create friction and hold the line in place.
Many anglers also apply tape incorrectly. They wrap it too loosely or cover only part of the knot area. The tape needs to wrap completely around the knot with overlapping layers. Incomplete coverage leaves gaps where the braid can still slip.
Insufficient tape thickness causes problems too. One thin layer often isn’t enough. Apply multiple layers to create a gripping surface that really holds the line.
Some people rush the process and start spooling immediately after applying tape. The tape needs time to set and bond properly. Waiting a few minutes makes a real difference in how well it holds.
Poor tension during spooling is another issue. If you don’t maintain consistent pressure while winding the braid, it sits loosely on the spool. Loose line slips more easily than tight line.
Finally, many anglers don’t test their setup before fishing. A quick test at home reveals problems before you’re on the water. These mistakes are all easy to avoid once you know what to watch for.
Troubleshooting Persistent Spool Slippage Issues
When your braid keeps slipping on bare metal, the root cause is simple. Bare metal offers almost no friction for the line to grip. Pressure and load make the problem worse. Your braid needs something to hold onto.
The friction solution is essential. Without it, your line will spin freely and slip under any real tension. This happens because braided line is smooth and slippery by design. Metal spools are even smoother. Together, they create a slipping disaster.
Tape works because it adds texture and grip. The rough surface catches the braid fibers. Your line can then anchor itself to the spool. Even thin tape makes a huge difference in performance.
Mono backing serves the same purpose. It provides a gripping surface that braid can bite into. The backing material creates friction through contact. Your braid winds over this prepared base instead of bare metal.
The key is coverage. Your tape or backing must reach the knotted area completely. Gaps or thin spots leave vulnerable zones. Braid will find these weak points and slip through them.
Pressure matters during application too. Press your friction material firmly onto the spool. Smooth out air bubbles and wrinkles. A flat, secure surface prevents shifting and movement.
Timing is critical as well. Let your tape or backing material set before you start spooling. This allows adhesive to bond properly. A few minutes of waiting prevents problems later.
Your setup only works if everything works together. The right knot plus friction material plus proper tension equals success. Skip any step, and slippage returns. Test your finished spool by pulling hard on the line. If it holds firm, you’ve solved the problem.
Final Thoughts
Braid slipping on a bare metal spool is a common problem. But it has a simple fix.
The friction material makes all the difference. Tape or mono backing gives your braid something to grip. Without it, your line spins freely under pressure.
Getting this right does not require special skills. You just need the right materials and a bit of patience.
Take your time with each step. Tie a secure knot first. Apply your tape or backing smoothly. Then let it cure before you spool.
Rushing through these steps causes most slippage problems. Anglers who skip steps or apply materials carelessly end up frustrated on the water.
Consistent tension while spooling ties everything together. Your friction material only works if the braid sits tight against it. Loose winding leaves gaps that lead to slipping.
Small details matter here. Full tape coverage protects the entire gripping surface. Partial coverage leaves weak spots where slippage starts again.
Testing your setup before you fish saves you trouble later. A quick pull test shows you if the line holds firm or moves under pressure.
If you notice slipping even after these steps, go back and check each part. Look at your knot, your tape coverage, and your tension. One weak link can cause the whole setup to fail.
Once you get this process right, you will not need to think about it again. Your reels will hold line securely trip after trip.
This small effort pays off big. You avoid lost fish, tangled line, and wasted time on the water.
Preventing braid slippage is not complicated. With the right materials and careful steps, your bare metal spool will hold tight every time you fish.
Frequently Asked Questions
Why does braid slip on bare metal spools in the first place?
Braided line slips because bare metal has no friction. When you apply pressure or cast, the smooth surface offers nothing for the braid to grip. The line simply spins around the spool without holding tight. This is especially true under heavy load or when fighting a fish. Mono backing or friction tape solves this by creating texture the braid can bite into.
What type of tape works best for preventing slippage?
Several tape options work well. Electrical tape is affordable and effective. Friction tape like cloth surgeon’s tape adds extra grip. Elastic finger tape also prevents slipping. Double sided hockey tape is another solid choice. The key is that any of these materials adds texture to the smooth metal surface. Pick whichever tape you can find easily at your local store.
How much tape do I actually need to apply?
Start with one inch of tape wrapped over your knot. Cover the entire area where your braid connects to the spool. Make sure the tape extends slightly beyond the knot on both sides. Full coverage prevents the braid from finding a bare metal edge to slip against. Don’t skimp on this step.
Can I use mono backing instead of tape?
Yes, mono backing works great. Wrap mono around the spool before tying your braid to it. The textured surface gives braid something to grip. Many anglers prefer this method because it’s permanent and doesn’t wear away. Both tape and mono backing solve the same problem in different ways.
How long should I wait after applying tape before spooling?
Let the tape set for a few minutes. This gives the adhesive time to bond properly. Rushing straight to spooling can cause the tape to shift or bunch up. A short wait prevents these headaches and ensures your setup holds tight.

Hi, I’m Ivy Webb, the passionate angler and creator behind BaitHookVault.com. I spend my days out on the water personally testing and reviewing a wide variety of fishing tools and gear.