How To Replace The Pawl On A Baitcaster Level Wind Mechanism?
Your baitcaster used to lay line like a dream. Now the line guide sticks. It piles line on one side of the spool. It clicks, grinds, or freezes in place mid cast. The tiny pawl inside your level wind mechanism is almost always the reason.
This little metal part rides inside the worm gear groove and pushes the line guide back and forth. When it wears down or snaps, your whole reel suffers.
This guide walks you through every step in plain language. You will learn how the part works, how to spot a bad one, and how to install a fresh one correctly.
Key Takeaways
- The pawl is the small part that fails most often. It is a tiny metal piece that sits inside the worm gear groove and drives the line guide across the spool.
- Bad symptoms are easy to spot. Look for line stacking on one side, a guide that sticks or freezes, grinding noise, or jerky back and forth movement.
- You only need basic tools. A small flathead screwdriver, a Phillips screwdriver, cotton swabs, reel oil, and a matching replacement pawl will do the whole job.
- Pawls are brand specific. A pawl from one reel brand rarely fits another. Buy the exact part for your reel model before you start.
- Cleaning often fixes the problem too. Sometimes dirt or sand jams the pawl. Clean first, then replace only if the part is truly worn.
- The repair is cheap and fast. Most pawls cost very little, and the whole job takes around fifteen to twenty five minutes once you know the steps.
What The Pawl Does Inside Your Level Wind
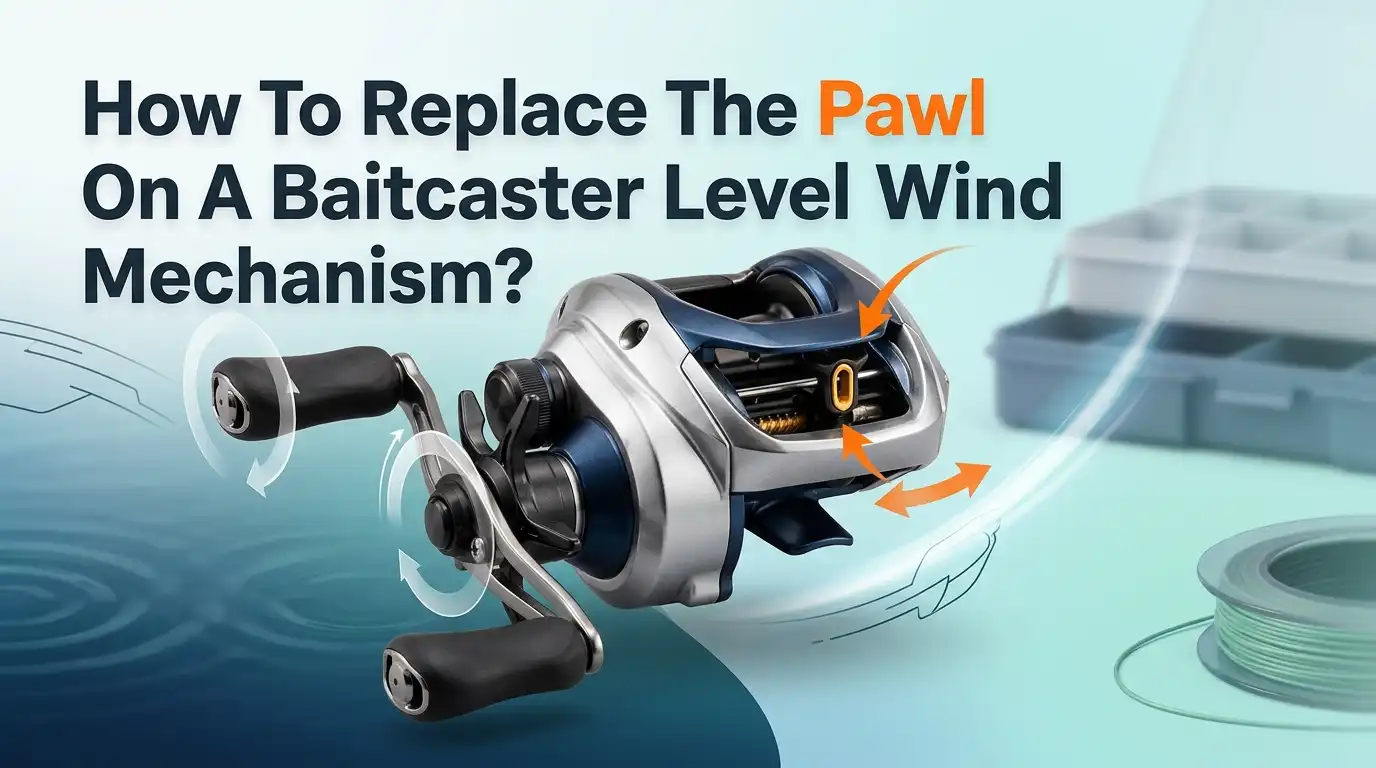
The pawl is small, but its job is big. It sits inside the level wind mechanism, which is the part that spreads line evenly across your spool. Without even line lay, your casts get short and tangled.
The pawl rides inside the groove of the worm gear. As you turn the handle, the worm gear spins. The pawl follows the groove and gets pushed left, then right, then left again. This motion carries the line guide across the front of the spool.
When the pawl works well, line stacks neatly in flat layers. When it wears down, the tip no longer grips the groove. The guide then stops or drifts to one side. A healthy pawl means smooth casts, even line, and fewer bird nests. That is why this little part deserves your attention.
Common Signs Your Pawl Has Gone Bad
You can usually tell a worn pawl just by using the reel. The clues are clear once you know what to watch for. Pay attention to how the line guide moves while you crank the handle slowly.
The most common sign is line stacking on one side of the spool. The guide reaches one end and refuses to reverse direction. Another sign is a guide that sticks halfway and will not travel the full width. You may also hear grinding, clicking, or scraping sounds during the retrieve.
Some reels show jerky, stop and start motion instead of smooth gliding. In bad cases, the line guide freezes completely. If you push the guide by hand and feel rough resistance, the pawl tip is likely chewed up. These symptoms point straight to a worn or broken pawl that needs a quick swap.
Why Pawls Wear Out Or Break
Knowing the cause helps you avoid the problem later. The pawl is a sacrificial part. Reel makers design it to wear out before the more expensive worm gear does. So some wear is normal over time.
Dirt and sand are the biggest enemies. Grit gets into the worm gear groove and grinds against the soft pawl tip. Saltwater speeds this up by adding corrosion to the mix. Skipping regular cleaning lets debris build up and chew the part down fast.
Poor lubrication also hurts. A dry worm gear creates extra friction that wears the tip flat. Using thick grease instead of light oil on the worm shaft is another mistake, since grease traps dirt and gums up the motion.
Hard use under heavy drag and big fish can also bend or snap the pawl. Once the tip rounds off, it stops gripping the groove.
Tools And Parts You Need For The Job
Gather everything before you start. A clean, well lit work surface makes the whole repair easier. Lay out a towel to catch tiny parts so nothing rolls away and gets lost.
Here is what you need for this repair:
- A matching replacement pawl for your exact reel brand and model. This is the most important item, since pawls are not interchangeable.
- A small flathead screwdriver, usually around 2.5 mm, to remove the pawl cap.
- A Phillips screwdriver, often a #0 size, for the side plate screws.
- Cotton swabs and a soft brush to clean the worm gear groove.
- Light reel oil and a small amount of reel grease for relubricating.
A magnetic tray or small cup helps hold screws. Some reels also need a 17 mm wrench for the handle nut. Check your reel schematic online so you order the right pawl the first time and avoid a second wait.
Step One: Remove The Side Plate And Spool
Start by taking the reel apart far enough to reach the pawl. Work slowly and remember the order of every part you remove. Snap a few phone photos as you go. These pictures save you during reassembly.
First, open the non handle side plate. Most baitcasters use a small latch or thumb release on the palming side. Press the latch and lift the side plate free. Set it aside in a safe spot.
Next, grab the end of the spool shaft and pull the spool straight out of the frame. It should slide out with light pressure. Do not force it.
If it resists, double check that the latch is fully released. With the spool out, you now have a clear view of the worm gear and the line guide assembly. This open access makes the pawl easy to reach.
Step Two: Locate And Open The Pawl Cap
Now find the pawl cap. It is a small round cover that holds the pawl against the worm gear. On most baitcasters, the cap sits on the front of the reel body, right behind the line guide. It looks like a tiny screw in disc.
Use your small flathead screwdriver to turn the cap counterclockwise. Turn gently, since the cap is small and the slot can strip if you push too hard. Keep steady downward pressure as you twist so the screwdriver does not slip.
Once loose, unscrew the cap the rest of the way by hand. A small spring or washer often sits behind it. Catch these parts carefully and set them in your tray in the order they came out. Some reels place the pawl directly under the cap, while others tuck it inside the line guide carriage. Look inside and note exactly how the old pawl sits.
Step Three: Remove The Old Pawl
With the cap off, you can pull out the worn pawl. Tilt the reel so the pawl slides toward you, or use the screwdriver tip to coax it out gently. Never yank or pry hard, since you could scratch the worm gear groove.
Some pawls come out stuck or jammed by debris. If yours will not budge, add a drop of oil and wiggle it back and forth until it frees up. Hold the side plate firmly and give it a light tap if needed.
Once out, look at the old pawl closely. Compare it to your new one. A worn pawl shows a flattened, rounded, or chipped tip instead of a sharp point. You may also see grooves worn into the side. This visual check confirms the pawl was your problem and that the new part will fix it.
Step Four: Clean The Worm Gear And Housing
Do not skip this step. A fresh pawl will wear out fast if the worm gear is still full of grit. Cleaning now protects your new part and improves how the reel feels.
Take a cotton swab and run it through the worm gear groove. Push it along the full length of the shaft to lift out old grease, sand, and dirt. Spin the worm gear by hand and clean every section of the spiral track.
Use a soft brush for stubborn buildup in the crossover points where the groove changes direction. Wipe the pawl housing and cap clean too. Old hardened grease in these spots causes sticking just like a bad pawl does.
A paper towel removes the loosened gunk. Keep cleaning until the groove looks shiny and the swab comes out clean. A clean track lets the new pawl glide freely.
Step Five: Install The New Pawl Correctly
Now fit the fresh pawl into place. The pointed or flat tip must face the worm gear groove so it can grip the spiral track. Check your old part for the correct orientation if you are unsure.
Drop the new pawl into its slot. Make sure it seats fully and lines up inside the worm gear groove. Wiggle the line guide gently by hand to confirm the tip drops into the track. If it sits crooked, it will not travel right.
Add back the washer or spring you removed earlier, in the same order. Thread the pawl cap on by hand first to avoid cross threading, then snug it with the flathead screwdriver. Do not overtighten. The cap only needs to hold the pawl in place, not crush it. A light, secure fit is the goal here.
Step Six: Reassemble The Reel
Put your baitcaster back together in reverse order. This is where your earlier photos really pay off. Take your time so every part lands where it belongs.
Slide the spool back into the frame until it sits flush. Replace any grill or cover plate and tighten its screws with the Phillips screwdriver. Do not overtighten small screws, since the threads strip easily in soft reel bodies.
Set the non handle side plate back on and press the latch closed until it clicks. Confirm the side plate sits flat with no gaps around the edge.
If your reel uses a handle nut, tighten it with the 17 mm wrench and replace its retaining screw. Give every screw a final check. A loose screw now means a rattle or failure later. Everything should feel snug but not forced.
Step Seven: Test The Level Wind Movement
Testing confirms your repair worked. Hold the reel and turn the handle slowly while you watch the line guide. This simple check catches any problem before you hit the water.
Crank the handle for a full minute. The line guide should travel smoothly all the way to one side, reverse, and glide back to the other side without sticking. It should move evenly and quietly at this point.
If the guide still stops or stacks to one side, open the cap again and recheck the pawl seat. The tip may not be sitting inside the groove correctly.
Listen for grinding too, which means leftover debris or a misaligned part. Once the guide sweeps the full width with no hitches, your repair is done. Spool fresh line and make a few test casts in the yard to feel the smooth, even line lay return.
Clean Versus Replace: Which Solution Fits You
Not every sticky level wind needs a new pawl. Sometimes a deep cleaning solves the issue for free. Knowing which path to take saves you time and money. Here is how the two options compare.
Cleaning and relubricating works best when the pawl looks fine but the reel feels gritty or stiff.
Pros: It costs nothing, takes little time, and needs no new parts. Cons: It only helps if the pawl itself is still sharp, and the fix may be temporary if grit returns.
Replacing the pawl is the right call when the tip is rounded, chipped, or broken.
Pros: It fully restores smooth, even line lay and lasts a long time. Cons: You must wait for the correct part to arrive, and the wrong part will not fit. A smart approach is to clean first, inspect the tip, then replace only if the wear is clear. This combo gives you the best result.
Tips To Keep Your New Pawl Lasting Longer
A new pawl can last for years with simple care. Regular maintenance is the single best way to avoid this repair again. A few small habits make a big difference over a season.
Clean the worm gear groove often, especially after fishing in sand, mud, or saltwater. Rinse saltwater reels with light fresh water and dry them well after each trip. Salt corrodes the pawl tip faster than anything else.
Use the right lube. Apply light reel oil to the pawl and worm shaft, not heavy grease, since grease traps dirt and grinds the tip down. A tiny drop is enough. Avoid forcing the handle when the guide sticks, as that can snap a fresh pawl. Store your reel in a dry case away from grit. Keep a spare pawl in your tackle box so a sudden failure never ends your fishing day early.
Frequently Asked Questions
How often should I replace the pawl on my baitcaster?
There is no fixed schedule. Replace the pawl only when you see worn symptoms like line stacking or a sticking guide. With good cleaning and light oil, a pawl can last several seasons. Heavy saltwater use wears it faster, so inspect it once or twice a year.
Can I use a pawl from a different reel brand?
No, you should not. Pawls are brand and model specific. The tip shape, length, and groove fit differ between makers. A mismatched pawl will not seat right and can damage the worm gear. Always order the exact part for your reel model.
Why does my line still stack on one side after replacing the pawl?
Check that the new pawl sits fully inside the worm gear groove. A crooked or loose pawl will not reverse the guide. Also inspect the worm gear for damage at the crossover points. A worn worm gear can cause stacking even with a fresh pawl.
Do I need to remove all the line to replace the pawl?
Usually no. You only remove the spool, and the line can stay on it. Set the spool down gently so the line does not unravel. Just keep the spool clean and free of dirt while it sits out during the repair.
Is it cheaper to fix the pawl myself or use a repair shop?
Doing it yourself is far cheaper. A pawl costs very little, and the only other expense is basic tools you likely own. A shop charges labor fees that often cost more than the part itself. The repair is simple enough for most anglers to handle at home.
What lubricant works best on the pawl and worm gear?
Use a light reel oil on the pawl and worm shaft. Avoid thick grease, since it traps sand and grit. A single small drop is enough to cut friction. Reapply after cleaning so the new pawl glides smoothly through the groove every time.

Hi, I’m Ivy Webb, the passionate angler and creator behind BaitHookVault.com. I spend my days out on the water personally testing and reviewing a wide variety of fishing tools and gear.