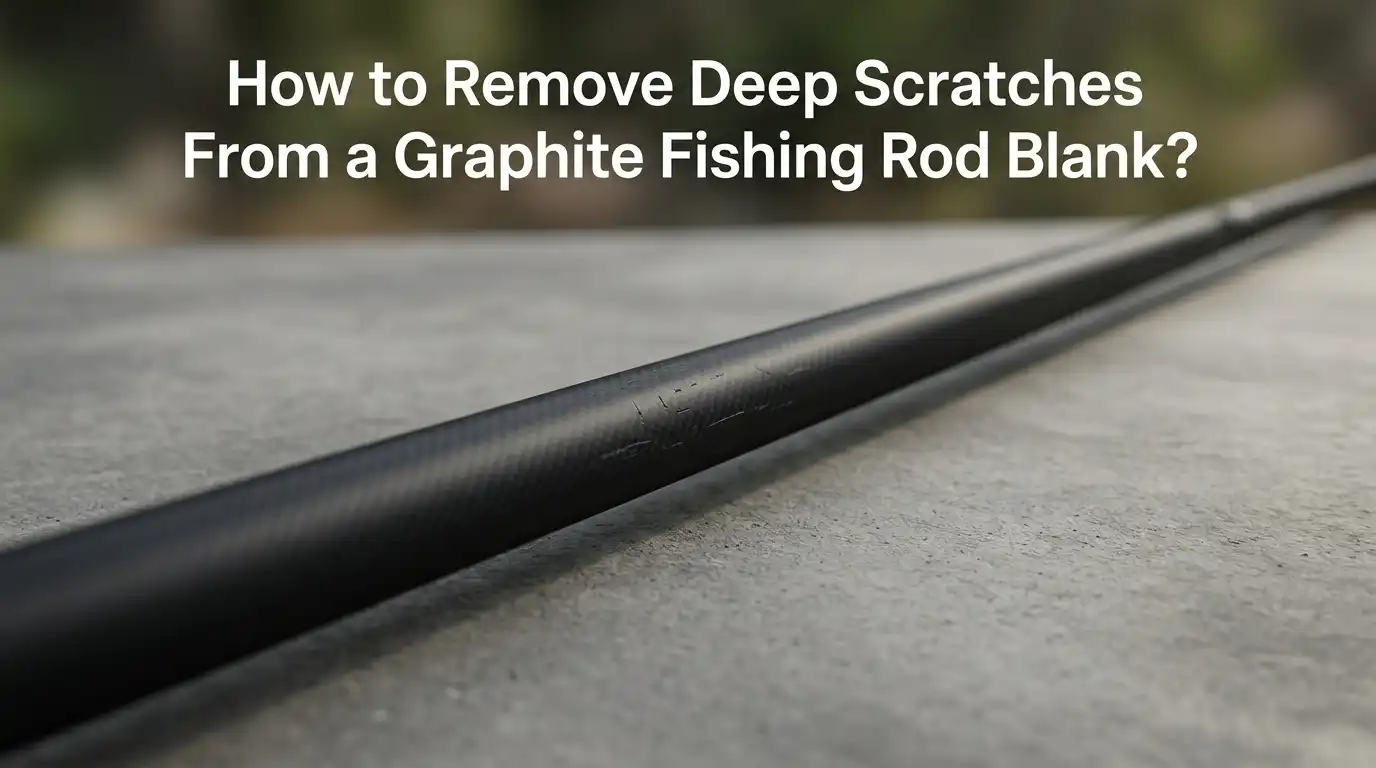
How to Remove Deep Scratches From a Graphite Fishing Rod Blank?
You pull your favorite rod off the rack and spot a long, ugly scratch running across the blank. Your heart sinks. That graphite rod cost you good money, and now it looks blemished.
Worse, you wonder if the scratch will weaken the rod and cause it to snap during a hookset. This worry sits in the back of your mind every time you hit the water.
The good news is that most scratches on a graphite rod blank only affect the outer clear coat. The structural carbon fibers underneath often stay intact. Even deeper scratches can be repaired or sealed with the right approach.
Key Takeaways
- Most scratches are cosmetic and live in the clear coat only. The graphite fibers underneath stay untouched. A scratch that catches your fingernail does not automatically mean the rod is ruined. Use a magnifying glass to check for cut fibers before you assume the worst.
- Never sand down to bare graphite on purpose. The factory epoxy that binds the carbon fibers is stronger than any room-curing epoxy you can apply at home. Sanding into the fibers causes permanent damage. Use a plastic blade or Scotchbrite pad instead of sandpaper whenever possible.
- A simple flex test reveals hidden structural damage. Load the rod gently as if fighting a fish. Listen for cracking sounds and watch for any unusual behavior at the scratch site. If the rod flexes normally with no noise, you can likely fish it without fear.
- Sealing the scratch with the right product prevents moisture entry and further peeling. Options range from clear nail polish for small nicks to two-part urethane coatings for larger areas. Each method has its own pros and cons, and your choice depends on the scratch depth and location.
- Temporary fixes like thread wraps or electrical tape work surprisingly well. Some anglers cover cosmetic scratches with a decorative thread wrap coated in epoxy. This hides the blemish and adds a small amount of hoop strength to the area.
- When in doubt, test the rod before a big trip. Tie on a weight equal to half the rod’s lure rating and lift it gently. Watch the scratch area closely. If nothing cracks, splinters, or changes shape, you have a green light to fish it hard.
Does the Scratch Affect Structural Integrity?
The first question every angler asks is whether the scratch will cause the rod to break. The answer depends on the depth. A graphite rod blank consists of thousands of carbon fibers running lengthwise from butt to tip. These fibers sit inside a heat-cured epoxy matrix and get a protective clear coat on top.
A scratch that only cuts the clear coat poses zero structural risk. You can verify this by running your fingernail across the scratch. If it feels shallow and you see no exposed carbon fibers under magnification, the blank is fine. The rod will cast and fight fish exactly as before.
A deeper gouge that exposes raw graphite fibers creates a different situation. Every cut fiber is one less strand carrying the load when the rod bends. A scratch that goes through multiple fiber layers creates a stress riser, a point where force concentrates.
The rod may survive dozens of fishing trips or fail on the very next hookset. There is no guaranteed way to predict the outcome, which is why many rod builders suggest fishing with a backup rod until you gain confidence in the repair.
Pros: Inspecting the scratch gives you clarity. You stop worrying and make an informed decision.
Cons: A visual check cannot reveal internal delamination. Damage between layers remains hidden until the rod fails under load.
Perform a Tap Test on the Blank
A tap test offers a quick way to check for hidden damage inside the graphite layers. This technique works because healthy carbon fiber produces a crisp, uniform sound when tapped. Delaminated or fractured areas sound dull and different.
Take a small coin, a nickel works best, and gently tap along the blank. Start a few inches away from the scratch and move closer. Listen carefully to the sound at each point.
A consistent, bright ring means the layers are bonded properly. If the sound suddenly goes flat or dead right over the scratch area, you may have internal separation between the carbon plies.
This test takes less than two minutes and requires no special tools. It works on any graphite blank whether the rod is fully built or just a bare shaft.
Keep in mind that a tap test is not foolproof. Small cracks can still hide undetected. However, a clean tap sound from the scratched area gives you strong confidence that the blank is structurally sound.
Pros: Fast, free, and requires no disassembly. Works on any rod.
Cons: Not 100 percent reliable for micro cracks. Requires a trained ear to detect subtle differences.
Perform a Flex Test Before Repair
The flex test puts the rod under real-world stress in a controlled setting. This is the most practical way to see if the scratch has compromised the blank. You simply load the rod and watch what happens.
Attach a weight to the tip or have a friend hold the line. Bend the rod gradually as if playing a medium-sized fish. Keep your eyes locked on the scratched area during the entire flex.
Listen for any cracking, popping, or creaking sounds. Look for any change in how the rod curves through the damaged spot. A healthy blank bends in a smooth, even arc. A sudden flat spot or sharp angle at the scratch signals trouble.
Stop immediately if you hear any noise or see unusual bending. The rod has internal damage and should be retired or repaired with a graphite sleeve by a professional. If the rod flexes silently and maintains a smooth curve, the scratch is cosmetic. You can proceed with a surface repair and fish with confidence.
Pros: Simulates actual fishing stress. Gives immediate visual and audible feedback.
Cons: Risks breaking an already compromised rod. Always wear eye protection and point the rod away from your face.
Method 1: Clear Nail Polish for Small Scratches
Clear nail polish is the simplest, fastest, and cheapest fix for surface-level scratches. It acts as a hard enamel that fills the scratch and seals it from moisture. Many experienced rod builders and anglers swear by this quick touch-up method.
Start by cleaning the scratched area with a soft cloth and mild soapy water. Let it dry completely. Apply a thin coat of clear nail polish directly into the scratch using the brush built into the cap.
Work carefully and avoid piling on too much product. A thin layer fills the scratch without creating a lump on the blank surface.
Let the polish dry for 30 minutes. Inspect the result. If the scratch still looks visible, apply a second thin coat. The polish levels out as it dries and becomes nearly invisible on glossy blanks.
This method works best on scratches that are long but shallow, the kind caused by lure strikes or rod-to-rod contact in a rod locker.
Pros: Cheap, available everywhere, dries fast, and easy to apply. Creates a hard protective shell.
Cons: Not suitable for deep gouges. May yellow over time with UV exposure. Does not add structural strength.
Method 2: Filling Deep Scratches with Epoxy Finish
When a scratch goes through the clear coat and into the graphite, nail polish may not fill it adequately. A thin epoxy finish designed for rod building works much better. This approach fills the gouge completely and creates a smooth, durable surface.
Clean the scratch thoroughly with isopropyl alcohol on a lint-free cloth. Do not use acetone, which can dissolve the epoxy binder in the graphite itself.
Mix a small batch of rod wrapping epoxy or a two-part clear epoxy according to the manufacturer instructions. Use a toothpick to apply the epoxy directly into the scratch. Work slowly and push the epoxy down into the gouge so no air pockets remain.
Rotate the rod slowly for the first 15 minutes to prevent the epoxy from sagging. Many rod turners or homemade drying setups work well for this step.
Once the epoxy cures fully after 24 hours, you can lightly buff the area with a soft cloth to blend it into the surrounding finish. The filled scratch becomes nearly invisible and feels smooth to the touch.
Pros: Fills deep voids completely. Creates a permanent, waterproof seal. Blends well with factory gloss finishes.
Cons: Requires a rod turner or constant manual rotation. Takes 24 hours to cure. Over-application creates a visible bump.
Method 3: Sanding and Refinishing a Larger Area
A rod covered in multiple scratches or one large patch of damage may need a more comprehensive approach. Sanding and refinishing the affected section restores the blank to a uniform look. This method must be done with extreme caution on graphite rods because sanding too aggressively cuts into the structural carbon fibers.
Start with a grey Scotchbrite pad, which is roughly equivalent to 0000 steel wool. Rub the scratched area lightly to remove loose clear coat fragments and dull the surrounding surface.
Never use coarse sandpaper like 400 grit directly on a graphite blank. If you must use sandpaper, go no coarser than 1000 grit and use it wet with very light pressure.
Wipe the abraded area with denatured alcohol to remove all dust. Apply a thin coat of a quality two-part urethane finish using a foam brush or a clean fingertip.
Thin coats work better than thick ones. Let each coat dry and apply two to three layers for a durable result. The refinished area may look slightly different from the rest of the rod, but the protection will be solid.
Pros: Restores large damaged areas. Gives the rod a uniform, refreshed look.
Cons: Time-consuming. Risk of sanding into graphite fibers. May not match the original factory gloss perfectly.
Method 4: Covering Scratches with a Decorative Thread Wrap
Sometimes the best repair is also the most creative. A decorative thread wrap covers the scratch entirely and turns a blemish into a custom design feature. This method works well for deep cosmetic scratches that bother you visually but do not threaten the rod structure.
Choose a thread color that matches or complements your existing guide wraps. Wrap a band of thread directly over the scratch, keeping the wraps tight and even.
A half-inch to one-inch band is usually enough. Apply a thin coat of color preserver if you want the thread color to stay true. Then coat the wrap with rod finish epoxy and rotate until cured.
The finished wrap hides the scratch completely and adds a small amount of hoop reinforcement around the blank. Other anglers will think you added a decorative accent on purpose. If you enjoy rod building or want to learn basic wrapping skills, this is a satisfying project that upgrades your rod instead of just fixing it.
Pros: Completely hides the scratch. Adds a custom touch. Provides minor structural reinforcement.
Cons: Requires thread wrapping skills and tools. Adds a visible band that may look out of place if not matched well. Takes more time than other methods.
Method 5: Using a Graphite Sleeve for Structural Damage
A scratch that cuts deeply into multiple carbon fiber layers needs more than a cosmetic fix. A graphite sleeve acts as an internal splint that bridges the damaged area and restores some of the lost strength. This is the most advanced repair method and closely mirrors how professional rod builders fix broken blanks.
Find a piece of old graphite rod blank or purchase a short section of blank with an inner diameter slightly larger than the outer diameter of your rod at the scratch location.
Cut a one-inch piece. Slit the sleeve lengthwise so you can open it like a clamshell and fit it over the damaged spot. Rough up both the inside of the sleeve and the rod surface with Scotchbrite.
Mix a high-strength epoxy and coat both surfaces. Clamp the sleeve around the rod over the scratch. You can use zip ties or rubber bands to hold it in place while the epoxy cures.
Once cured, the sleeve becomes a permanent structural bandage. Wrap over it with thread and coat with epoxy for a clean finished look. The rod will have a slightly thicker section at the repair point, but it will handle fish again.
Pros: Restores measurable structural strength. Keeps an otherwise broken rod in service.
Cons: Adds weight and a visible bulge. Requires precise fitting and some rod building experience. Changes the rod action slightly at the repair point.
Temporary Fixes: Tape and Other Quick Solutions
Sometimes you find a scratch right before a trip and need a fast fix that gets you on the water. Electrical tape and similar temporary solutions work surprisingly well for short-term protection.
Black electrical tape wraps neatly around the blank and provides a smooth, protective layer over the scratch. Stretch the tape slightly as you wrap so it conforms to the blank taper.
Two or three tight layers keep moisture out and prevent the scratch from catching on anything. The tape also adds a tiny amount of compressive reinforcement that may help the rod survive a few fights. Some anglers leave electrical tape on for months without issue.
Another quick option is a heat-shrink tubing segment. Slide a piece of clear or colored heat-shrink over the tip end of the rod and position it over the scratch.
Apply gentle heat to shrink it tight against the blank. This creates a durable sleeve that stays put and looks cleaner than tape. Remove it later when you are ready for a permanent repair.
Pros: Takes 30 seconds. Requires no tools or skills. Gets you fishing immediately.
Cons: Looks ugly. Does not restore lost strength. Tape adhesive can leave residue over time.
Common Mistakes to Avoid When Repairing Rod Scratches
Many well-meaning anglers cause more damage while trying to fix a scratch. Knowing what not to do is just as important as knowing the right steps.
Do not use acetone on a scratched graphite blank. Acetone dissolves the epoxy binder that holds the carbon fibers together. Wiping acetone over an exposed scratch leaches out the binder and weakens the blank far beyond the original scratch damage. Stick to isopropyl alcohol or denatured alcohol for cleaning.
Do not sand aggressively with coarse sandpaper. Sanding into the graphite fibers damages the outer structural layer of the rod. Every fiber you cut is one less fiber carrying the load when the rod bends. Use Scotchbrite pads instead of sandpaper whenever possible.
Do not apply thread finish epoxy as a full-rod refinishing coat. This product is designed for small thread wraps, not large surface areas. It does not wet out properly on a bare blank and will peel off in sheets. Use a proper two-part urethane for refinishing projects.
Pros: Learning these mistakes now saves you from a ruined rod later.
Cons: These warnings apply mainly to deeper damage. Surface scratch repairs are much more forgiving.
Preventing Future Scratches on Your Rod Blanks
A few simple habits keep your graphite rods scratch-free for years. Prevention takes far less effort than any repair.
Store your rods in individual sleeves or a padded rod case. Rods banging against each other in a crowded trunk or boat locker cause many of the scratches anglers complain about. Sleeves cost very little and protect the blank from rubbing damage.
When you hook your lure onto the rod for transport, attach it to a guide frame, not directly to the blank. Hooking a lure to the blank itself is a common source of surface scratches. Guide frames are designed to take the contact.
Rinse your rods with fresh water after every saltwater trip and wipe them dry. Salt crystals act as an abrasive and grind into the clear coat over time. A quick rinse and a soft towel dry takes 30 seconds and extends the life of the finish.
Never lay your rod on rocks, concrete, or sandy surfaces, even for a moment. A rod holder or a simple leaning spot against a clean surface makes all the difference.
Pros: These habits cost nothing and prevent nearly all common scratch sources.
Cons: Requires mindfulness on every trip. Easy to forget when you are excited about fishing.
When to Consult a Professional Rod Builder
Some damage falls outside the scope of DIY repair. Knowing when to hand the rod to a professional saves you time, money, and heartache.
A scratch that goes more than halfway through the blank wall thickness is a serious structural concern. Professional builders can evaluate the damage and apply a graphite sleeve or internal ferrule repair that restores functional strength. They have the tools and materials to do this cleanly.
If the scratch sits right next to a guide foot and you cannot repair it without removing the guide, a pro can strip the guide, fix the blank, and rewrap it properly.
Attempting guide removal without experience often damages the blank more. A professional repair at this level typically costs less than buying a new rod of equal quality.
Rod builders also have access to factory-matched coatings and pigments. If you have a colored blank with a distinctive tint, they can match the repair finish far better than any off-the-shelf product.
Pros: Guarantees a structurally sound result. Saves you from buying a replacement rod.
Cons: Costs money and takes time. Not every area has a qualified rod builder nearby.
FAQs
Can a deep scratch cause a graphite rod to snap?
Yes, a deep scratch that cuts through multiple carbon fibers can create a weak point. The rod may bend normally for weeks and then snap suddenly on a hard hookset. The risk is real but unpredictable. Inspect the scratch with a magnifying glass. If you see cut fibers, treat the rod with caution and consider a sleeve repair or professional evaluation.
Is clear nail polish a permanent fix?
Clear nail polish works as a long-term sealant for shallow scratches. It hardens into a durable enamel that keeps moisture out. However, it can yellow slightly after years of sun exposure and may need a fresh application eventually. For deep gouges, nail polish is not a permanent solution and epoxy filling works better.
Can I use regular hardware store epoxy instead of rod building epoxy?
You can use a high-quality two-part clear epoxy from a hardware store for filling scratches. The key difference is that rod building epoxy contains UV inhibitors and is formulated for thin application and long working time. Hardware store epoxy may yellow faster under sunlight but works fine for small scratch repairs.
What if the scratch is on a matte finish rod?
Matte finish rods are harder to repair invisibly. Nail polish and epoxy both create a glossy spot that stands out against the matte surface. You can try a matte clear coat spray applied with a small brush just to the scratch area. Test first on an inconspicuous spot to check the match. Sometimes a simple thread wrap is the cleanest solution for matte blanks.
How do I know if a scratch is just in the clear coat?
Use a magnifying glass or a macro lens on your phone camera. If you see only a groove in a clear layer sitting on top of the blank color, the scratch is in the clear coat only. If you see exposed raw graphite fibers that look dull grey or black and fuzzy, the scratch has gone deeper. A clear coat scratch will also look clean-edged, while a fiber-deep scratch looks rough at the bottom.
Will a repaired scratch affect the rod warranty?
Most rod manufacturers consider scratches as user-inflicted wear and tear, not a manufacturing defect. A scratch, repaired or not, typically voids any warranty coverage at the scratched section. If your rod carries a good over-the-counter exchange policy, check with the retailer before attempting any repair that might alter the blank surface.

Hi, I’m Ivy Webb, the passionate angler and creator behind BaitHookVault.com. I spend my days out on the water personally testing and reviewing a wide variety of fishing tools and gear.