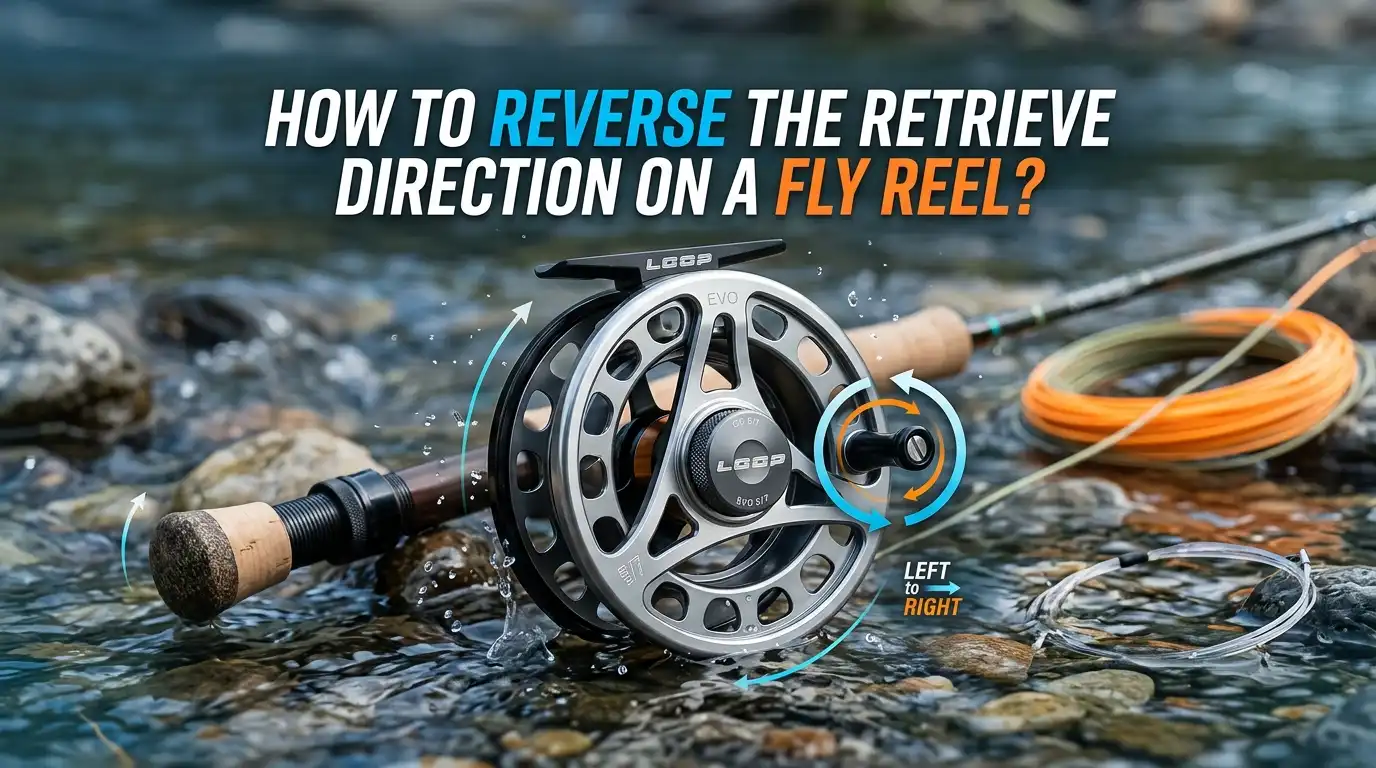
How To Reverse The Retrieve Direction On A Fly Reel?
Have you ever picked up a brand new fly reel only to find it winds the wrong way for your hand? It feels awkward. It slows you down. It can even ruin a good day on the water. The good news is that you can fix this yourself in just a few minutes.
Most fly reels are built to switch between left hand and right hand retrieve. You do not need a fancy workshop or expensive tools. You only need a little patience and the right steps.
In this guide, you will learn exactly how to reverse the retrieve direction on your fly reel. You will discover how the inner parts work, which tools you need, and how to avoid common mistakes.
In a Nutshell:
- Most fly reels ship with a left hand retrieve by default because the majority of anglers cast with their right hand. You can switch this to suit your own comfort.
- The secret part inside is the one way clutch bearing, also called the anti reverse bearing. Flipping this bearing over is what actually reverses the retrieve direction.
- You will usually only need a small Phillips screwdriver, a flat head screwdriver, or a pointed tool. Many reels need no tools at all beyond your hands.
- Always remove the spool first before you touch anything else. This gives you clear access to the bearing and protects the inner parts.
- You must remove and rewind your fly line and backing after the switch. If you skip this, the line will spool in the wrong direction and tangle.
- Test the reel before you respool. Tighten the drag fully and check that it winds in only one direction. This confirms you got it right.
Why Fly Reels Come Set For One Hand By Default
Most fly reels arrive from the factory set up for left hand retrieve. There is a simple reason for this. The majority of people are right handed.
A right handed angler usually casts with the right hand. After the cast, they reel with the left hand. This setup lets them keep the rod in their strong hand at all times.
The factory cannot know which hand you prefer, so they pick the most common option. This is why your new reel might feel backward when you first try it. The reel is not broken. It is simply waiting for you to adjust it.
Knowing this default helps you understand the change you are about to make. You are not repairing a fault. You are customizing the reel to fit your body and your fishing style for a more comfortable day.
Understanding How A Fly Reel Retrieve Works
To reverse the direction, you first need to know what makes a reel wind only one way. Inside every modern fly reel sits a small part called the one way clutch bearing. Some brands call it the anti reverse bearing or ARB bearing. This tiny part is the heart of the whole system.
The clutch bearing locks in one direction and spins free in the other. When you wind the handle, it grips and pulls line onto the spool. When a fish pulls hard, it works with the drag to control the run. The bearing only allows the spool to gain line in one set direction.
When you flip this bearing over, you reverse which way it grips. The wind direction simply swaps sides. This is the core trick behind the entire process, and it is easier than it sounds.
Tools You Will Need Before You Start
Gathering your tools first makes the whole job smooth and quick. The good news is that this task needs very little gear. Most reels only ask for basic items you likely already own at home.
Here is what you should have ready: a small Phillips head screwdriver for reels with a screw on cap, a flat head screwdriver or a thin pointed tool for reels held by a small clip, and a clean flat surface so no small parts roll away and get lost.
A clean towel laid out on a table works perfectly. It stops parts from bouncing and gives you a soft place to rest the bearing.
Pros: This short tool list means almost anyone can do the job at home. You save money on a shop visit.
Cons: Tiny clips can fly out and vanish if you rush. Work slowly and keep your fingers near any spring loaded clip.
Step One: Remove The Spool From The Reel Frame
The first hands on step is always to remove the spool from the frame. The spool is the round part that holds your line. You need it off to reach the clutch bearing hidden inside.
Most reels use a quick release lever or button below the handle. Hold this lever back and the spool will lift away from the frame. Do not try to unscrew the drag knob to free the spool unless your manual says so. On many reels that method does not work and can loosen parts you want left alone.
Pros: This step gives you full, clear access to the inner workings. It takes only seconds on most reels.
Cons: Some older or cheaper reels have stiff release levers. Apply gentle, steady pressure rather than force to avoid cracking the plastic housing or scratching the metal.
Step Two: Find Your Clutch Bearing Type
Once the spool is off, look closely at its inside. You are hunting for the clutch bearing. There are two common places to find it, and knowing your type decides your next move.
A spool mounted bearing sits inside the spool itself. You will often see a six sided shape held by a screw cap or a small metal clip. A spindle mounted bearing sits on the center post of the frame instead. Look for a small clip and a stack of washers or drag discs around the spindle.
Take a moment to study which type you have before touching anything. Pros: Identifying the type early stops you from prying at the wrong part.
Cons: Spindle mounted designs are trickier because they hold the drag stack together. A wrong move can scatter small washers, so go slow with this type.
Step Three: Reverse A Spool Mounted Clutch Bearing
If your bearing sits in the spool, this method is for you. It is the simpler of the two designs and the most common on starter reels. You will have it done in under five minutes.
Start by removing whatever holds the bearing in place. A screw cap simply unscrews by hand or with a screwdriver. A hexagonal metal clip needs a small tool to pop one end free from its tabs. Keep your fingers over the clip because it can shoot out under tension.
With the cap or clip off, flip the spool over. The bearing housing will drop out into your hand. Turn it over so the opposite face points down, then drop it back in. Replace the cap or clip.
Pros: Very fast and beginner friendly. Cons: That little clip loves to escape, so trap it carefully every time.
Step Four: Reverse A Spindle Mounted Clutch Bearing
This design needs more care because it holds the drag system together. Do not rush. Loosen the drag knob all the way first to take tension off the parts before you begin.
You will see a small clip seated in a groove on the spindle. Use a thin flat head screwdriver to slide it out of the groove. Cover it with your finger so it does not fly away. Next, gently lift off the washer and any thin shims below the clip. Keep them in order.
Now remove the clutch bearing, flip it so the opposite side faces down, and set it back. Replace the shims, washer, and clip in the exact reverse order.
Pros: This protects your reel’s drag if done with care. Cons: More parts mean more chances to lose one. Lay each piece down in order as you go.
Step Five: Test The Direction Before You Respool
Never skip this check. Testing now saves you from redoing the whole job later. Once your bearing is flipped and the spool is back in the frame, you must confirm the wind direction changed.
First, tighten the drag knob fully. This locks the bearing so the spool can only turn one way. Now turn the handle. The spool should wind in your new chosen direction and resist turning the other way.
It often helps to attach the reel to your rod for this test. Hold the rod as you would while fishing. Pretend to reel in a fish. Does it feel natural for your hand now? If yes, you nailed it.
Pros: A quick test gives you total peace of mind. Cons: If the direction is still wrong, you simply flip the bearing back. No harm done, just a small repeat.
Step Six: Remove And Rewind Your Fly Line And Backing
Here is a step many people forget. After you reverse the bearing, your line now spools the wrong way. If you leave it, the line will come off backward and tangle the moment you cast.
You must strip off all the fly line and backing, then wind it back on in the correct direction. Do not let the line pile on the floor. That is a fast path to a giant knot. Instead, wind it onto a spare reel, a clean can, or a line spool holder.
Once the line is off, reattach your backing first, then your fly line. Make sure both wind on the way your newly set reel turns.
Pros: Proper rewinding means smooth, snag free casts. Cons: This is the most time consuming part of the whole job, but it is not hard, just a little tedious.
Choosing Between Left Hand And Right Hand Retrieve
Before or after the switch, it helps to know which hand truly suits you. There is no single right answer. Your comfort decides the winner.
Left hand retrieve suits most right handed casters. You keep the rod in your strong hand and never swap hands when a fish hits. This feels smooth and matches what spin anglers are used to.
Right hand retrieve appeals to some anglers, often in saltwater, who feel they reel faster and with more power using their dominant hand. They accept a quick hand swap in exchange for cranking speed.
Pros of matching your dominant casting hand to the rod: smooth transitions and no fumbling during a hookup. Cons: your weaker hand does the reeling. Try both setups on the water before you commit. The best choice is the one that lets you fish all day without thinking about your hands.
Common Mistakes To Avoid During The Switch
A few small errors trip up many anglers. Knowing them ahead of time keeps your job clean and quick. Most mistakes come from rushing.
The biggest error is losing the tiny clip. It is spring loaded and loves to fly off. Always cup your fingers over it. Another common slip is forgetting to rewind the line, which leads to tangles on your first cast.
Some people force the spool or drag knob and crack a part. Gentle pressure is always enough. Others mix up the order of the shims and washers on spindle mounted reels. Lay parts out in a row as you remove them.
Pros of working carefully: your reel stays in perfect shape and works for years. Cons: careful work takes a few extra minutes, but those minutes are far cheaper than buying a new reel or paying for repairs.
What To Do If Your Reel Will Not Switch
Not every reel can reverse direction. A small number of older or specialty reels are fixed for one hand only. If you cannot find a clutch bearing or any way to flip it, your reel may be one of these.
First, check the maker’s website or your reel manual. Many brands post free guides or videos for their exact model. If your reel truly will not switch, you have a couple of options.
You can buy a replacement spool or conversion kit made for your model from the manufacturer. Or you can simply learn to fish with the current setup, which many anglers do happily.
Pros of checking the manual first: you avoid breaking a part that was never meant to move. Cons: some sealed drag reels need a shop or factory service, which costs more and takes time. When in doubt, contact the maker before you pry anything.
Caring For Your Reel After The Conversion
Once your reel winds the right way, a little care keeps it that way. A clean, well kept reel lasts for many seasons. The clutch bearing is the part that needs the most attention over time.
After fishing, especially in saltwater, rinse the reel gently with fresh water and let it dry fully. Now and then, the anti reverse bearing may need a tiny drop of light reel oil to keep engaging crisply. Never over oil it, as too much can make the bearing slip.
Store your reel in a dry case away from grit and sand. Pros of regular care: smooth retrieves and a reel that holds its value. Cons: it adds a short cleaning routine to each trip, but five minutes of care prevents costly damage and keeps your conversion working perfectly for years to come.
Frequently Asked Questions
Can every fly reel be switched to the other hand?
Most modern fly reels can switch, but not all. Many use a flippable clutch bearing that makes the change easy. A few older or sealed drag models are fixed for one hand. Always check your reel manual or the maker’s website first to be sure yours can reverse.
Do I really need to change the line after reversing the reel?
Yes, you do. When you flip the bearing, the wind direction changes. Your old line will now spool off backward and tangle. You must strip the line and backing, then rewind both in the new correct direction. Skipping this step almost always causes knots on your first cast.
Which hand should a right handed person use to reel?
Most right handed anglers reel with their left hand. This keeps the rod in your strong hand and avoids swapping hands when a fish strikes. Some anglers still prefer right hand reeling for speed. There is no wrong choice. Pick what feels natural and lets you fish comfortably.
What if the small clip flies out and I lose it?
This happens to many people. Always cup your fingers over the clip while you remove it. If you do lose one, contact your reel maker, since they often sell tiny replacement parts. Work over a towel on a table so any flying part lands softly and stays in view.
Will reversing the retrieve damage my fly reel?
No, not if you work gently. The reel is built to switch, so flipping the bearing is a normal task. Damage only happens when people force parts or lose small pieces. Go slowly, keep parts in order, and use light pressure. Your reel will work just as well as before.
How long does it take to reverse the retrieve direction?
The bearing flip itself takes only a few minutes. Most of your time goes into removing and rewinding the line. For a spool mounted bearing, plan on about ten to fifteen minutes total. Spindle mounted reels take a little longer because of the extra washers and the drag stack.

Hi, I’m Ivy Webb, the passionate angler and creator behind BaitHookVault.com. I spend my days out on the water personally testing and reviewing a wide variety of fishing tools and gear.