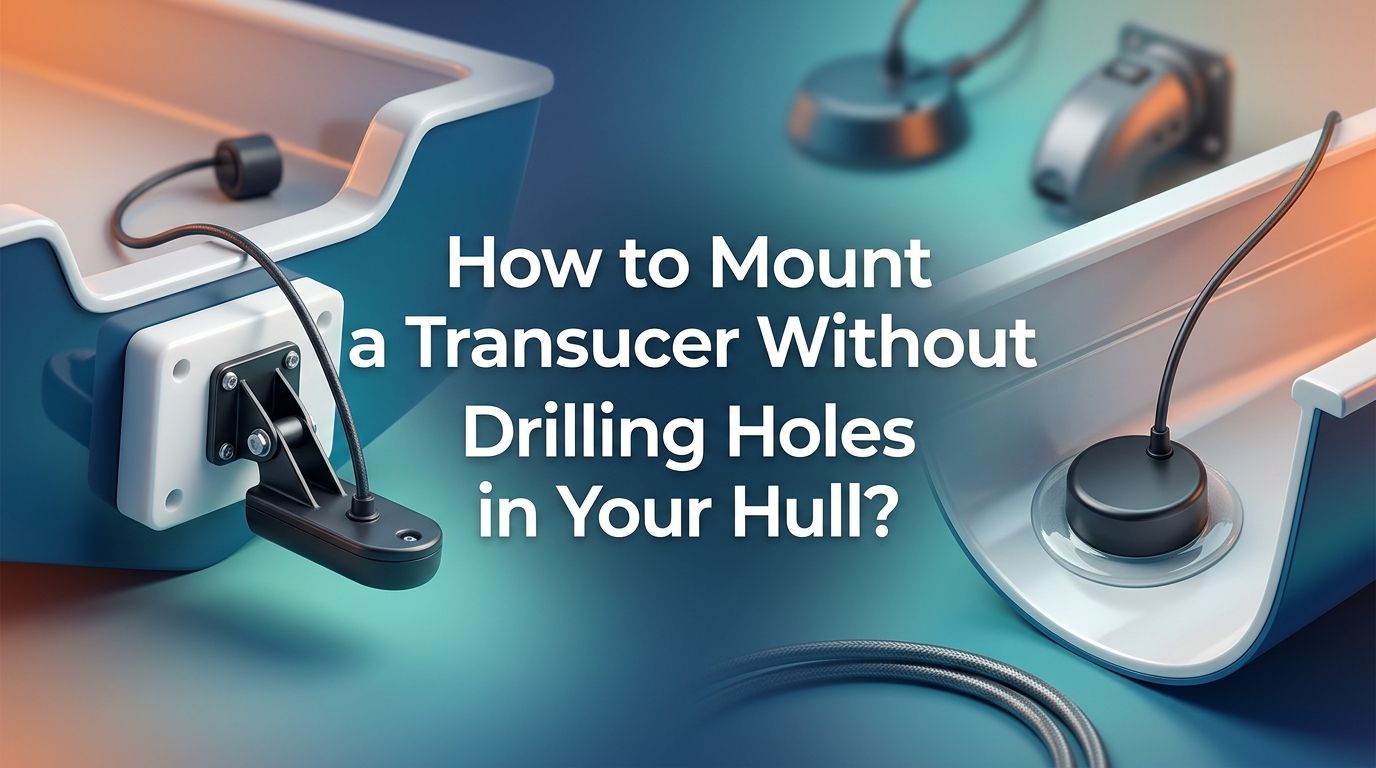
How to Mount a Transducer Without Drilling Holes in Your Hull?
You just bought a brand new fish finder. The excitement is real. But then you look at your boat’s hull, and one thought stops you cold: “Do I really have to drill holes in this thing?”
The good news is, you don’t have to. Whether you own a fiberglass bass boat, an aluminum jon boat, or a fishing kayak, there are several proven methods to mount a transducer without putting a single hole in your hull.
This guide walks you through every practical, no drill transducer mounting method available today. You will learn which option works best for your specific hull material, boat type, and fishing style.
In a Nutshell
- Adhesive mounting pads and stern pads are among the most popular no drill options. Products like stern saver pads use a strong marine adhesive to bond a mounting block directly to the transom. They hold up well at speed and work on fiberglass, aluminum, and composite hulls. The bond is strong enough for daily use but can be removed if needed.
- Shoot through hull mounting lets you place the transducer inside the boat. You bond it to the hull’s interior with marine epoxy. The sonar signal passes through a solid fiberglass layer. This method works only on single skin fiberglass hulls and is not suitable for cored or aluminum hulls.
- Suction cup mounts offer the fastest setup and are ideal for portable fish finders. They attach to the transom in seconds with no prep work. However, they can lose grip at higher speeds or on textured surfaces.
- Magnetic transducer mounts use powerful magnets that sandwich the hull from both sides. They work well on aluminum boats and offer a truly portable option. They are easy to install and remove, but they only work on metal hulls.
- Marine adhesive sealants like 3M 5200 or Sikaflex can bond a transducer bracket or mounting plate directly to the transom. These create an extremely strong, permanent bond. Removal can be difficult, so plan carefully before committing.
- Clamp on and arm style mounts attach to existing hardware like rod holders, tracks, or scupper holes. They require zero modification to the hull and are especially popular on kayaks. They give you full adjustability and easy removal.
How to Decide Which No Drill Method Is Right for Your Boat
The best mounting method depends on your hull material, boat type, and how you fish. Fiberglass hulls open up the most options, including shoot through mounting and adhesive pads. Aluminum hulls work well with magnetic mounts and adhesive solutions like 3M 5200.
Kayak anglers often benefit from scupper hole mounts or arm style systems that clip into existing tracks. If you use your fish finder on multiple boats, a portable suction cup or magnetic mount gives you the flexibility to switch between vessels quickly.
Speed also matters. If you run your boat at full throttle regularly, you need a mount that can handle vibration and water pressure. Adhesive pads and epoxied shoot through mounts handle speed well. Suction cups may struggle above 20 mph on rough water.
How to Mount a Transducer With an Adhesive Stern Pad
Adhesive stern pads are one of the most reliable no drill options. These are mounting blocks made from marine grade plastic like King StarBoard. They bond to your transom with a strong adhesive.
Start by cleaning the transom surface with rubbing alcohol or acetone. Remove any wax, oil, or dirt. Apply the adhesive evenly to both the pad and the transom surface. Press the pad firmly into place and let it cure for 24 to 48 hours before mounting the transducer.
Once cured, you screw the transducer bracket directly into the stern pad instead of the hull. The adhesive creates a strong bond that holds at cruising and planing speeds.
Pros: No holes in the hull, strong hold, works on fiberglass and aluminum, easy to install.
Cons: Adhesive can fail over time if the surface was not prepped well, removal may leave residue, not every pad fits every transducer bracket.
How to Do a Shoot Through Hull Transducer Installation
Shoot through hull mounting places the transducer inside the boat. The sonar signal passes through the fiberglass and into the water. This method only works on solid single layer fiberglass hulls. It will not work on aluminum, wood, or cored fiberglass.
Find a flat spot on the hull bottom, behind the keel and away from strakes or ribs. Sand the area lightly with 80 grit sandpaper. Mix a slow cure two part marine epoxy and apply it to both the hull surface and the transducer face.
Press the transducer firmly into the epoxy. Twist it slightly to push out air bubbles. Air gaps between the transducer and hull will kill your sonar signal. Let the epoxy cure fully before testing.
Pros: Completely hidden inside the boat, no drag in the water, protected from damage and debris.
Cons: Works only on solid fiberglass, can reduce sonar performance slightly, permanent installation, requires careful prep to avoid air bubbles.
How to Use Marine Adhesive to Bond a Transducer Mount
Marine adhesive sealants like 3M 5200 and Sikaflex 291 create extremely strong bonds between surfaces. You can use them to attach a transducer bracket or a polyethylene mounting plate directly to the transom without any screws.
Clean the transom thoroughly. Apply a generous bead of adhesive to the mounting plate. Press the plate against the transom and hold it firmly. Use clamps or tape to keep pressure on the bond while it cures. Full cure time for 3M 5200 is about 5 to 7 days.
Once cured, screw the transducer into the mounting plate. The adhesive absorbs vibration and flexes slightly with hull movement, which helps the bond last longer.
Pros: Extremely strong bond, waterproof, works on most hull materials, affordable.
Cons: Very difficult to remove once cured (especially 3M 5200), long cure time, requires clean dry conditions during installation.
How to Install a Suction Cup Transducer Mount
Suction cup mounts are the fastest way to get a transducer on your boat. They are designed for portable fish finder setups and work well for occasional or casual use.
Wet the suction cup slightly and press it firmly against a smooth, clean section of the transom. Most suction cup mounts allow you to adjust the transducer angle. Some come with a safety tether that clips to the boat in case the cup loses grip.
This method works best on smooth fiberglass or smooth aluminum surfaces. Textured, painted, or oxidized surfaces will weaken the suction. Clean the area before attaching.
Pros: Instant installation, fully portable, no surface preparation, easy removal.
Cons: Can lose grip at speed or on rough water, does not work on textured surfaces, less reliable in hot weather when suction weakens.
How to Use a Magnetic Mount for Aluminum Boats
Magnetic transducer mounts are a creative solution for aluminum boat owners. They use two powerful magnets that sandwich the hull. One magnet sits on the outside with the transducer, and one sits on the inside.
Place the inside magnet against the hull interior. Walk to the outside and position the transducer mount magnet on the exterior. The magnets pull toward each other through the hull and create a firm clamp. Most magnetic mounts work on hull thicknesses up to 1/4 inch.
This setup is completely portable. You can move the transducer anywhere on the hull in seconds. It is ideal for anglers who fish from rental boats or share vessels.
Pros: No holes, no adhesive, fully portable, instant on and off, works on any flat aluminum surface.
Cons: Only works on metal hulls, may not hold at very high speeds, magnets can scratch paint if not padded, limited to thinner hull gauges.
How to Mount a Transducer Through a Kayak Scupper Hole
Many fishing kayaks have scupper holes that are large enough to fit a transducer. This is a simple and effective no drill method. You drop the transducer into the scupper hole so it sits flush with or slightly below the hull.
Measure your transducer and your scupper hole diameter first. Some anglers build a small bracket from PVC or cutting board material that holds the transducer centered in the hole. Secure it with zip ties, Velcro straps, or friction fit.
The transducer sits directly in the water, which gives you the best possible sonar signal without any signal loss from hull interference.
Pros: Free, uses existing hull features, excellent sonar performance, easy to remove.
Cons: Only works if scupper hole is large enough, may allow water to splash up through the hole, limited to kayaks with compatible scupper sizes.
How to Use a Clamp On or Track Mount System
Track mount systems and clamp on arms attach to existing hardware on your boat or kayak. Many kayaks come with gear tracks or rail systems pre installed. You can slide a transducer arm into the track, tighten it, and you are ready to fish.
For boats without tracks, clamp on mounts grip the gunwale, transom lip, or trolling motor shaft. Adjustable arms let you position the transducer at the correct depth in the water.
These systems are popular because they offer full adjustability without any permanent changes. You can swing the transducer up out of the water when you do not need it.
Pros: No permanent modification, adjustable depth and angle, easy to install and remove, works on many boat types.
Cons: May vibrate at higher speeds, can get bumped out of position, adds visible hardware to the outside of the boat.
How to Prep Your Hull Surface for the Strongest Bond
Surface preparation is the single most important step for any adhesive based transducer mount. A dirty or waxy surface will cause even the best adhesive to fail. Take the time to prep correctly.
Start by washing the mounting area with soap and water to remove loose dirt. Then wipe it down with rubbing alcohol or acetone to remove wax, oil, and grease. Let the surface dry completely.
For the strongest bond, lightly sand the area with 80 or 120 grit sandpaper. This creates tiny grooves that help the adhesive grip. Wipe away sanding dust with a clean cloth. Apply the adhesive within a few minutes of sanding while the surface is still fresh.
Do not install adhesive mounts in extreme cold or direct sunlight. The ideal temperature for most marine adhesives is between 50°F and 90°F.
How to Test Your Transducer Signal After a No Drill Install
After mounting, you should always test the transducer before heading out for a full fishing trip. A bad bond or poor positioning can ruin your sonar readings. Testing is simple and takes only a few minutes on the water.
Launch your boat in shallow water where you know the depth. Turn on your fish finder and compare the reading to the known depth. The numbers should be close. Look for a clear, strong bottom return on the sonar screen.
If the reading is weak, fuzzy, or missing, the transducer may have air bubbles trapped beneath it (common with shoot through installs) or it may not be sitting deep enough in the water. Adjust the mount angle and retest.
For adhesive and magnetic mounts, check the mount after your first trip at speed. Look for any signs of shifting or loosening. Tighten or reapply as needed.
How to Avoid Common Mistakes With No Drill Transducer Mounts
The most common mistake is rushing the surface preparation. Skipping the cleaning and sanding steps will cause adhesive failure within weeks. Always prep the surface properly, even if it takes extra time.
Another frequent error is choosing the wrong method for your hull material. Magnetic mounts do nothing on fiberglass. Shoot through installs fail on cored hulls. Match the method to the material before you buy anything.
Many anglers also forget to let adhesives fully cure before use. Pulling away from the dock 12 hours after bonding a stern pad is asking for trouble. Follow the manufacturer’s cure time recommendations exactly. For 3M 5200, that means waiting a full week before putting the boat in the water.
Finally, always use a safety tether or lanyard on any portable mount. Suction cups and magnetic mounts can release unexpectedly. A simple cord keeps your transducer from sinking to the bottom of the lake.
How to Remove a No Drill Transducer Mount Cleanly
At some point, you may want to remove or relocate your transducer mount. The removal method depends on the adhesive used. 3M 5200 is notoriously difficult to remove and may require a heat gun, dental floss, or a putty knife to break the bond.
3M 4200, which is a slightly weaker but still strong marine sealant, comes off more easily. If you think you might want to move the transducer later, use 4200 instead of 5200 during installation.
For stern pads bonded with included adhesive, apply heat with a heat gun or hair dryer. Warm the adhesive for a few minutes, then slide a thin putty knife behind the pad. Work slowly to avoid scratching the gel coat.
Clean any remaining adhesive residue with Goo Gone, acetone, or a plastic scraper. Polish the area afterward if needed to restore the finish.
How long does a no drill transducer mount last?
A properly installed adhesive mount can last two to five years or more depending on conditions. Surface prep quality, adhesive type, water temperature, and boat speed all affect longevity. Magnetic and suction cup mounts last indefinitely since they have no adhesive to degrade, but they must be reattached each trip.
Does a shoot through hull transducer lose signal quality?
Yes, there is some signal loss. The sonar beam must pass through the fiberglass, which reduces depth range and detail slightly. Most anglers report that shoot through installs work well in water up to 100 to 200 feet deep. For deeper water or advanced sonar features like side imaging, a direct water contact mount gives better results.
Can I use a no drill mount on a pontoon boat?
Yes. Adhesive mounting pads and clamp on systems work well on pontoon boat transoms. Magnetic mounts may also work if the pontoon has an aluminum hull section. Avoid suction cup mounts on pontoons since the textured surfaces common on these boats weaken the suction.
Will 3M 5200 damage my gel coat when I remove it?
It can. 3M 5200 bonds aggressively to gel coat, and removing it often pulls up small pieces of the surface. Using 3M 4200 is a safer choice if you want a strong bond that can still be removed without major damage. Applying heat during removal also reduces the risk of gel coat damage.
What is the best no drill mount for a kayak transducer?
For kayaks, scupper hole mounts and track mounted transducer arms are the top choices. They use existing features on the kayak and require zero drilling or adhesive. If your kayak lacks these features, a duct seal or epoxy putty pressed against the inside of the hull can work as a simple shoot through option.

Hi, I’m Ivy Webb, the passionate angler and creator behind BaitHookVault.com. I spend my days out on the water personally testing and reviewing a wide variety of fishing tools and gear.